This is a simple step-by-step walkthrough for creating a Python GUI application using Qt Creator and PyQt5. Since GUIs are entirely visual it's hard to convey what to do through text, so this tutorial is full of step-by-step screenshots.
The app is a simple sales tax calculator, which takes an input price, a tax rate and outputs the resulting total price with tax. It's not the most exciting project, but it is easy to understand and a great way to learn the basics of building Python GUI applications with PyQt5.
- Designing the Interface in Qt Creator
- Adjusting the Layout with Qt Designer
- Design Complete
- Writing the Python Code to Load the UI
- Loading Your .ui File in Python with PyQt5
- Connecting Signals and Slots — Hooking Up the Logic
- Implementing the Tax Calculation in Python
- Complete Sales Tax Calculator Code
- Summary
Designing the Interface in Qt Creator
You will need a copy of Qt Creator to follow this tutorial. Get this by downloading Qt from here: https://www.qt.io/download — you can opt to install only Qt Creator during installation.
Start Qt Creator. To start designing create a window we need a blank design. From the File menu select "New file or project. In the popup window that appears choose:
- Qt Designer Form
- Main Window (other Widget types are available)
- Select a location to save the resulting
.uifile - Revision control (can skip this)
- Click Done to create the design.
The steps are shown visually below.
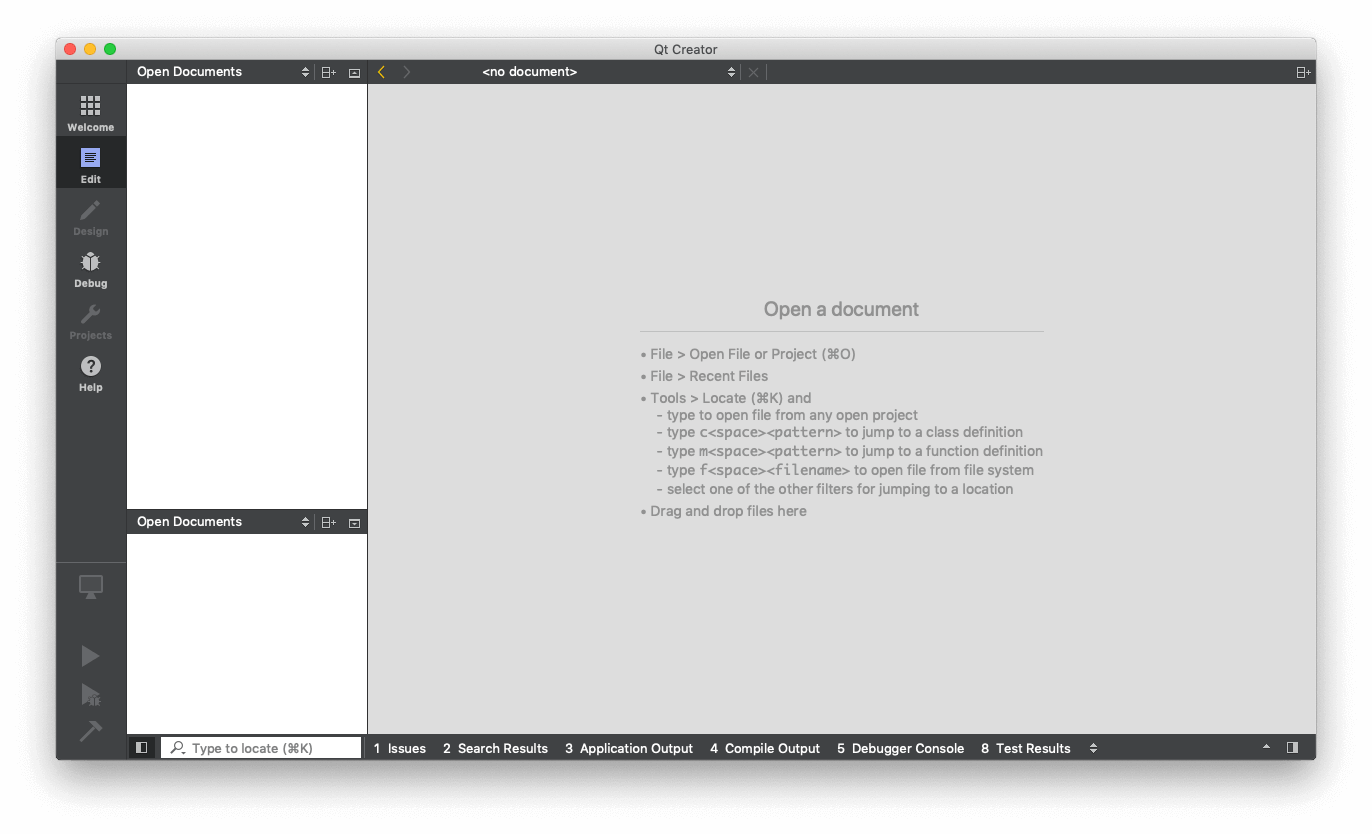 Qt Creator — Initial View
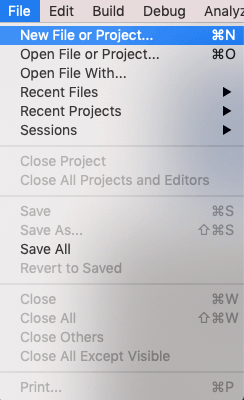 Qt Creator — Start new design
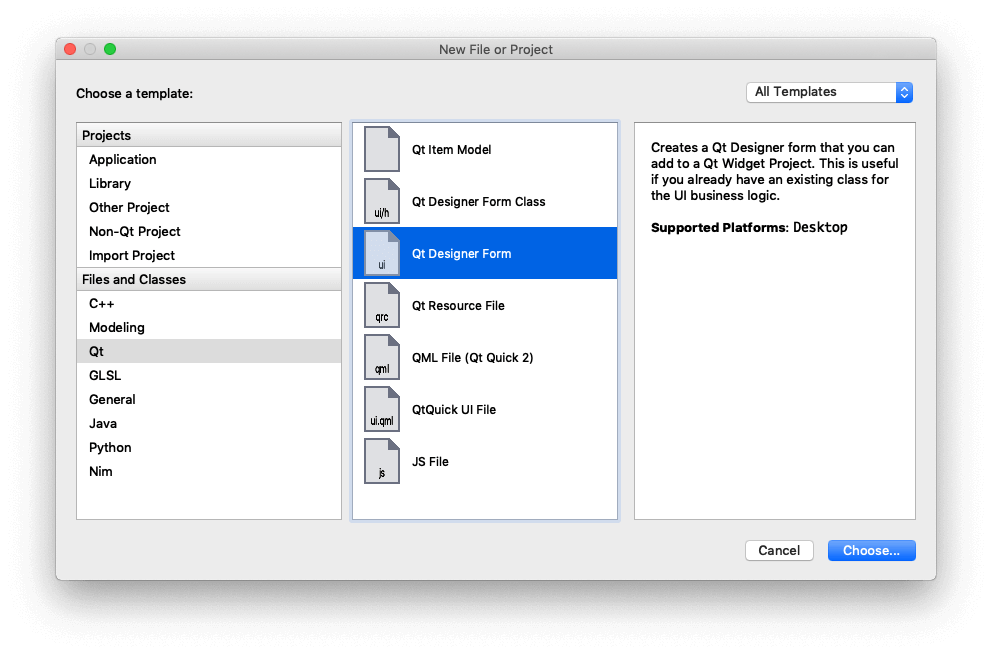 Qt Creator — Create a new Qt Designer Form
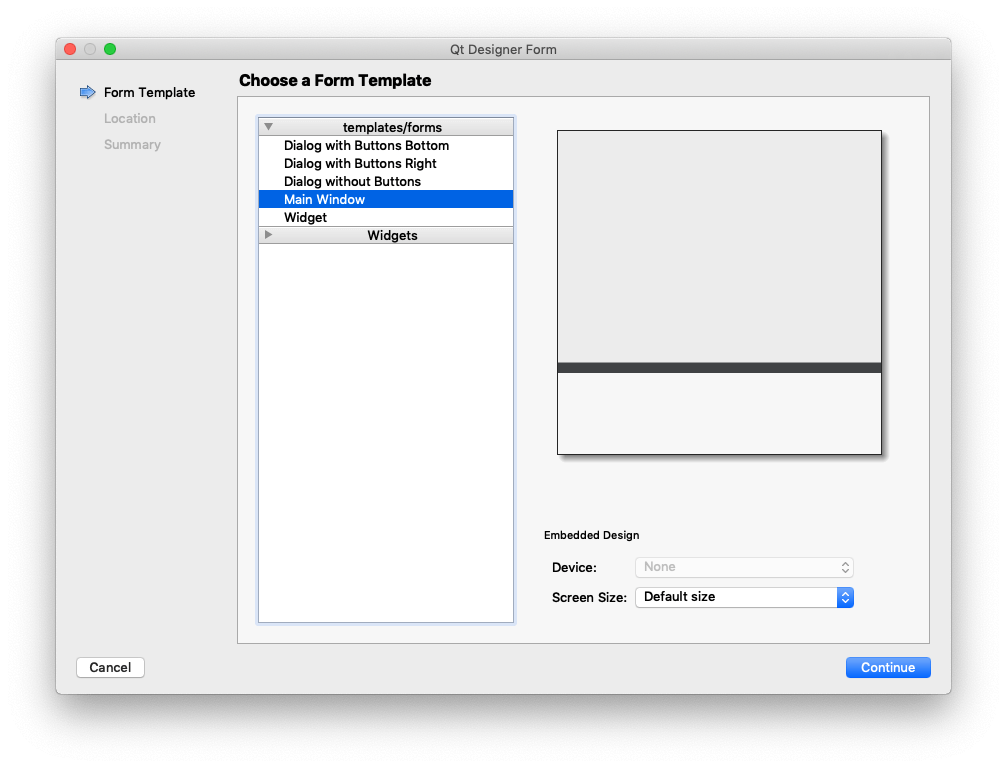 Qt Creator — Select MainWindow for widget type
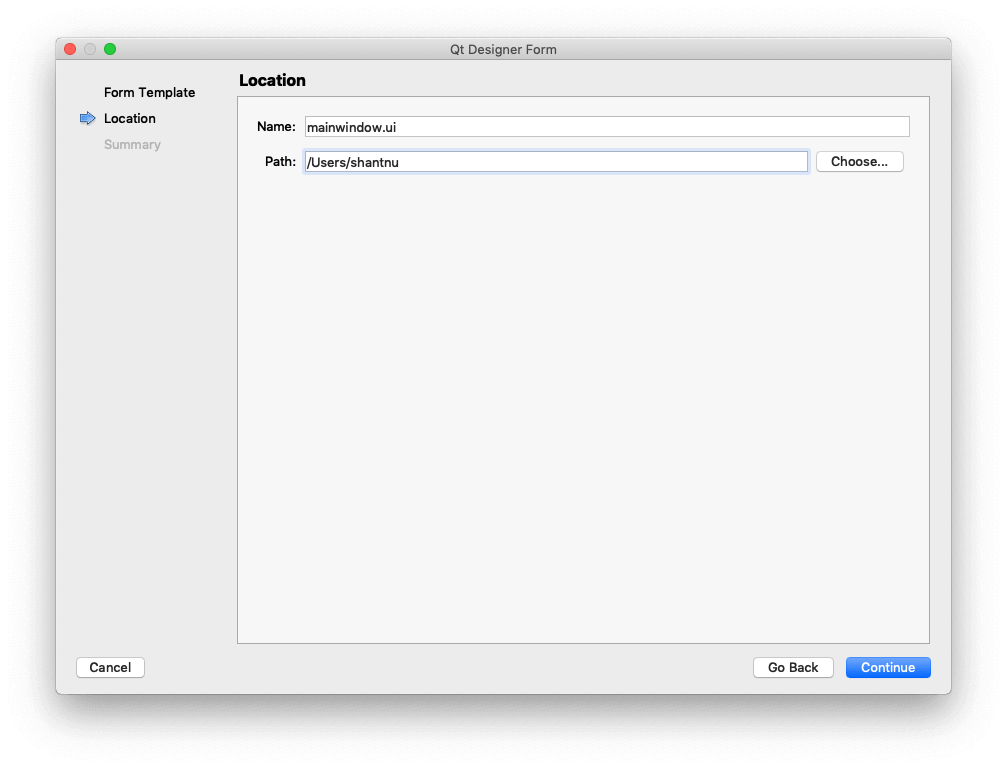 Qt Creator — Select Save location for the .ui file
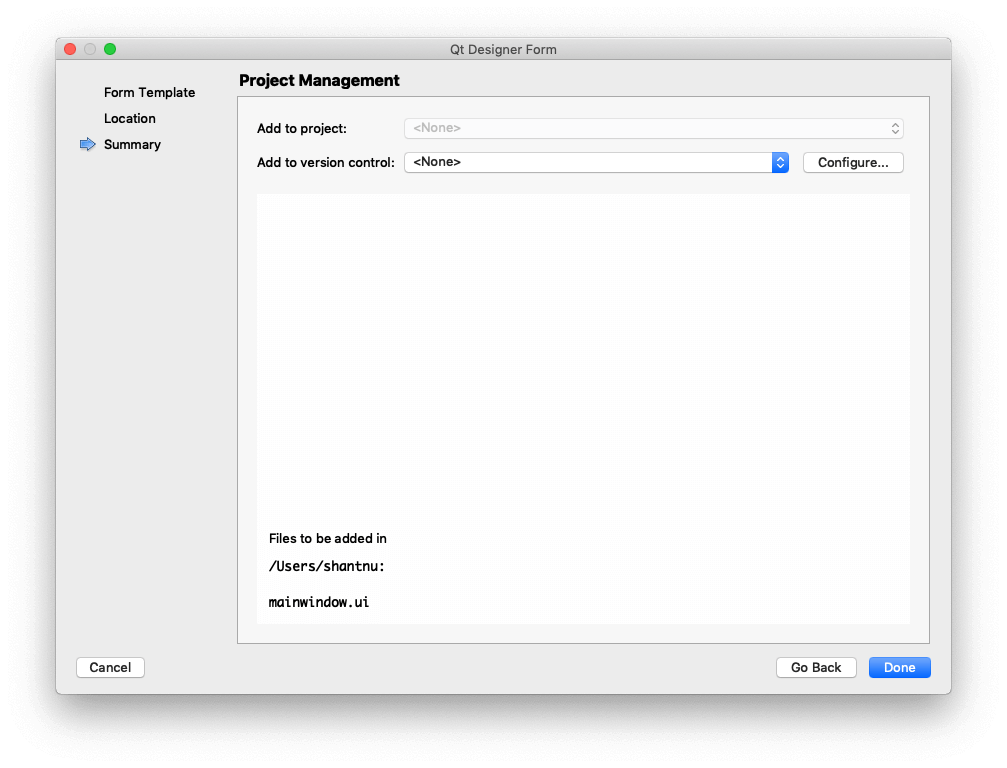 Qt Creator — Project management / revision control
Phew. After all that you should be presented with a blank empty canvas on which to construct your new application.
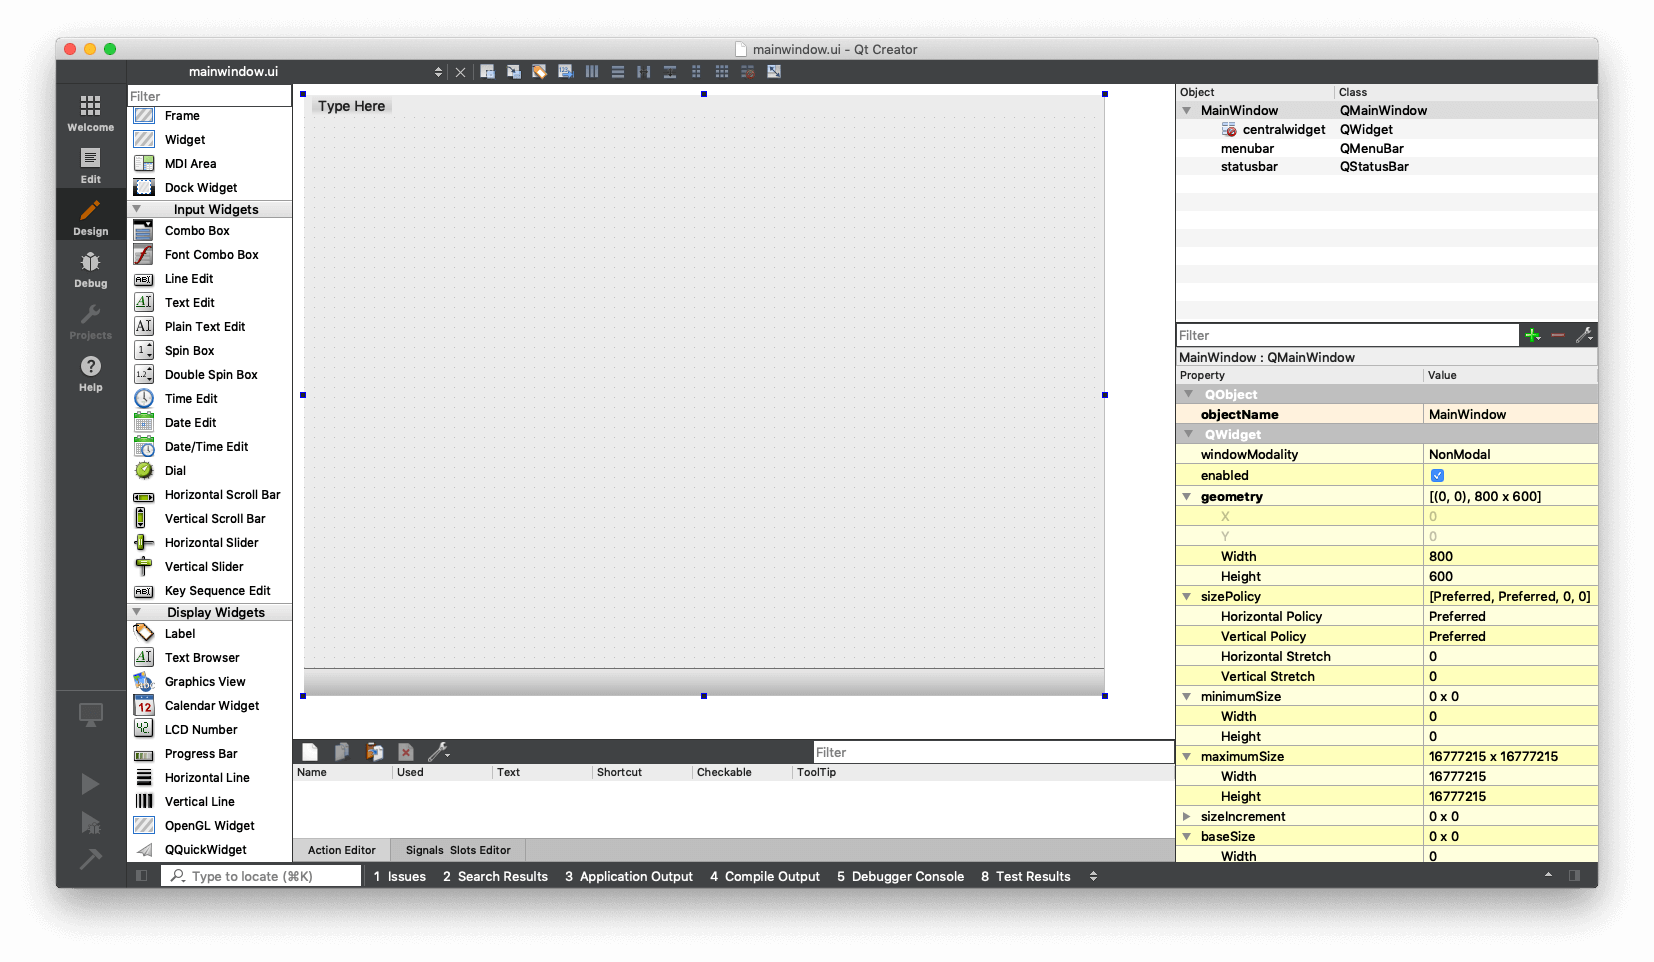 Qt Designer — Blank Canvas
Now we can start designing our UI, using the drag-and-drop interface. First select a Line Edit (QLineEdit) box from the left.
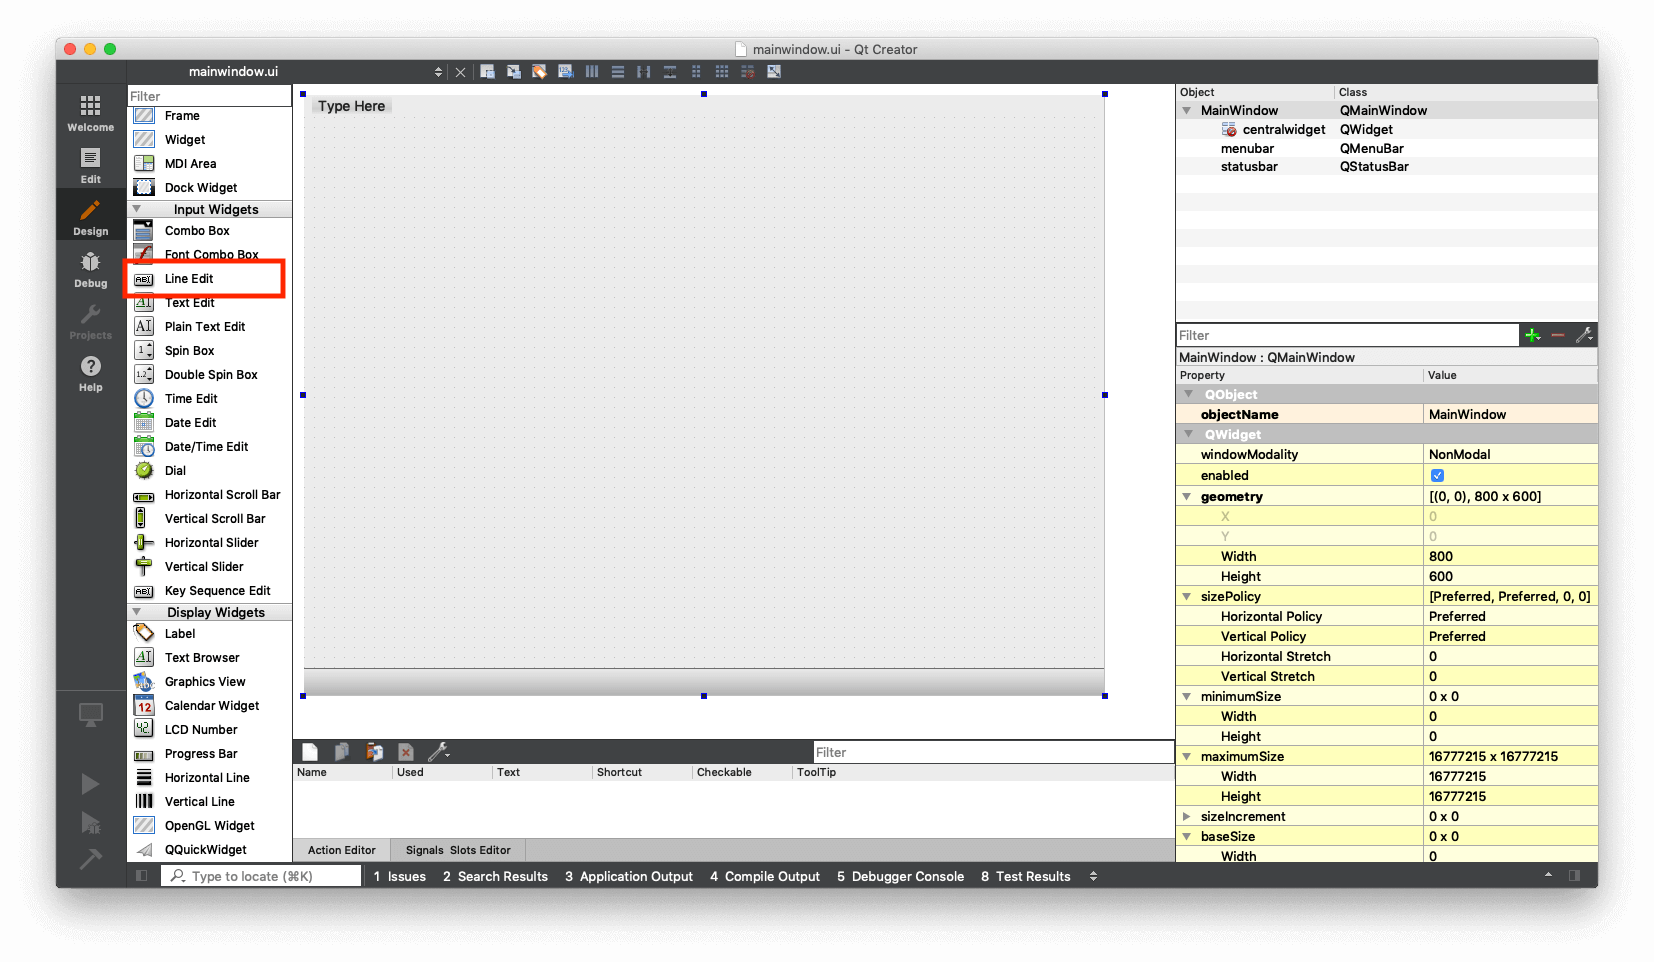 Qt Designer — with Line Edit highlighted
Drag Line Edit to the main window, to get a box like that shown below.
 Qt Designer — Line Edit on MainWindow
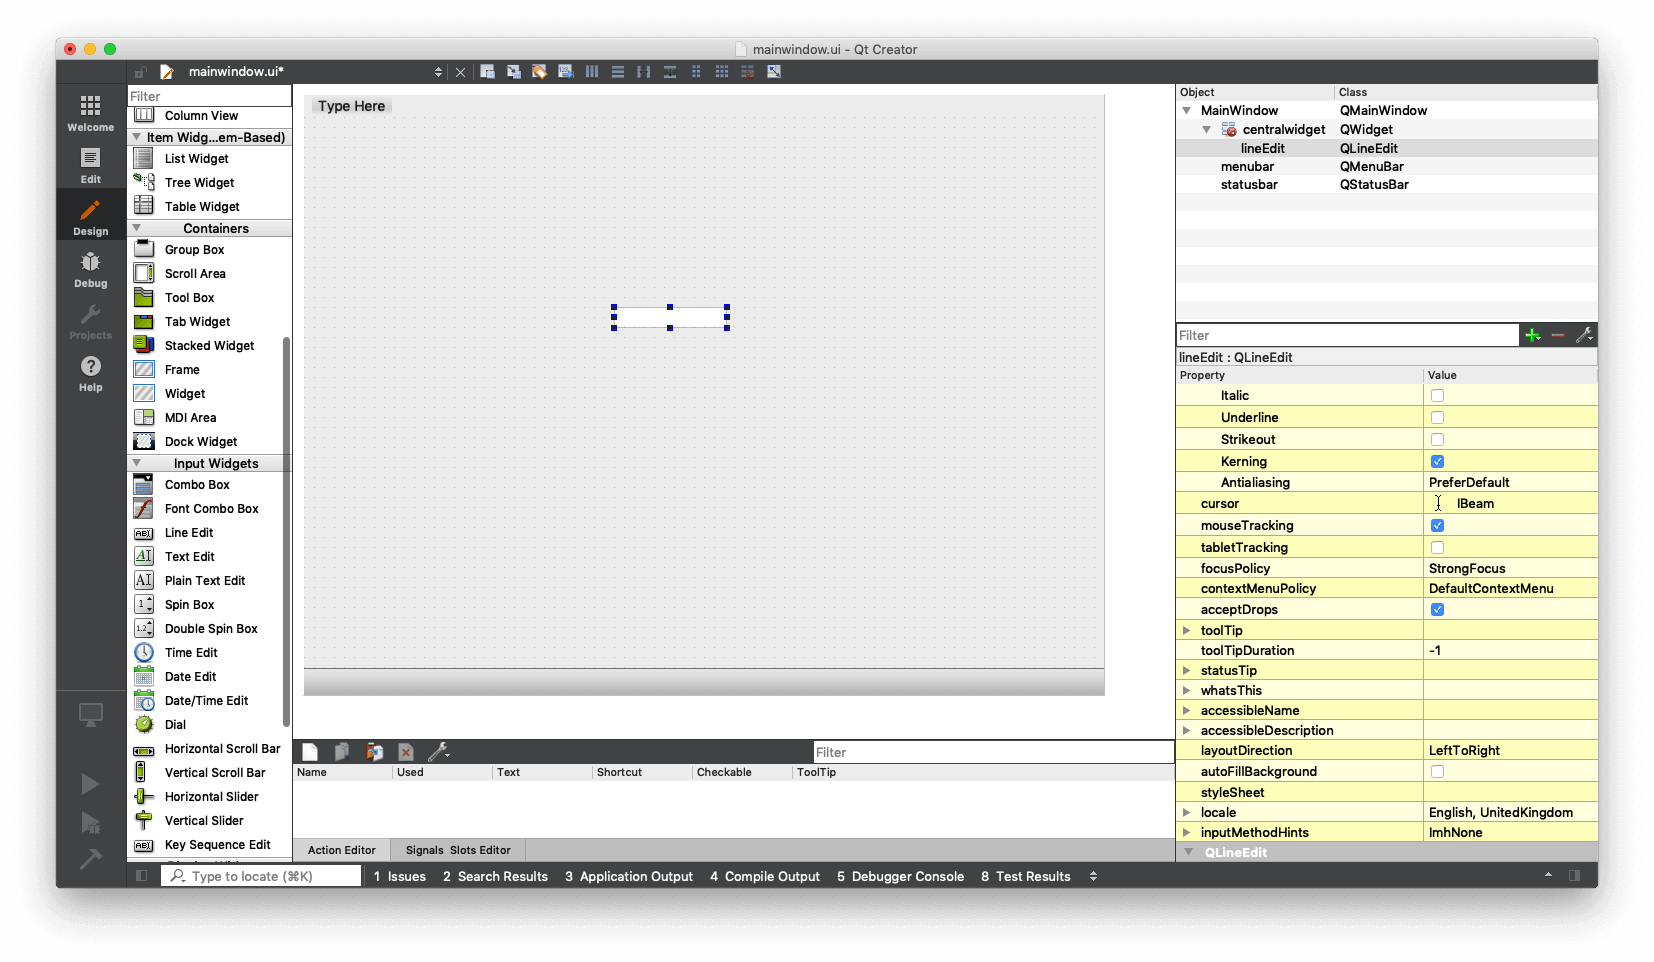
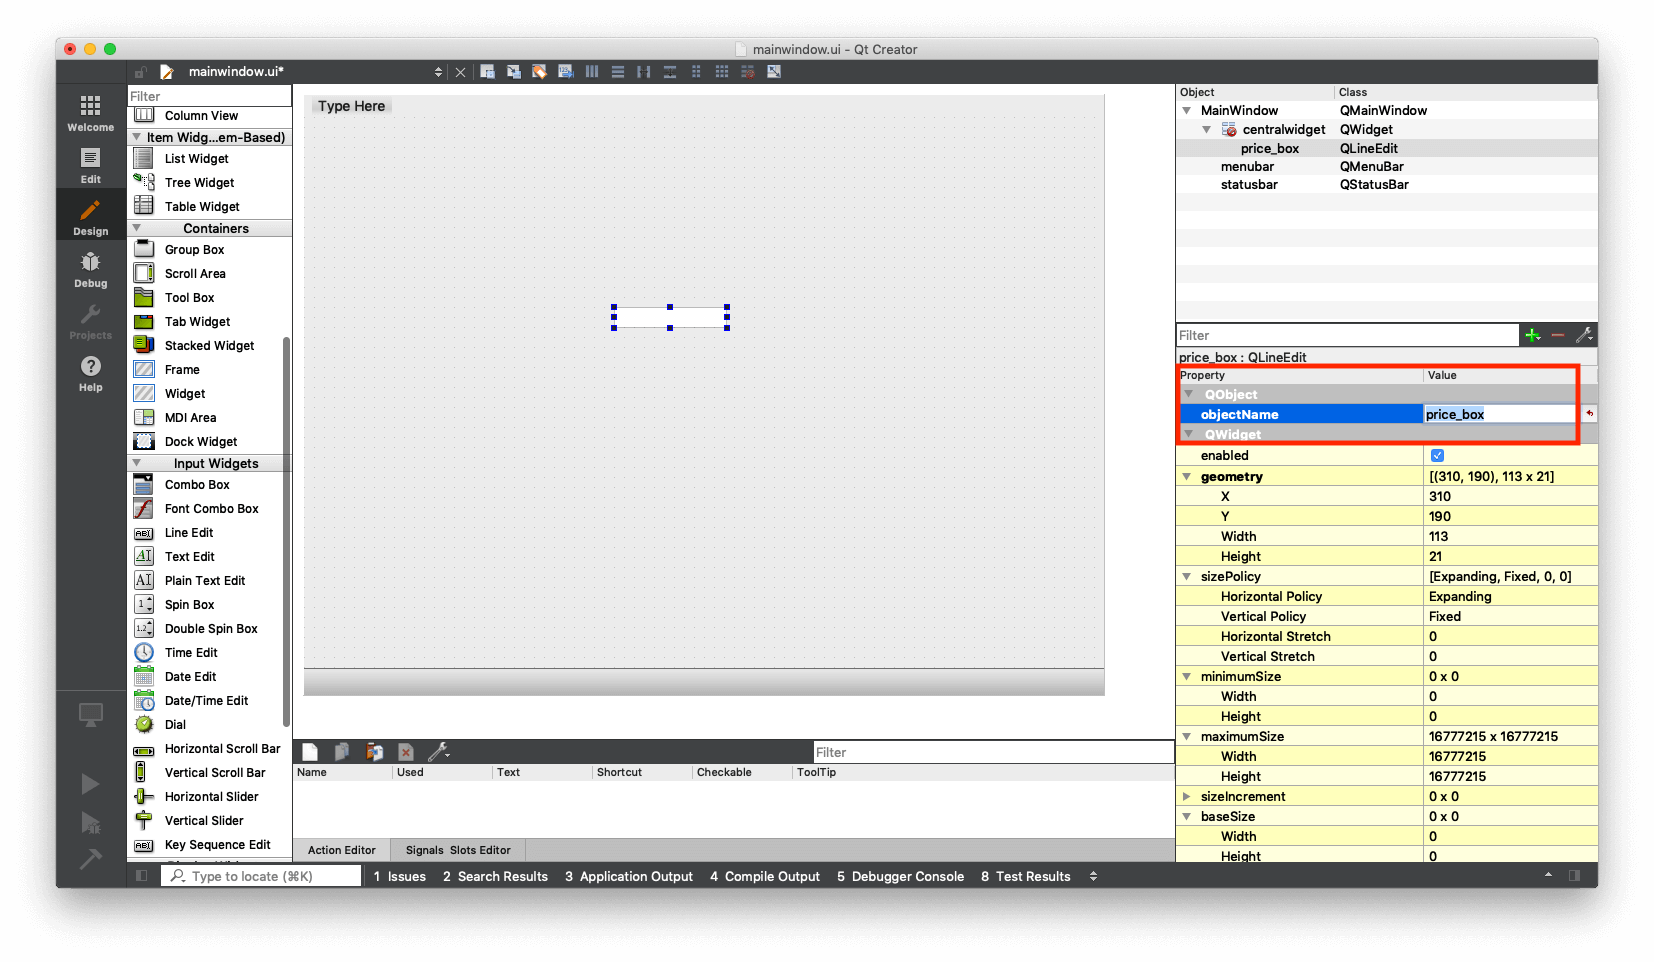
The red highlight in the box below shows objectName which is the name of the object. The name entered here is the name that will be used to refer to this object from our Python code, so call it something sensible.
I'm calling it price_box, as we will enter the price into this box.
 Qt Designer — Editing the objectName
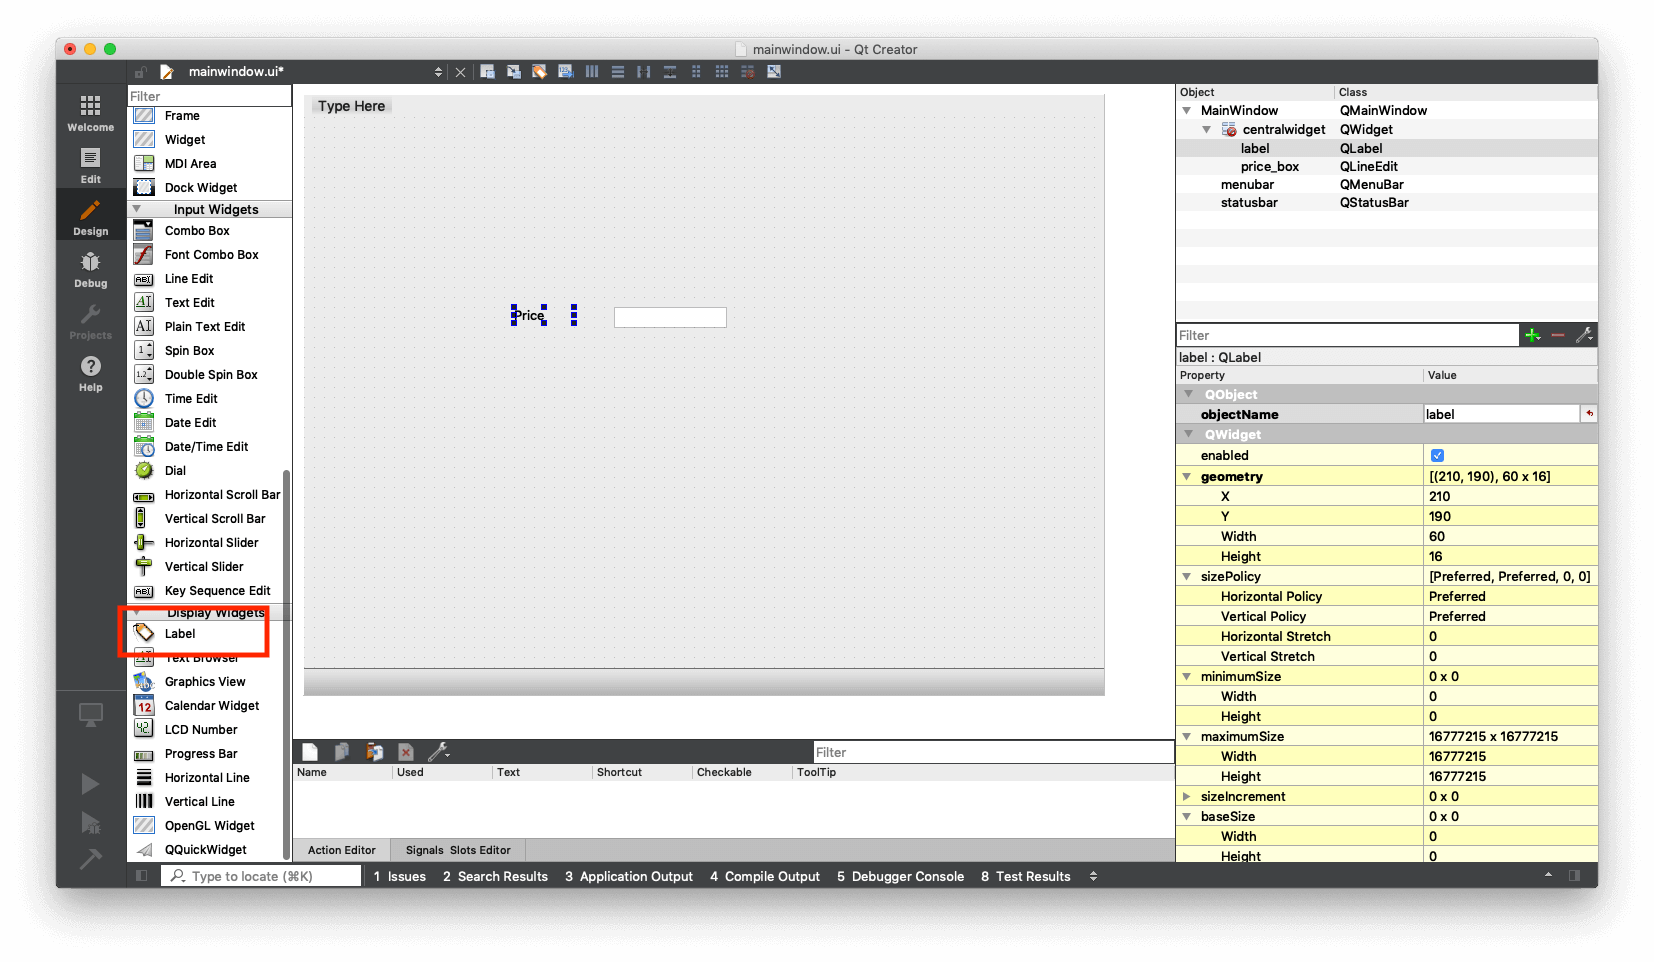
The next thing we will do is attach a label to the box, to make it clear to the user what this box is for.
Find the Label in the list of widgets on the left, and drag it onto the main window. It gets the default text of "TextLabel". Double click the widget and type to change it to "Price".
Don't worry about positioning too much, we'll sort the layout right at the end. Just put the widgets in roughly the right place.
 Qt Creator — Adding a QLabel widget
You can also make the text large and bold, as seen here:
 Qt Creator — QLabel font properties
Adding a QSpinBox for Tax Rate
For the tax box, we are going to use something different — a Spin Box (QSpinBox). This is a numeric input widget which limits the values you can enter. We don't need a Spin Box, it's just good to see how you can use different widgets that Qt Creator provides.
Drag a Spin Box to the window. The first thing we do is change the objectName to something sensible, tax_rate in our case. Remember, this is how this object will be called from Python.
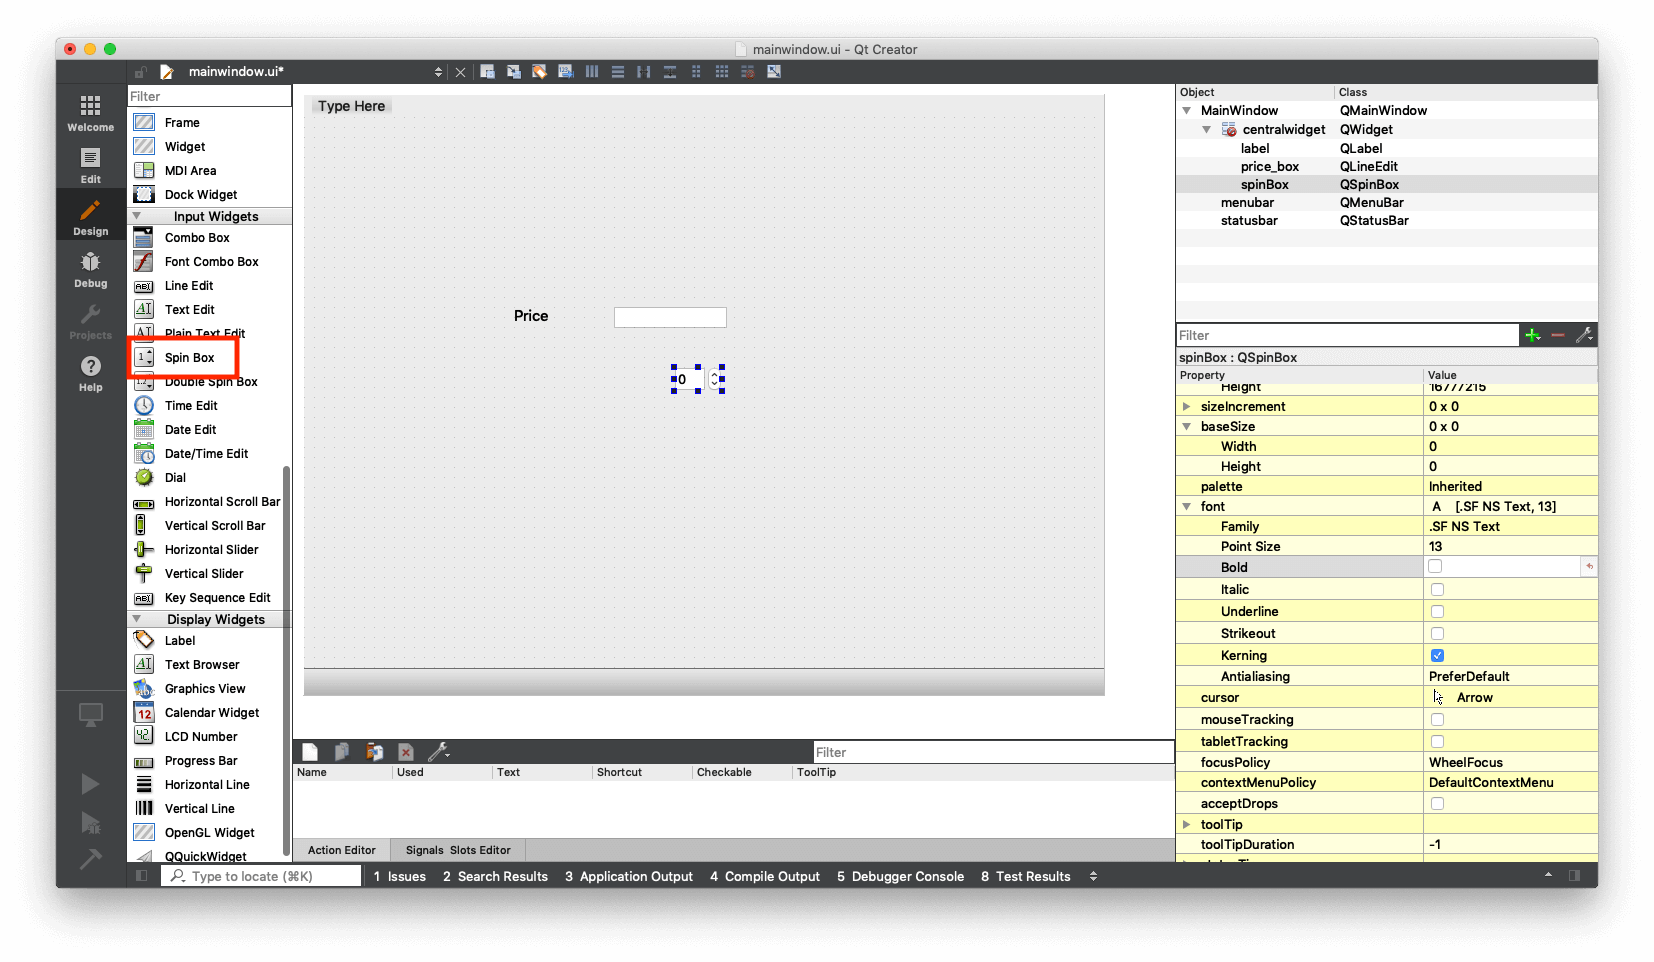 Qt Creator — Adding a QSpinBox widget
We can choose a default value for our Spin Box. I'm choosing 20:
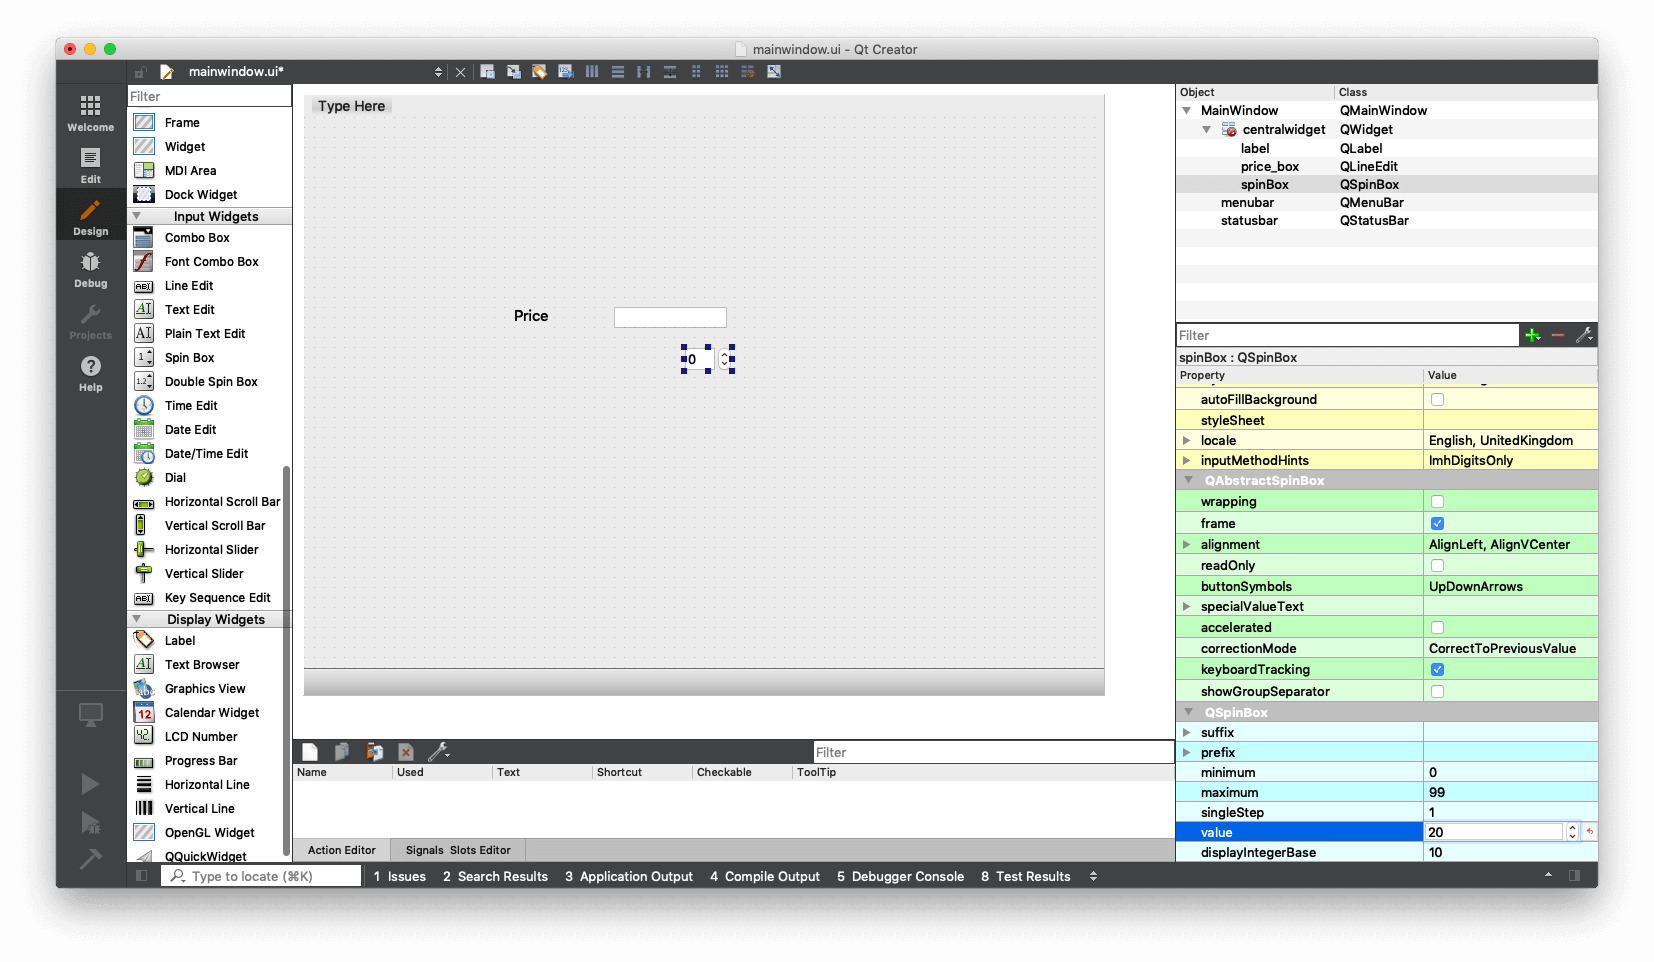 Qt Designer — Setting default value on a QSpinBox
One neat feature of QSpinBox is that you can also set the minimum and maximum limits. We're keeping them to what they are for our app, but feel free to tweak them for yours.
 Qt Designer — QSpinBox min and max properties
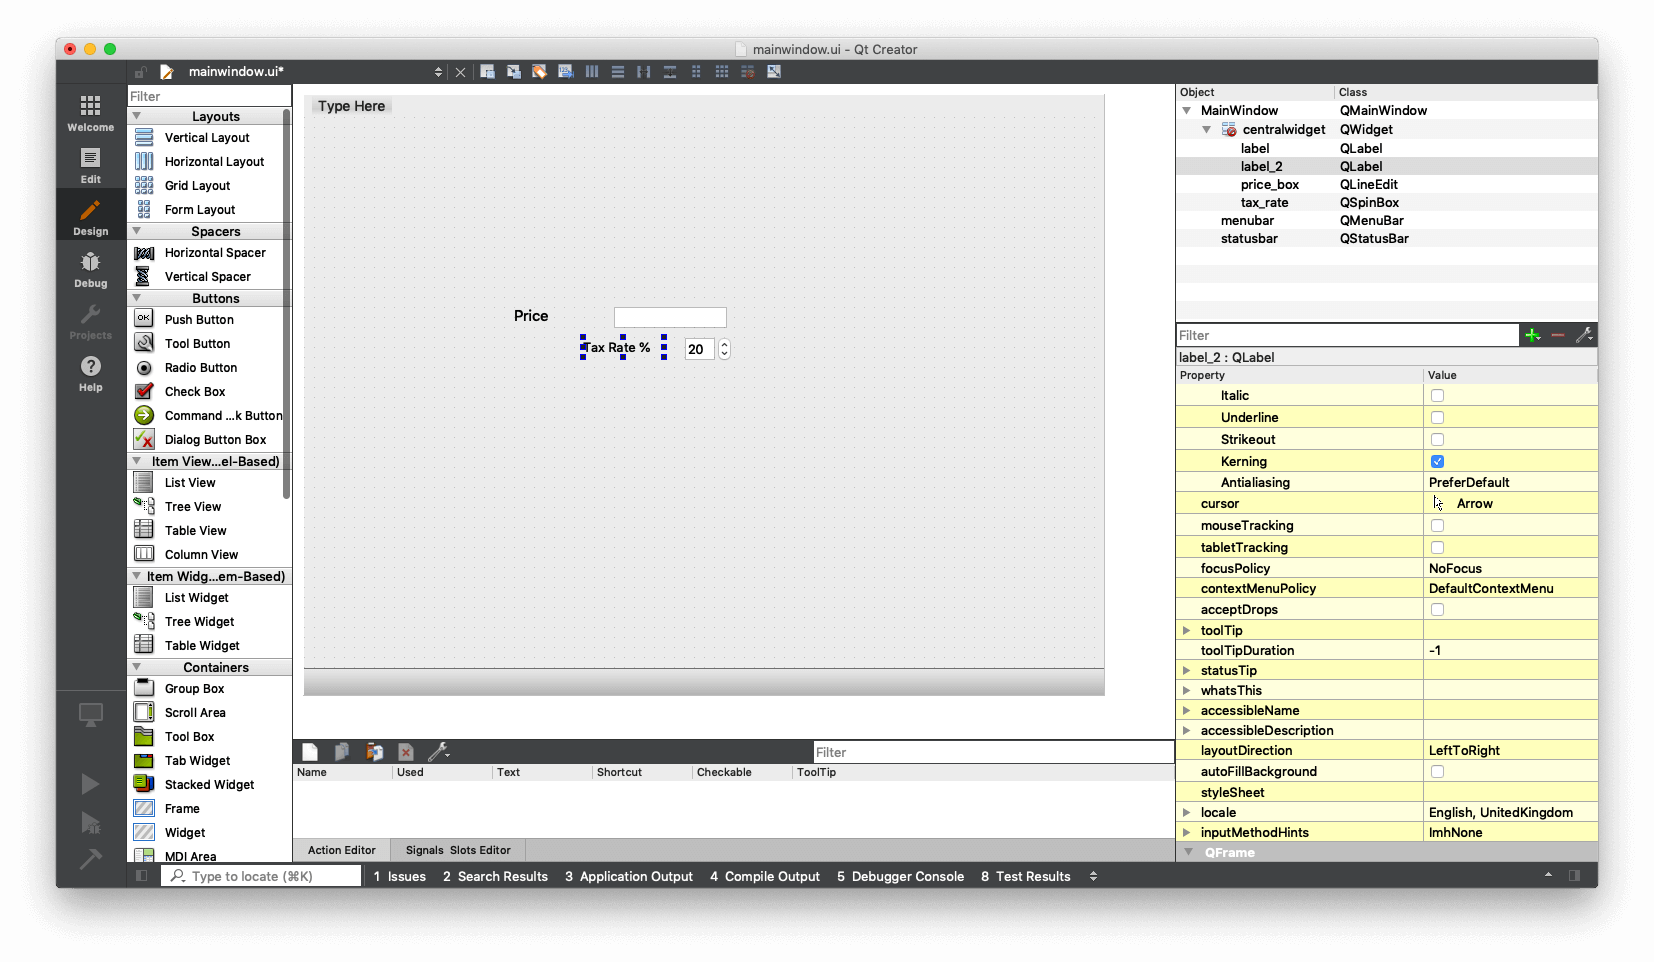
Add another label called Tax Rate, editing it the same as before and drag it into place next to the Spin Box.
 Qt Designer — Adding a Tax Rate label
Adding a QPushButton
Next look for the widget called Push Button in the widget panel and drag it to the window.
The button just says PushButton, which isn't very helpful. Change the objectName to calc_tax_button and then double click to edit the label text on the button to "Calculate Tax".
 Qt Designer — Adding a QPushButton widget
Adding an Output Label
Drag another Label on to the window. This label will be where we write out the result of our calculation. So double-click and edit to delete the default text. Change its objectName to results_output.
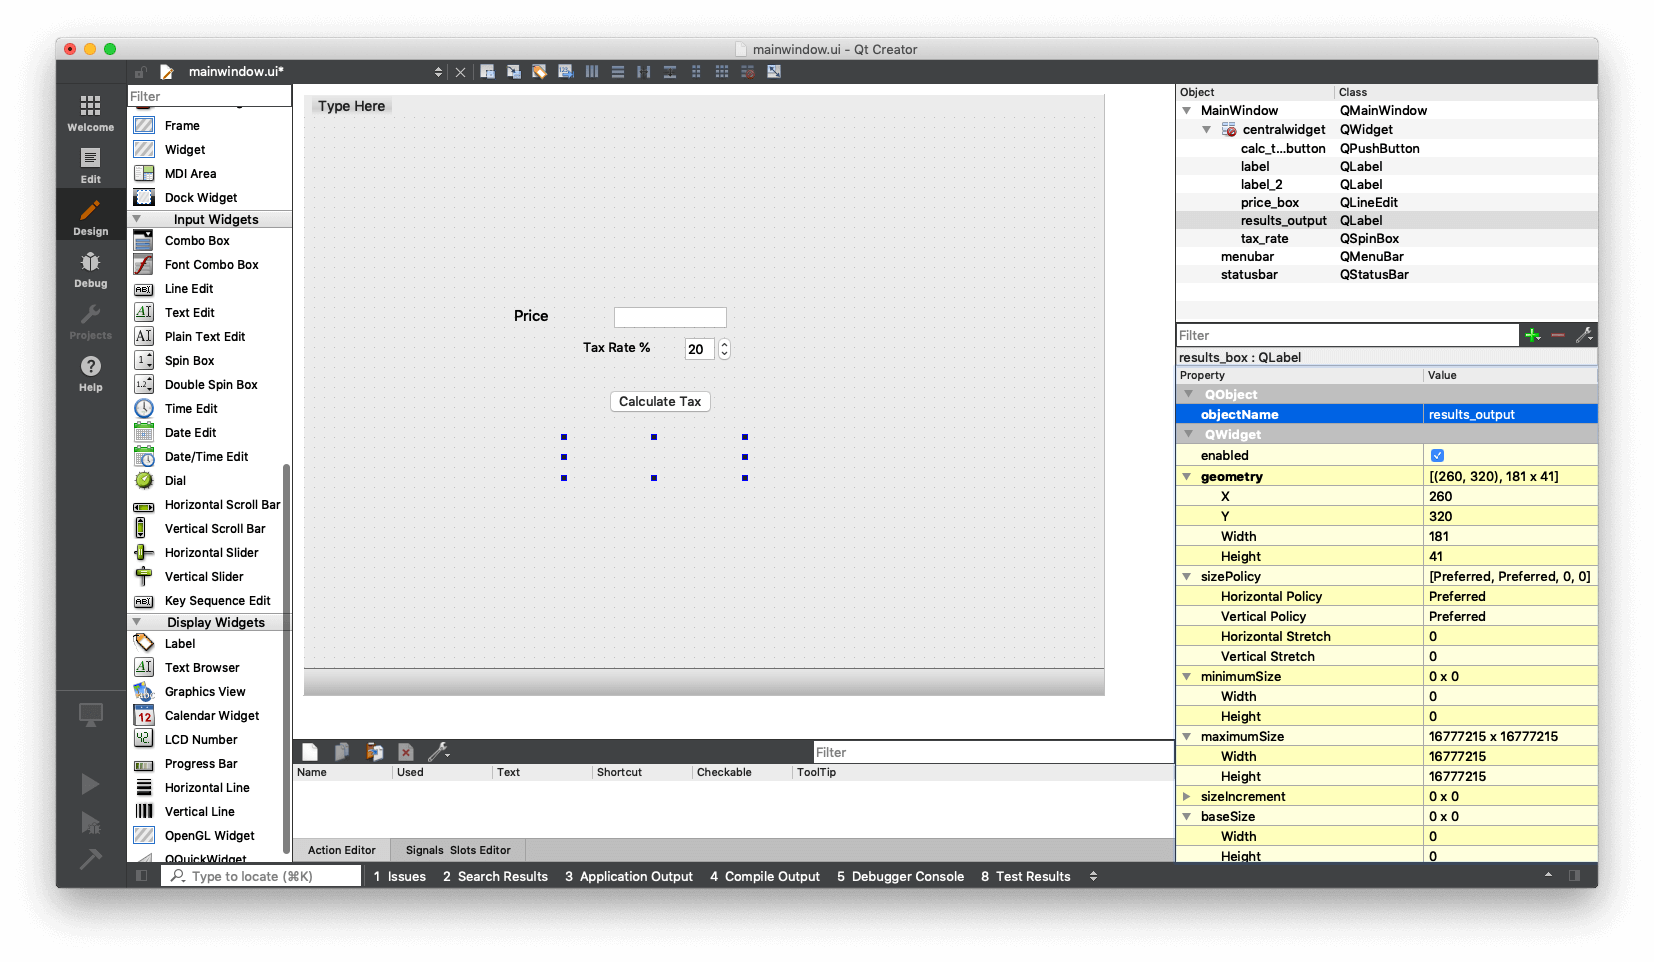 Qt Designer — QLabel as output for calculation results
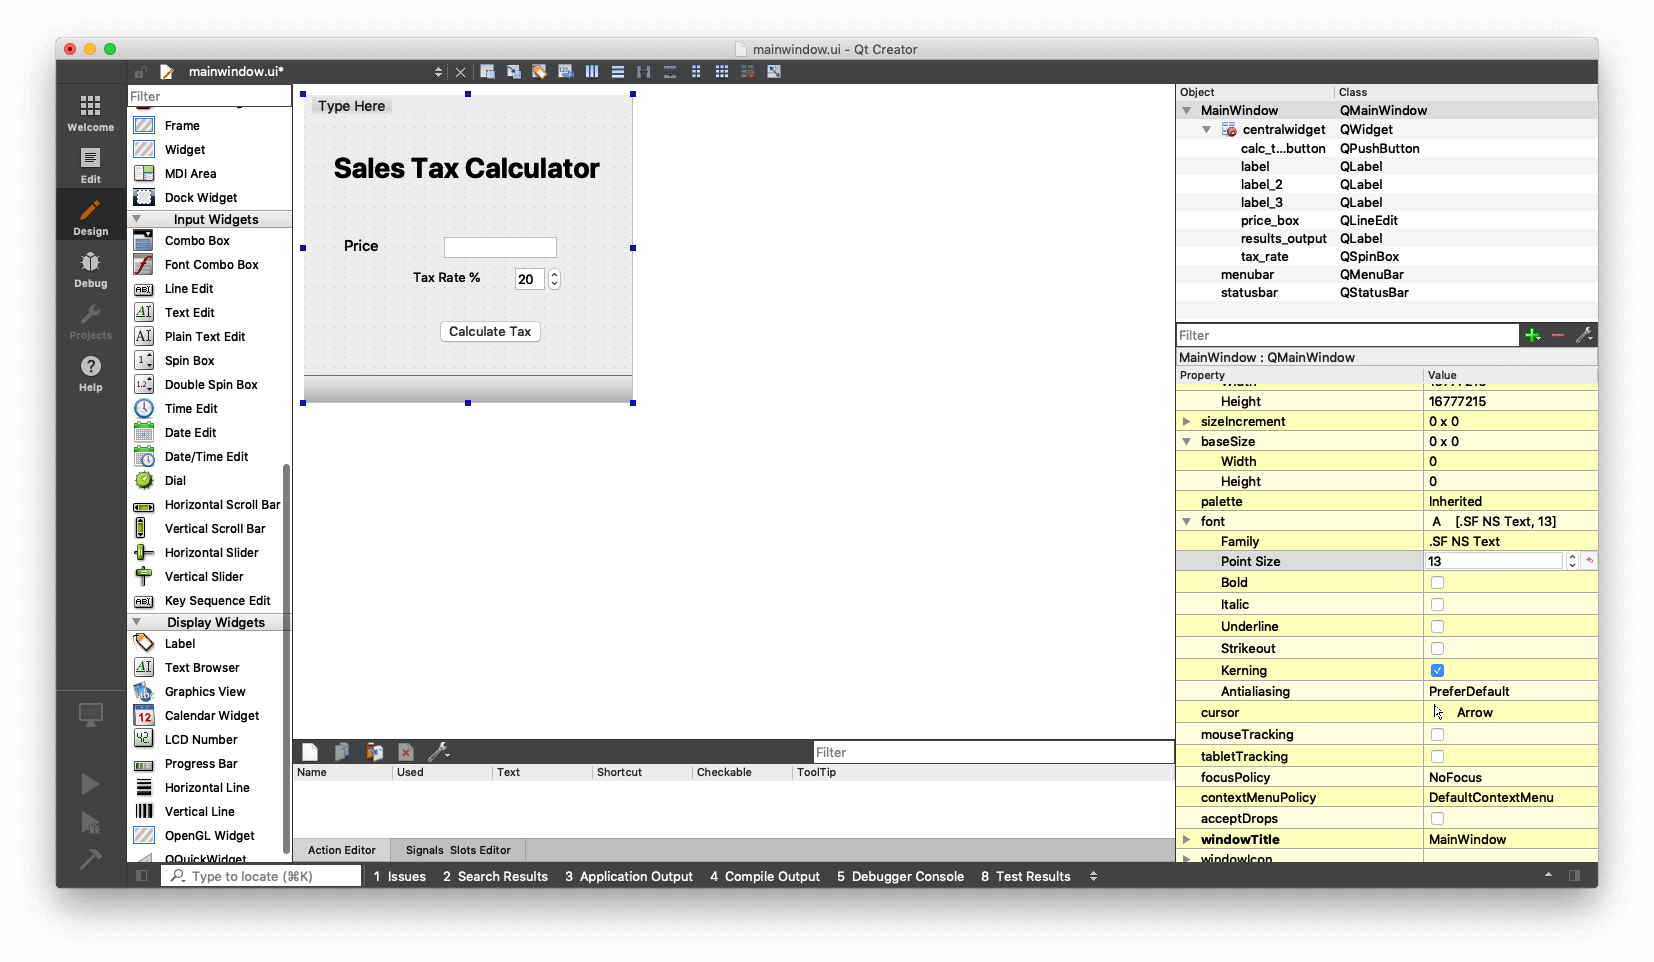
Finally, if you want to you can add a header. This is a simple label box with the font increased:
 Qt Designer — Adding a header label
Adjusting the Layout with Qt Designer
So we now have the bones of our UI in place, but it's not looking particularly pretty. Firstly, we have a lot of empty space because our window is way too big.
To shrink the window, first select all the widgets and move them out of the way (top left), and then drag the window down to size using the blue handles in the corner.
 Qt Designer — Resized QMainWindow
That certainly helped a bit, but the alignments are still a bit wonky.
Helpfully, Qt provides a system of layouts which can be used to automatically position elements within a window. In our case we have a classic form layout, where we have a vertical stack of widgets and labels. Qt has a specific Form Layout (QFormLayout) for exactly this purpose.
To apply it, right-click on your Main Window and select "Lay out" at the bottom (yes, there is a space between Lay and out, I don't know why) and then choose "Lay Out in a Form Layout" (snappy title).
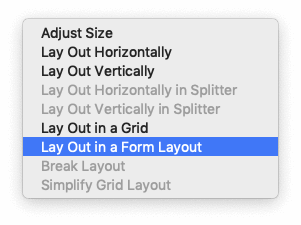 Qt Designer — Applying a QFormLayout
You should see the widgets instantly snap into position. If the positions are not correct just drag them around — they will continue to snap to a regular grid, with both sides aligned.
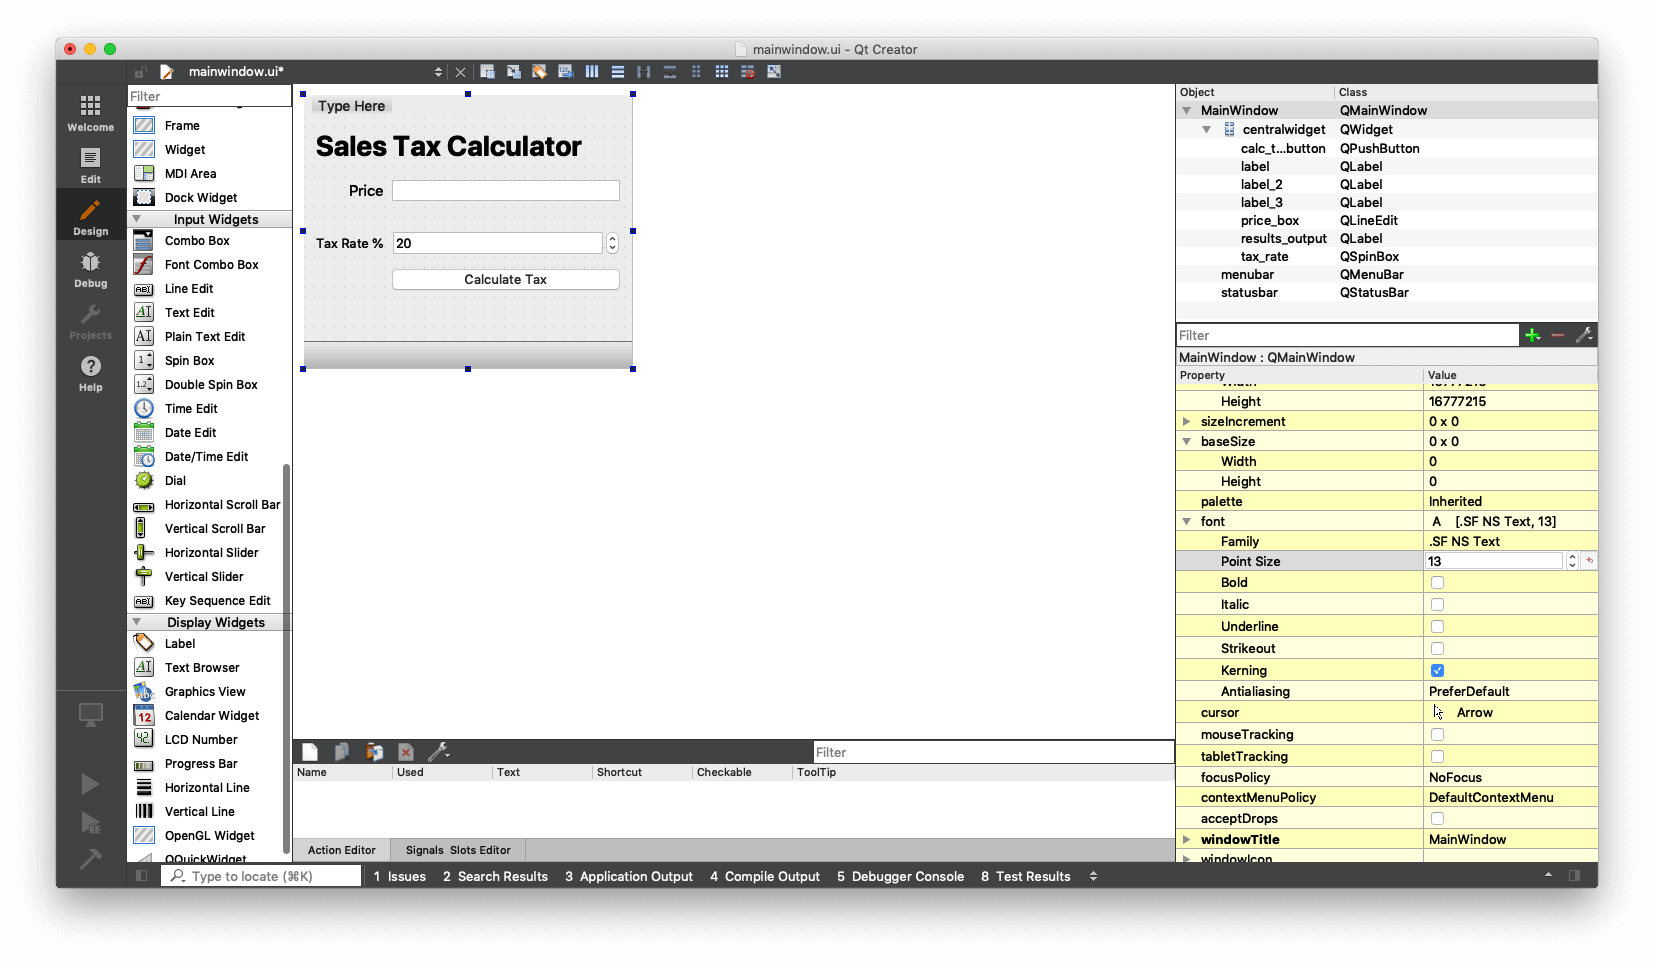 Qt Designer — Form Layout applied to widgets
The big label (if you've added it) doesn't have a "pair" so can't align. If you drag it around, it'll throw the other elements off. To fix this, just drag-resize it out of the form layout, and it will be ignored.
The last 2 final tweaks are —
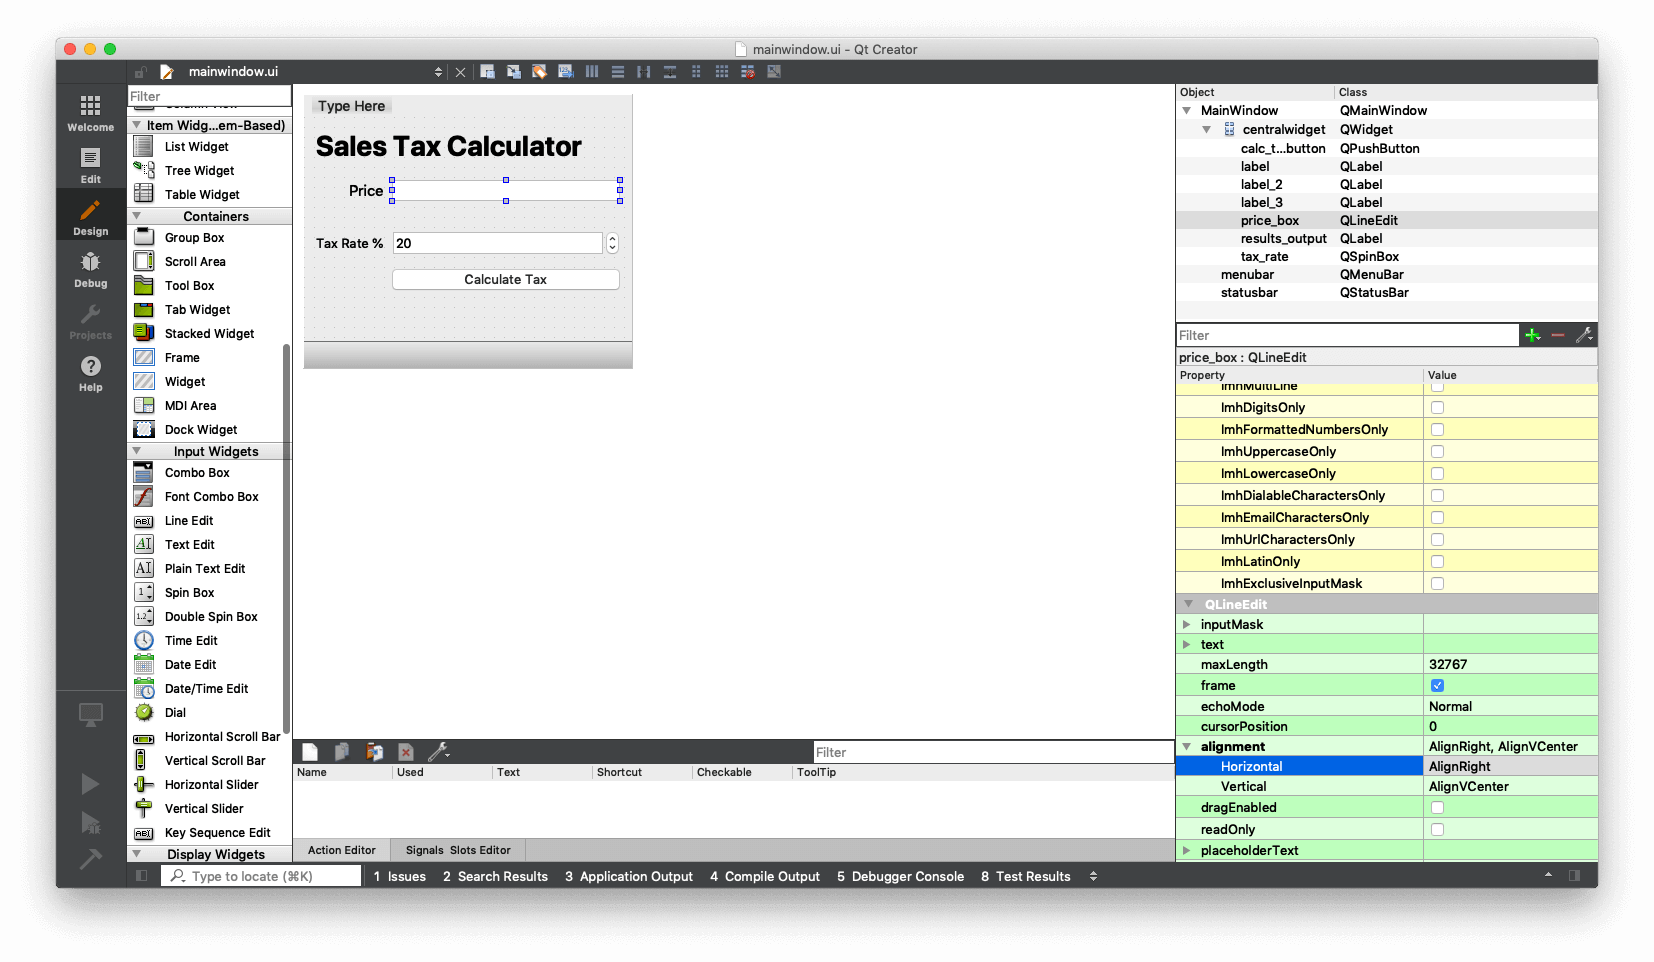
- Set the input box to right-aligned, which is more natural for numbers.
- Update the name of the Main Window
windowTitleproperty (choose a good name).
 Qt Designer — Setting alignment on a QLineEdit input
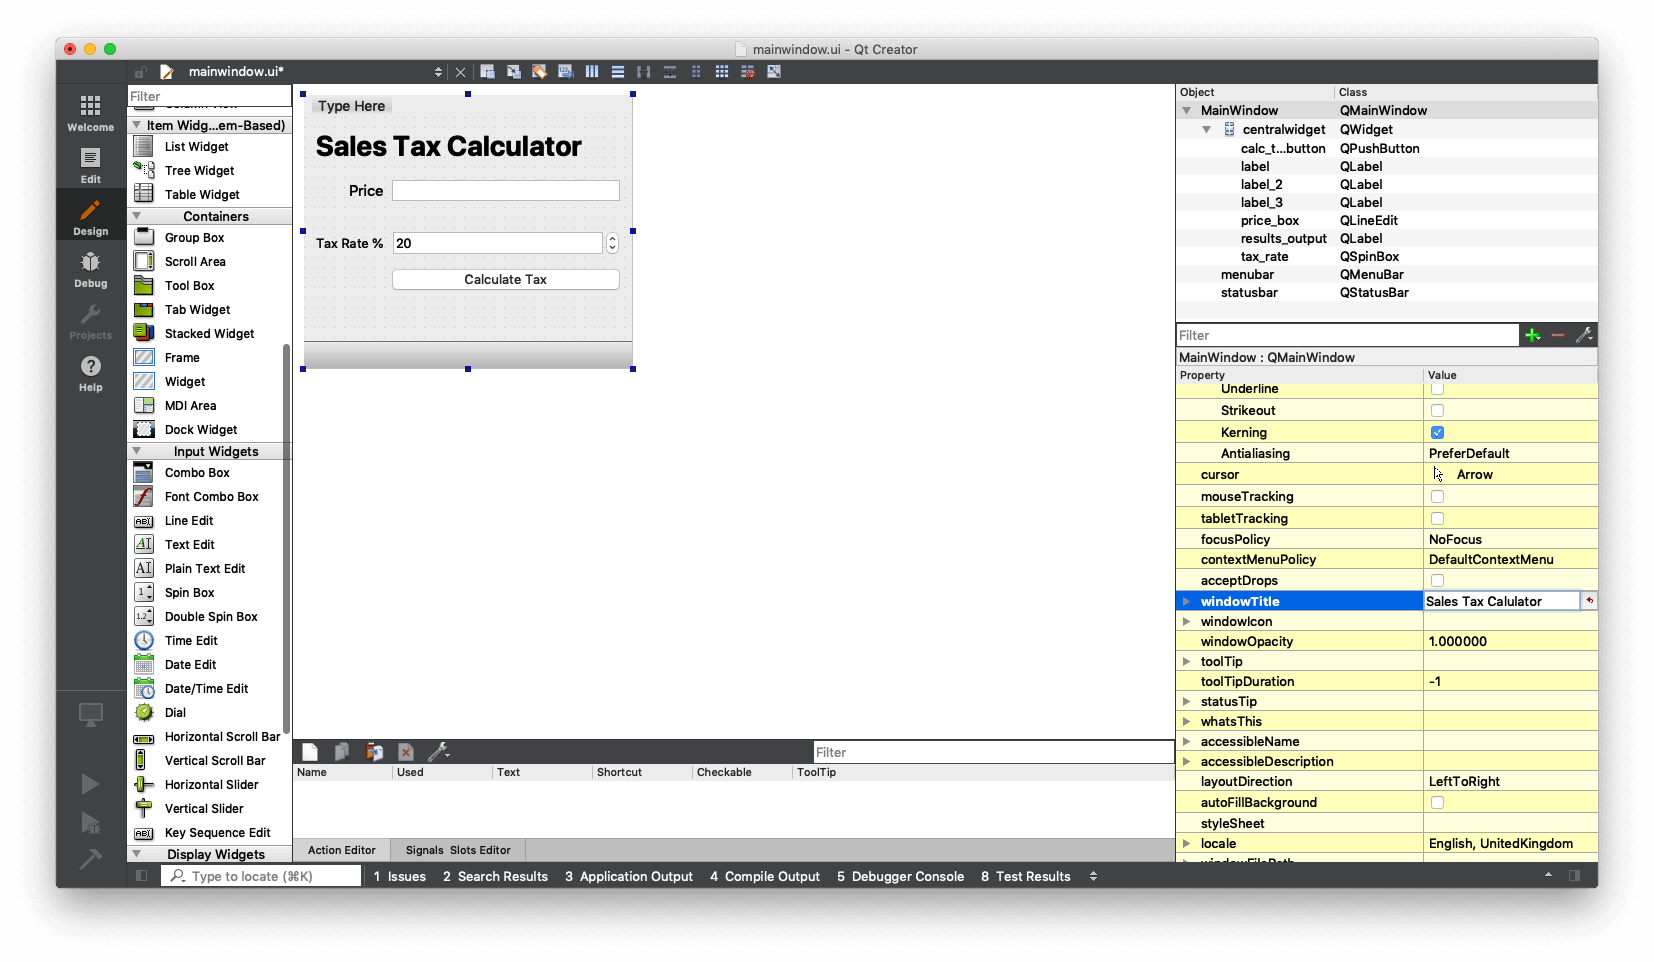 Qt Designer — Setting the windowTitle property
Design Complete
That's the design complete. Save your .ui file by File -> Save (it will default to the name & location you gave during setup).
In the next part we'll write the Python code to bring our PyQt5 UI to life.
Writing the Python Code to Load the UI
The UI file we've created is just an XML definition, containing the positions, attributes and names of the widgets. Open it in a text editor, if you want, and you will find something like this:
<?xml version="1.0" encoding="UTF-8"?>
<ui version="4.0">
 <class>MainWindow</class>
 <widget class="QMainWindow" name="MainWindow">
  <property name="geometry">
   <rect>
    <x>0</x>
    <y>0</y>
    <width>328</width>
    <height>273</height>
   </rect>
  </property>
  <property name="windowTitle">
   <string>Sales Tax Calulator</string>
  </property>
  <widget class="QWidget" name="centralwidget">
   <layout class="QFormLayout" name="formLayout">
    <item row="0" column="0" colspan="2">
     <widget class="QLabel" name="label_3">
      <property name="font">
       <font>
        <pointsize>28</pointsize>
        <weight>75</weight>
        <bold>true</bold>
...
Each of the widgets we added is an object, with a set of common and widget-specific methods e.g. text() (to read the value in a LineEdit).
This example uses the `loadUI` method to load the UI file, for other options take a look at First steps with Qt Creator
Loading Your .ui File in Python with PyQt5
To use your UI file in your app you need to load it into your Python code. PyQt5 provides a uic.loadUiType() method to load a .ui file and create a QWidget (or QMainWindow) object.
The following skeleton file can be used to load any .ui file generated from Qt Creator and display it.
- PyQt5
- PySide2
import sys
from PyQt5 import QtCore, QtGui, QtWidgets, uic

qtcreator_file  = "your .ui file" # Enter file here.
Ui_MainWindow, QtBaseClass = uic.loadUiType(qtcreator_file)


class MyWindow(QtWidgets.QMainWindow, Ui_MainWindow):
    def __init__(self):
        QtWidgets.QMainWindow.__init__(self)
        Ui_MainWindow.__init__(self)
        self.setupUi(self)

if __name__ == "__main__":
    app = QtWidgets.QApplication(sys.argv)
    window = MyWindow()
    window.show()
    sys.exit(app.exec_())
import sys
from PySide2 import QtCore, QtGui, QtWidgets
from PySide2.QtUiTools import QUiLoader

qtcreator_file  = "your .ui file" # Enter file here.
loader = QUiLoader()
file = QtCore.QFile(qtcreator_file)
file.open(QtCore.QFile.ReadOnly)
file.close()

if __name__ == "__main__":
    app = QtWidgets.QApplication(sys.argv)
    window = loader.load(file, None)
    window.show()
    sys.exit(app.exec_())
Let's take a quick look at the code. At the bottom of the file we define our entrypoint which first creates a QApplication instance, passing in sys.argv allows Qt to be configured from the command line while running your app (we won't be doing that here).
Next we create an instance of MyWindow, show it using window.show() and then execute the application event loop, with app.exec_().
if __name__ == "__main__":
    app = QtGui.QApplication(sys.argv)
    window = MyWindow()
    window.show()
    sys.exit(app.exec_())
````

To load your own `.ui` file just change the filename on this line:

```python
qtcreator_file  = "your .ui file" # Enter file here.
Save the file as tax.py and then run it from the command line.
python3 tax.py
You should see your UI appear, looking something not unlike the following —
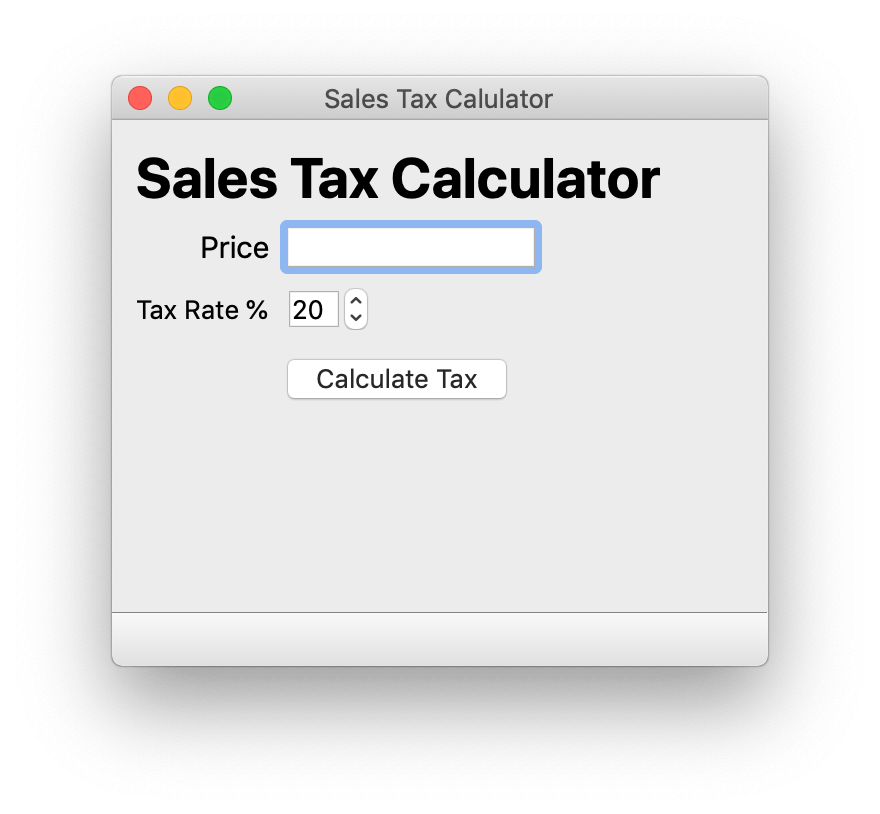 Simple Tax Calculator — Skeleton UI running in Python
Connecting Signals and Slots — Hooking Up the Logic
You'll probably notice that while you can enter numbers and click the button, nothing happens when you do. This is because we still need to implement the actual application logic in our Python code.
The key widget in our GUI is the button. Once you press the button, something happens. What? We need to tell our code what to do when the user presses the Calculate Tax button. In the __init__ function, add this line:
self.calc_tax_button.clicked.connect(self.calculate_tax)
Remember that in Qt Creator we called our button calc_tax_button — this was the name of the object, not the text that was displayed on it. The button is attached by loadUI to our MyMainWindow instance (here available as self) using the name we defined for it.
All the objects you create in Qt Creator are available in this same way (even the labels which you didn't rename).
.clicked is an internal signal that is triggered when someone clicks on a QPushButton. We connect this signal to a handler using .connect(self.calculate_tax). This means that every time the button is pressed and the .clicked signal fires, the connected method self.calculate_tax is called.
You can connect multiple target functions or methods (called slots in Qt terminology) to a signal, and they will all be called when the signal fires.
Implementing the Tax Calculation in Python
We haven't written the target method self.calculate_tax yet, so let's do it now. In the MyWindow class, add the method with the following code:
def calculate_tax(self):
    price = Decimal(self.price_box.text())
    tax = Decimal(self.tax_rate.value())
    total_price = price  + ((tax / 100) * price)
    total_price_string = "The total price with tax is: {:.2f}".format(total_price)
    self.results_output.setText(total_price_string)
We're using the Python builtin type Decimal for our calculations, as it prevents rounding errors for fixed-point currency calculations. It otherwise works exactly like float, which you should already be familiar with. To use Decimal we need to import it at the top of the file, by adding the following —
from decimal import Decimal
Save the file, and run it again from the command line. You should now have a fully functioning sales tax calculator application!
python3 tax.py
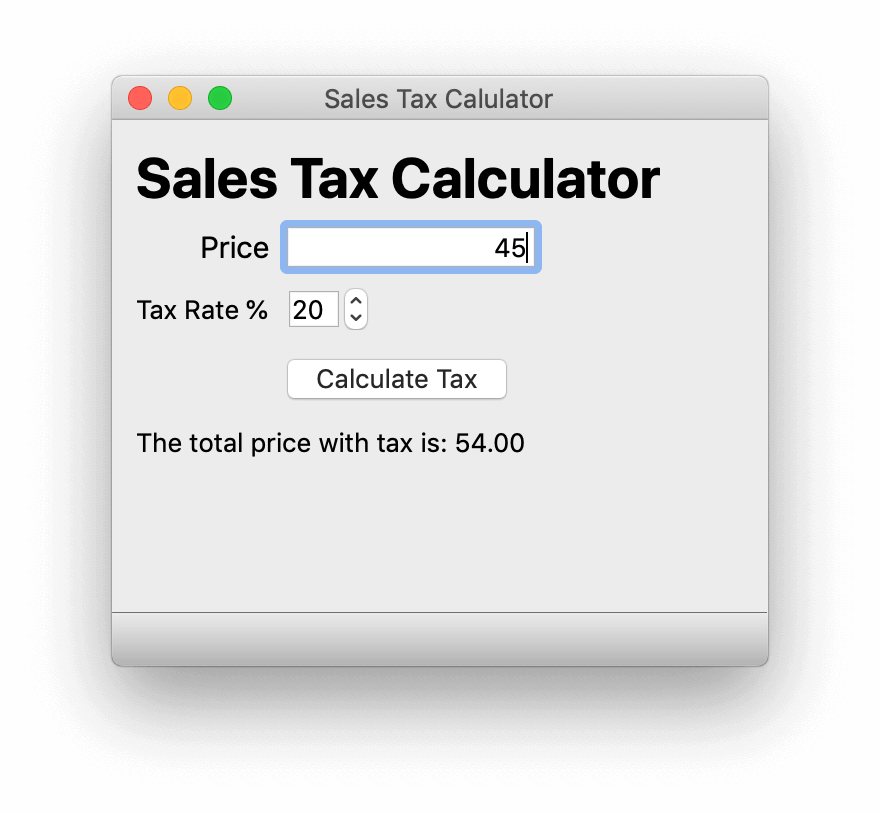 Simple Tax Calculator — Running with calculation logic
Let's step through the code line by line to see what it is doing.
We have to do two things: read the price box, read the tax box, and calculate the final price. Remember, we will call the objects by the names we gave them in Qt Creator (which is why it's a good idea to rename them, as names like box1 become confusing fast!)
price = Decimal(self.price_box.text())
First we read our price_box by calling .text(). This method returns the current value of the QLineEdit.
You don't have to remember these all these names yourself, just Google "Qt5 QLineEdit" to get to the documentation page, which lists all the available methods.
The read value is a string, so we convert it to a Decimal and store it in a variable called price.
Next, we read the tax rate from the QSpinBox widget named tax_rate using the builtin method .value(). This returns a float which we convert to a Decimal for accuracy.
tax = Decimal(self.tax_rate.value())
Now that we have both these values, we can calculate the final price:
total_price = price  + ((tax / 100) * price)
total_price_string = "The total price with tax is: {:.2f}".format(total_price)
self.results_output.setText(total_price_string)
We create a string with our final price, rounding the result down to 2 decimal places. Finally we output it to our QLabel widget results_output, replacing the text there (initially empty).
Complete Sales Tax Calculator Code
The complete Python code for our PyQt5 sales tax calculator is shown below.
import sys
from decimal import Decimal

from PyQt5 import QtCore, QtGui, QtWidgets, uic


qtCreatorFile = "mainwindow.ui" # Enter file here.
Ui_MainWindow, QtBaseClass = uic.loadUiType(qtCreatorFile)


class MyWindow(QtWidgets.QMainWindow, Ui_MainWindow):
    def __init__(self):
        QtWidgets.QMainWindow.__init__(self)
        Ui_MainWindow.__init__(self)
        self.setupUi(self)
        self.calc_tax_button.clicked.connect(self.calculate_tax)

    def calculate_tax(self):
        price = Decimal(self.price_box.text())
        tax = Decimal(self.tax_rate.value())
        total_price = price  + ((tax / 100) * price)
        total_price_string = "The total price with tax is: {:.2f}".format(total_price)
        self.results_output.setText(total_price_string)


if __name__ == "__main__":
    app = QtWidgets.QApplication(sys.argv)
    window = MyWindow()
    window.show()
    sys.exit(app.exec_())
Summary
In this tutorial we built a simple PyQt5 sales tax calculator application using Qt Creator and Python. You learned how to design a GUI with Qt Designer, load a .ui file into Python using uic.loadUiType(), and connect signals to slots to implement application logic. These are the fundamental building blocks for creating any Python GUI application with PyQt5. If you want to learn more about PyQt5, check out the Getting started with PyQt5 course.
Packaging Python Applications with PyInstaller by Martin Fitzpatrick
This step-by-step guide walks you through packaging your own Python applications from simple examples to complete installers and signed executables.