In the previous tutorials, we've looked at packaging your PyQt5 applications for Windows and macOS -- turning them into EXE Installers and macOS bundles respectively. But to make your application truly cross-platform you should also provide installers for Linux. In this tutorial we'll look at how to do just that, first using PyInstaller to bundle our application into a executable app and then using a tool called fpm to convert that into a Linux package.
This tutorial is broken down into a series of steps, using PyInstaller to build first simple, and then more complex PyQt5 applications into Linux executables. You can choose to follow it through completely, or skip to the parts that are most relevant to your own project.
We finish off by building an Ubuntu .deb package, the usual method for distributing application on that systems. Thanks to the magic of fpm the instructions will also work for other Linux distributions, such as Redhat .rpm or Arch .pacman.
You always need to compile your app on your target system. So, if you want to create an Ubuntu package do this on Ubuntu.
 Example Ubuntu Package
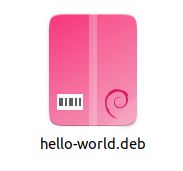
If you're impatient, you can download the Example Ubuntu Package first.
Requirements
PyInstaller works out of the box with PyQt5 and as of writing, current versions of PyInstaller are compatible with Python 3.6+. Whatever project you're working on, you should be able to package your apps. This tutorial assumes you have a working installation of Python with pip package management working.
You can install PyInstaller using pip.
pip3 install PyInstaller
If you experience problems packaging your apps, your first step should always be to update your PyInstaller and hooks package the latest versions using
pip3 install --upgrade PyInstaller pyinstaller-hooks-contrib
The hooks module contains package-specific packaging instructions for PyInstaller which is updated regularly.
Install in virtual environment (optional)
You can also opt to install PyQt5 and PyInstaller in a virtual environment (or your applications virtual environment) to keep your environment clean.
python3 -m venv packenv
Once created, activate the virtual environment by running from the command line —
call packenv\scripts\activate.bat
Finally, install the required libraries. For PyQt5 you would use —
PyQt/PySide Development Services — Stuck in development hell? I'll help you get your project focused, finished and released. Benefit from years of practical experience releasing software with Python.
pip3 install PyQt5 PyInstaller
Getting Started
It's a good idea to start packaging your application from the very beginning so you can confirm that packaging is still working as you develop it. This is particularly important if you add additional dependencies. If you only think about packaging at the end, it can be difficult to debug exactly where the problems are.
For this example we're going to start with a simple skeleton app, which doesn't do anything interesting. Once we've got the basic packaging process working, we'll extend the application to include icons and data files. We'll confirm the build as we go along.
To start with, create a new folder for your application and then add the following skeleton app in a file named app.py. You can also download the source code and associated files
from PyQt5 import QtWidgets

import sys

class MainWindow(QtWidgets.QMainWindow):

    def __init__(self):
        super().__init__()

        self.setWindowTitle("Hello World")
        l = QtWidgets.QLabel("My simple app.")
        l.setMargin(10)
        self.setCentralWidget(l)
        self.show()

if __name__ == '__main__':
    app = QtWidgets.QApplication(sys.argv)
    w = MainWindow()
    app.exec()
This is a basic bare-bones application which creates a custom QMainWindow and adds a simple widget QLabel to it. You can run this app as follows.
python app.py
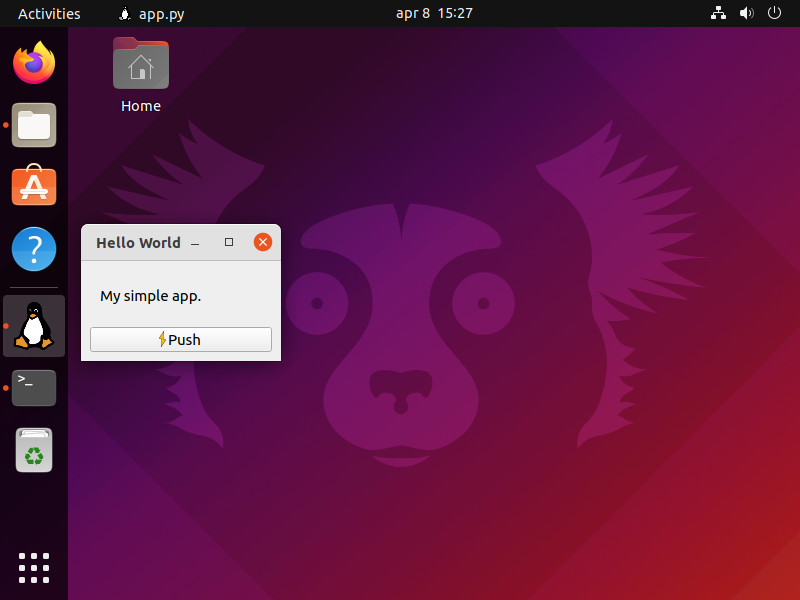
This should produce the following window (on Ubuntu).
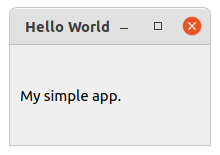 Simple skeleton app in PyQt5
Building a basic app
Now we have our simple application skeleton in place, we can run our first build test to make sure everything is working.
Open your terminal (shell) and navigate to the folder containing your project. You can now run the following command to run the PyInstaller build.
pyinstaller app.py
You'll see a number of messages output, giving debug information about what PyInstaller is doing. These are useful for debugging issues in your build, but can otherwise be ignored. The output that I get for running the command on my system is shown below.
$ pyinstaller app.py
85 INFO: PyInstaller: 4.10
85 INFO: Python: 3.9.7
88 INFO: Platform: Linux-5.13.0-39-generic-x86_64-with-glibc2.34
89 INFO: wrote /home/martin/pyinstaller/linux2/no-datas/pyqt5/app.spec
91 INFO: UPX is not available.
91 INFO: Extending PYTHONPATH with paths
['/home/martin/pyinstaller/linux2/no-datas/pyqt5']
236 INFO: checking Analysis
240 INFO: Building because inputs changed
240 INFO: Initializing module dependency graph...
243 INFO: Caching module graph hooks...
255 INFO: Analyzing base_library.zip ...
2008 INFO: Processing pre-find module path hook distutils from '/home/martin/.local/lib/python3.9/site-packages/PyInstaller/hooks/pre_find_module_path/hook-distutils.py'.
2013 INFO: distutils: retargeting to non-venv dir '/usr/lib/python3.9'
4231 INFO: Caching module dependency graph...
4348 INFO: running Analysis Analysis-00.toc
4379 INFO: Analyzing /home/martin/pyinstaller/linux2/no-datas/pyqt5/app.py
4403 INFO: Processing module hooks...
4403 INFO: Loading module hook 'hook-PyQt5.py' from '/home/martin/.local/lib/python3.9/site-packages/PyInstaller/hooks'...
4559 WARNING: Hidden import "sip" not found!
4559 INFO: Loading module hook 'hook-xml.etree.cElementTree.py' from '/home/martin/.local/lib/python3.9/site-packages/PyInstaller/hooks'...
4560 INFO: Loading module hook 'hook-heapq.py' from '/home/martin/.local/lib/python3.9/site-packages/PyInstaller/hooks'...
4562 INFO: Loading module hook 'hook-distutils.py' from '/home/martin/.local/lib/python3.9/site-packages/PyInstaller/hooks'...
4568 INFO: Loading module hook 'hook-xml.py' from '/home/martin/.local/lib/python3.9/site-packages/PyInstaller/hooks'...
4627 INFO: Loading module hook 'hook-PyQt5.QtWidgets.py' from '/home/martin/.local/lib/python3.9/site-packages/PyInstaller/hooks'...
4709 INFO: Loading module hook 'hook-difflib.py' from '/home/martin/.local/lib/python3.9/site-packages/PyInstaller/hooks'...
4711 INFO: Loading module hook 'hook-multiprocessing.util.py' from '/home/martin/.local/lib/python3.9/site-packages/PyInstaller/hooks'...
4712 INFO: Loading module hook 'hook-sysconfig.py' from '/home/martin/.local/lib/python3.9/site-packages/PyInstaller/hooks'...
4713 INFO: Loading module hook 'hook-encodings.py' from '/home/martin/.local/lib/python3.9/site-packages/PyInstaller/hooks'...
4759 INFO: Loading module hook 'hook-PyQt5.QtGui.py' from '/home/martin/.local/lib/python3.9/site-packages/PyInstaller/hooks'...
4807 INFO: Loading module hook 'hook-lib2to3.py' from '/home/martin/.local/lib/python3.9/site-packages/PyInstaller/hooks'...
4820 INFO: Loading module hook 'hook-pickle.py' from '/home/martin/.local/lib/python3.9/site-packages/PyInstaller/hooks'...
4827 INFO: Loading module hook 'hook-PyQt5.QtCore.py' from '/home/martin/.local/lib/python3.9/site-packages/PyInstaller/hooks'...
4853 INFO: Loading module hook 'hook-distutils.util.py' from '/home/martin/.local/lib/python3.9/site-packages/PyInstaller/hooks'...
4862 INFO: Looking for ctypes DLLs
4897 INFO: Analyzing run-time hooks ...
4900 INFO: Including run-time hook '/home/martin/.local/lib/python3.9/site-packages/PyInstaller/hooks/rthooks/pyi_rth_subprocess.py'
4903 INFO: Including run-time hook '/home/martin/.local/lib/python3.9/site-packages/PyInstaller/hooks/rthooks/pyi_rth_pkgutil.py'
4905 INFO: Including run-time hook '/home/martin/.local/lib/python3.9/site-packages/PyInstaller/hooks/rthooks/pyi_rth_multiprocessing.py'
4910 INFO: Including run-time hook '/home/martin/.local/lib/python3.9/site-packages/PyInstaller/hooks/rthooks/pyi_rth_inspect.py'
4912 INFO: Including run-time hook '/home/martin/.local/lib/python3.9/site-packages/PyInstaller/hooks/rthooks/pyi_rth_pyqt5.py'
4916 INFO: Looking for dynamic libraries
6561 INFO: Looking for eggs
6561 INFO: Python library not in binary dependencies. Doing additional searching...
6596 INFO: Using Python library /lib/x86_64-linux-gnu/libpython3.9.so.1.0
6604 INFO: Warnings written to /home/martin/pyinstaller/linux2/no-datas/pyqt5/build/app/warn-app.txt
6625 INFO: Graph cross-reference written to /home/martin/pyinstaller/linux2/no-datas/pyqt5/build/app/xref-app.html
6643 INFO: checking PYZ
6645 INFO: Building because name changed
6645 INFO: Building PYZ (ZlibArchive) /home/martin/pyinstaller/linux2/no-datas/pyqt5/build/app/PYZ-00.pyz
6923 INFO: Building PYZ (ZlibArchive) /home/martin/pyinstaller/linux2/no-datas/pyqt5/build/app/PYZ-00.pyz completed successfully.
6926 INFO: checking PKG
6926 INFO: Building because name changed
6927 INFO: Building PKG (CArchive) app.pkg
6959 INFO: Building PKG (CArchive) app.pkg completed successfully.
6962 INFO: Bootloader /home/martin/.local/lib/python3.9/site-packages/PyInstaller/bootloader/Linux-64bit-intel/run
6963 INFO: checking EXE
6963 INFO: Building because name changed
6964 INFO: Building EXE from EXE-00.toc
6969 INFO: Copying bootloader EXE to /home/martin/pyinstaller/linux2/no-datas/pyqt5/build/app/app
6970 INFO: Appending PKG archive to custom ELF section in EXE
6979 INFO: Building EXE from EXE-00.toc completed successfully.
6981 INFO: checking COLLECT
6982 INFO: Building COLLECT COLLECT-00.toc
8674 INFO: Building COLLECT COLLECT-00.toc completed successfully.
If you look in your folder you'll notice you now have two new folders dist and build.
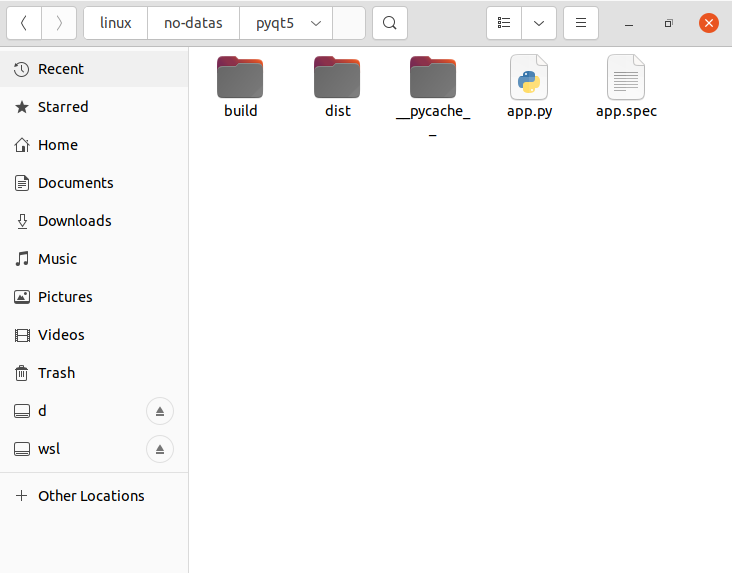 build & dist folders created by PyInstaller
Below is a truncated listing of the folder content, showing the build and dist folders.
.
├── app.py
├── app.spec
├── build
│ └── app
│ ├── localpycos
│ ├── Analysis-00.toc
│ ├── COLLECT-00.toc
│ ├── EXE-00.toc
│ ├── PKG-00.pkg
│ ├── PKG-00.toc
│ ├── PYZ-00.pyz
│ ├── PYZ-00.toc
│ ├── app
│ ├── app.pkg
│ ├── base_library.zip
│ ├── warn-app.txt
│ └── xref-app.html
└── dist
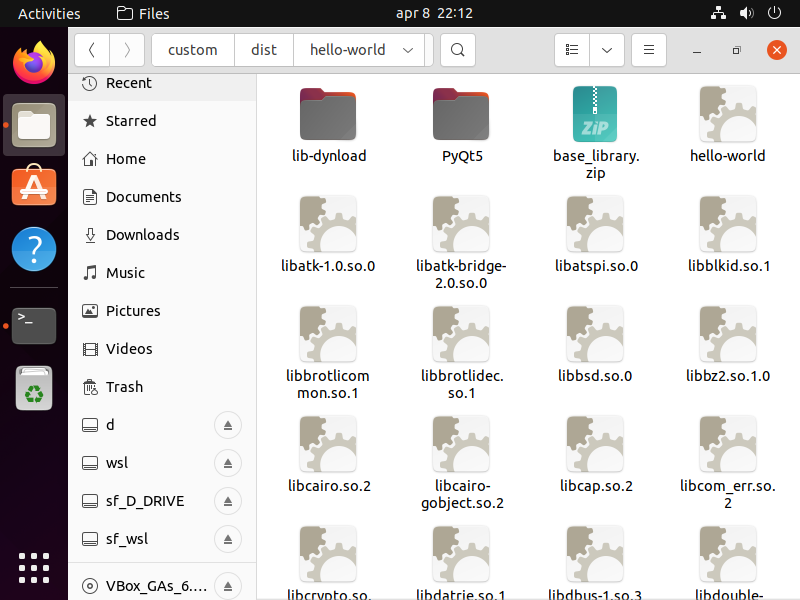
├── app
│ ├── lib-dynload
│ ├── PyQt5
│ ...
│ ├── app
│ └── libQt5Core.so.5
└── app.app
The build folder is used by PyInstaller to collect and prepare the files for bundling, it contains the results of analysis and some additional logs. For the most part, you can ignore the contents of this folder, unless you're trying to debug issues.
The dist (for "distribution") folder contains the files to be distributed. This includes your application, bundled as an executable file, together with any associated libraries (for example PyQt5) and binary .so files.
Everything necessary to run your application will be in this folder, meaning you can take this folder and "distribute" it to someone else to run your app.
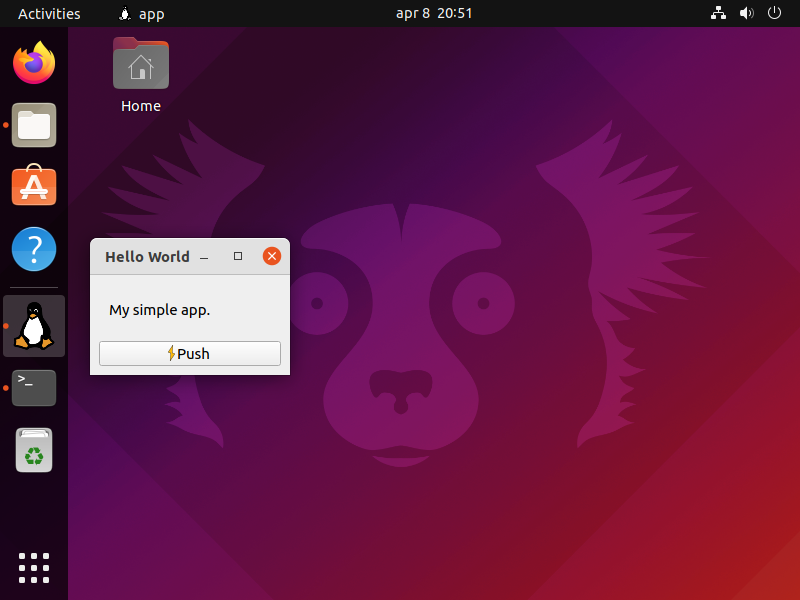
You can try running your app yourself now, by running the executable file, named app from the dist folder. After a short delay you'll see the familiar window of your application pop up as shown below.
Simple app, running after being packaged
In the same folder as your Python file, alongside the build and dist folders PyInstaller will have also created a .spec file. In the next section we'll take a look at this file, what it is and what it does.
The Spec file
The .spec file contains the build configuration and instructions that PyInstaller uses to package up your application. Every PyInstaller project has a .spec file, which is generated based on the command line options you pass when running pyinstaller.
When we ran pyinstaller with our script, we didn't pass in anything other than the name of our Python application file. This means our spec file currently contains only the default configuration. If you open it, you'll see something similar to what we have below.
# -*- mode: python ; coding: utf-8 -*-

block_cipher = None

a = Analysis(['app.py'],
             pathex=[],
             binaries=[],
             datas=[],
             hiddenimports=[],
             hookspath=[],
             hooksconfig={},
             runtime_hooks=[],
             excludes=[],
             win_no_prefer_redirects=False,
             win_private_assemblies=False,
             cipher=block_cipher,
             noarchive=False)

pyz = PYZ(a.pure, a.zipped_data,
             cipher=block_cipher)

exe = EXE(pyz,
          a.scripts,
          [],
          exclude_binaries=True,
          name='app',
          debug=False,
          bootloader_ignore_signals=False,
          strip=False,
          upx=True,
          console=True,
          disable_windowed_traceback=False,
          target_arch=None,
          codesign_identity=None,
          entitlements_file=None )

coll = COLLECT(exe,
               a.binaries,
               a.zipfiles,
               a.datas,
               strip=False,
               upx=True,
               upx_exclude=[],
               name='app')
The first thing to notice is that this is a Python file, meaning you can edit it and use Python code to calculate values for the settings. This is mostly useful for complex builds, for example when you are targeting different platforms and want to conditionally define additional libraries or dependencies to bundle.
Once a .spec file has been generated, you can pass this to pyinstaller instead of your script to repeat the previous build process. Run this now to rebuild your executable.
pyinstaller app.spec
The resulting build will be identical to the build used to generate the .spec file (assuming you have made no changes). For many PyInstaller configuration changes you have the option of passing command-line arguments, or modifying your existing .spec file. Which you choose is up to you.
Tweaking the build
So far we've created a simple first build of a very basic application. Now we'll look at a few things we can do to tweak our build.
Naming your app
One of the simplest changes you can make is to provide a proper "name" for your application. By default the app takes the name of your source file (minus the extension), for example main or app. This isn't usually what you want.
You can provide a nicer name for PyInstaller to use for your executable file (and dist folder) by editing the .spec file to add a name= under the EXE and COLLECT blocks.
On Linux you will want to use a name with no spaces (use hyphens instead).
exe = EXE(pyz,
          a.scripts,
          [],
          exclude_binaries=True,
          name='hello-world',
          debug=False,
          bootloader_ignore_signals=False,
          strip=False,
          upx=True,
          console=False
         )
coll = COLLECT(exe,
               a.binaries,
               a.zipfiles,
               a.datas,
               strip=False,
               upx=True,
               upx_exclude=[],
               name='hello-world')
The name under EXE is the name of the executable file, the name under COLLECT is the name of the output folder. Usually you would want these to be the same.
Alternatively, you can re-run the pyinstaller command and pass the -n or --name configuration flag along with your app.py script.
pyinstaller -n "hello-world" app.py
# or
pyinstaller --name "hello-world" app.py
The resulting executable file will be given the name hello-world and the unpacked build placed in the folder dist\hello-world\.
The name of the .spec file is taken from the name passed in on the command line, so this will also create a new spec file for you, called hello-world.spec in your root folder.
If you've created a new .spec delete the old one to avoid getting confused!
 Application with custom name "hello-world"
Application icon
One simple improvement we can make is to change the application icon which is shown while the application is running. We can set this icon in the code directly. To show an icon on our window we need to modify our simple application a little bit, to add a call to .setWindowIcon().
from PyQt5 import QtWidgets, QtGui
import sys

class MainWindow(QtWidgets.QMainWindow):

    def __init__(self):
        super().__init__()

        self.setWindowTitle("Hello World")
        l = QtWidgets.QLabel("My simple app.")
        l.setMargin(10)
        self.setCentralWidget(l)

        self.show()

if __name__ == '__main__':
    app = QtWidgets.QApplication(sys.argv)
    app.setWindowIcon(QtGui.QIcon('penguin.svg'))
    w = MainWindow()
    app.exec()
Here we've added the .setWindowIcon call to the app instance. This defines a default icon to be used for all windows of our application. You can override this on a per-window basis if you like, by calling .setWindowIcon on the window itself.
If you run the above application you should now see the icon appears on the dock.
![]() Window showing the custom penguin icon
Window showing the custom penguin icon
You can use a PNG file instead of SVG, but if using PNG make sure that the icon is large enough not to appear blurry due to scaling.
Even if you don't see the icon, keep reading!
Dealing with relative paths
There is a gotcha here, which might not be immediately apparent. To demonstrate it, open up a shell and change to the folder where our script is located. Run it with
python3 app.py
If the icons are in the correct location, you should see them. Now change to the parent folder, and try and run your script again (change <folder> to the name of the folder your script is in).
cd ..
python3 <folder>/app.py
![]() Window with icon missing.
Window with icon missing.
The icons don't appear. What's happening?
We're using relative paths to refer to our data files. These paths are relative to the current working directory -- not the folder your script is in. So if you run the script from elsewhere it won't be able to find the files.
One common reason for icons not to show up, is running examples in an IDE which uses the project root as the current working directory.
This is a minor issue before the app is packaged, but once it's installed you don't know what the current working directory will be when it is run -- if it's wrong your app won't be able to find anything. We need to fix this before we go any further, which we can do by making our paths relative to our application folder.
In the updated code below, we define a new variable basedir, using os.path.dirname to get the containing folder of __file__ which holds the full path of the current Python file. We then use this to build the relative paths for icons using os.path.join().
Since our app.py file is in the root of our folder, all other paths are relative to that.
from PyQt5 import QtWidgets, QtGui
import sys, os

basedir = os.path.dirname(__file__)


class MainWindow(QtWidgets.QMainWindow):

    def __init__(self):
        super().__init__()

        self.setWindowTitle("Hello World")
        l = QtWidgets.QLabel("My simple app.")
        l.setMargin(10)
        self.setCentralWidget(l)
        self.show()

if __name__ == '__main__':
    app = QtWidgets.QApplication(sys.argv)
    app.setWindowIcon(QtGui.QIcon(os.path.join(basedir, 'penguin.svg')))
    w = MainWindow()
    app.exec_()
Try and run your app again from the parent folder -- you'll find that the icon now appear as expected, no matter where you launch the app from.
With this added to your script, running it should now show the icon on your window and taskbar. The final step is to ensure that this icon is correctly packaged with your application and continues to be shown when run from the dist folder.
Try it, it wont.
The issue is that our application now has a dependency on a external data file (the icon file) that's not part of our source. For our application to work, we now need to distribute this data file along with it. PyInstaller can do this for us, but we need to tell it what we want to include, and where to put it in the output.
In the next section we'll look at the options available to you for managing data files associated with your app.
Data files and Resources
So far we successfully built a simple app which had no external dependencies. However, once we needed to load an external file (in this case an icon) we hit upon a problem. The file wasn't copied into our dist folder and so could not be loaded.
In this section we'll look at the options we have to be able to bundle external resources, such as icons or Qt Designer .ui files, with our applications.
Bundling data files with PyInstaller
The simplest way to get these data files into the dist folder is to just tell PyInstaller to copy them over. PyInstaller accepts a list of individual file paths to copy over, together with a folder path relative to the dist/<app name> folder where it should to copy them to.
As with other options, this can be specified by command line arguments, --add-data
pyinstaller --add-data "penguin.svg:." --name "hello-world" app.py
You can provide `--add-data` multiple times. Note that the path separator is platform-specific, on Linux or Mac use `:` while on Windows use `;`
Or via the datas list in the Analysis section of the spec file, shown below.
a = Analysis(['app.py'],
             pathex=[],
             binaries=[],
             datas=[('penguin.svg', '.')],
             hiddenimports=[],
             hookspath=[],
             runtime_hooks=[],
             excludes=[],
             win_no_prefer_redirects=False,
             win_private_assemblies=False,
             cipher=block_cipher,
             noarchive=False)
And then execute the .spec file with
pyinstaller hello-world.spec
In both cases we are telling PyInstaller to copy the specified file penguin.svg to the location . which means the output folder dist. We could specify other locations here if we wanted. On the command line the source and destination are separated by the path separator :, whereas in the .spec file, the values are provided as a 2-tuple of strings.
If you run the build, you should see your .svg file now in the output folder dist ready to be distributed with your application.
![]() The icon file copied to the dist folder
The icon file copied to the dist folder
If you run your app from dist you should now see the icon on the window, and on the taskbar as expected.
![]() The penguin icon showing on the dock
The penguin icon showing on the dock
The file must be loaded in Qt using a relative path, and be in the same relative location to the EXE as it was to the .py file for this to work.
Bundling data folders
Usually you will have more than one data file you want to include with your packaged file. The latest PyInstaller versions let you bundle folders just like you would files, keeping the sub-folder structure. For example, lets extend our app to add some additional icons, and put them under a folder.
from PyQt5.QtWidgets import QMainWindow, QApplication, QLabel, QVBoxLayout, QPushButton, QWidget
from PyQt5.QtGui import QIcon
import sys, os

basedir = os.path.dirname(__file__)


class MainWindow(QMainWindow):

    def __init__(self):
        super().__init__()

        self.setWindowTitle("Hello World")
        layout = QVBoxLayout()
        label = QLabel("My simple app.")
        label.setMargin(10)
        layout.addWidget(label)

        button = QPushButton("Push")
        button.setIcon(QIcon(os.path.join(basedir, "icons", "lightning.svg")))
        button.pressed.connect(self.close)
        layout.addWidget(button)

        container = QWidget()
        container.setLayout(layout)

        self.setCentralWidget(container)

        self.show()

if __name__ == '__main__':
    app = QApplication(sys.argv)
    app.setWindowIcon(QIcon(os.path.join(basedir, "icons", "penguin.svg")))
    w = MainWindow()
    app.exec_()
The icons (both SVG files) are stored under a subfolder named 'icons'.
.
├── app.py
└── icons
    └── lightning.svg
    └── penguin.svg
If you run this you'll see the following window, with an icon on the button and an icon in the dock.
 Window with two icons, and a button.
The paths are using the Unix forward-slash / convention, so they are cross-platform for macOS. If you're only developing for Windows, you can use \\
To copy the icons folder across to our build application, we just need to add the folder to our .spec file Analysis block. As for the single file, we add it as a tuple with the source path (from our project folder) and the destination folder under the resulting dist folder.
# -*- mode: python ; coding: utf-8 -*-


block_cipher = None


a = Analysis(['app.py'],
             pathex=[],
             binaries=[],
             datas=[('icons', 'icons')],   # tuple is (source_folder, destination_folder)
             hiddenimports=[],
             hookspath=[],
             hooksconfig={},
             runtime_hooks=[],
             excludes=[],
             win_no_prefer_redirects=False,
             win_private_assemblies=False,
             cipher=block_cipher,
             noarchive=False)
pyz = PYZ(a.pure, a.zipped_data,
             cipher=block_cipher)

exe = EXE(pyz,
          a.scripts,
          [],
          exclude_binaries=True,
          name='hello-world',
          debug=False,
          bootloader_ignore_signals=False,
          strip=False,
          upx=True,
          console=False,
          disable_windowed_traceback=False,
          target_arch=None,
          codesign_identity=None,
          entitlements_file=None )
coll = COLLECT(exe,
               a.binaries,
               a.zipfiles,
               a.datas,
               strip=False,
               upx=True,
               upx_exclude=[],
               name='hello-world')
If you run the build using this spec file you'll see the icons folder copied across to the dist folder. If you run the application from the folder, the icons will display as expected -- the relative paths remain correct in the new location.
Alternatively, you can bundle your data files using Qt's QResource architecture. See our tutorial for more information.
Creating a Linux Package (Ubuntu deb)
So far we've used PyInstaller to bundle the application into a Linux executable, along with the associated data files. The output of this bundling process is a folder. However, in order to share this application with other people and allow them to install it, we need to create a Linux package. Packages are distributable files which allow users to install software on their Linux system, as well as setting up things like application entries in the dock/menu.
On Ubuntu (and Debian) packages are named .deb files, on Redhat .rpm and on Arch Linux .pacman. These files are all different formats, but thankfully the process for building them is the same: using a tool named fpm.
In this tutorial we'll work through the steps for creating a Linux package, using an Ubuntu .deb file as an example. However, you will be able to use the same steps for your own system.
Installing fpm
The fpm tool is written in ruby and requires ruby to be installed to use it. Install ruby using your systems package manager, for example.
$ sudo apt install ruby
Once ruby is installed, you can install fpm using the gem tool.
$ gem install fpm --user-install
If you see a warning e.g. You don't have /home/martin/.local/share/gem/ruby/2.7.0/bin in your PATH you will need to add that to your path in your .bashrc file.
...and that's it. Once the installation is complete, you're ready to use fpm. You can check it is installed and working by running:
$ fpm --version
1.14.2
Checking your build
In a terminal, change to the folder containing your application source files & run a PyInstaller build to generate the dist folder. Test that the generated build runs as expected (it works, and icons appear) by opening the dist folder in the file manager, and double-clicking on the application executable.
If everything works, you're ready to package the application -- if not, go back and double check everything.
It's always a good idea to test your built application before packaging it. Then if anything goes wrong, you know where the problem is!
Now let's package our folder using fpm.
Structuring your package
Linux files are used to install all sorts of applications, including system tools. Because of this they are set up to allow you to place files anywhere in the Linux filesystem -- and there are specific correct places to put different files. For a bundled package like ours, we can -- thankfully -- put our executable and associated data files all under the same folder (in /opt). However, to have our application show up in the menus/search we'll also need to install a .desktop file under /usr/share/applications.
The simplest way to ensure things end up in the correct location is to recreate the target file structure in a folder & then tell fpm to package using that folder as the root. This process is also easily automatable using a script (see later).
In your projects root folder, create a new folder called package and subfolders which map to the target filesystem -- /opt will hold our application folder hello-world, and /usr/share/applications will hold our .desktop file., while /usr/share/icons... will hold our application icon.
$ mkdir -p package/opt
$ mkdir -p package/usr/share/applications
$ mkdir -p package/usr/share/icons/hicolor/scalable/apps
Next copy (recursively, with -r to include subfolders) the contents of dist/app to package/opt/hello-world -- the /opt/hello-world path is the destination of our application folder after installation.
$ cp -r dist/hello-world package/opt/hello-world
We're copying the dist/hello-world folder. The name of this folder will depend on the application name configured in PyInstaller.
The icons
We've already set an icon for our application while it's running, using the penguin.svg file. However, we want our application to show it's icon in the dock/menus. To do this correctly, we need to copy our application icons into a specific location, under /usr/share/icons.
This folder contains all the icon themes installed on the system, but default icons for applications are always placed in the fallback hicolor theme, at /usr/share/icons/hicolor.
Inside this folder, there are various folders for different sizes of icons.
$ ls /usr/share/icons/hicolor/
128x128/          256x256/          64x64/            scalable/
16x16/            32x32/            72x72/            symbolic/
192x192/          36x36/            96x96/
22x22/            48x48/            icon-theme.cache
24x24/            512x512/          index.theme
We're using the scalable folder, since our icon is an SVG (Scalable Vector Graphics). If you're using a specifically sized PNG file, place it in the correct location -- and feel free to add multiple different sizes, to ensure your application icon looks good when scaled. Application icons go in the subfolder apps.
$ cp icons/penguin.svg package/usr/share/icons/hicolor/scalable/apps/hello-world.svg
Name the destination filename of the icon after your application to avoid it clashing with any others! Here we're calling it hello-world.svg.
The .desktop file
The .desktop file is a text configuration file which tells the Linux desktop about a desktop application -- for example, where to fine the executable, the name and which icon to display. You should include a .desktop file for your apps to make them easy to use. An example .desktop file is shown below -- add this to the root folder of your project -- with the name hello-world.desktop, and make any changes you like.
[Desktop Entry]

# The type of the thing this desktop file refers to (e.g. can be Link)
Type=Application

# The application name.
Name=Hello World

# Tooltip comment to show in menus.
Comment=A simple Hello World application.

# The path (folder) in which the executable is run
Path=/opt/hello-world

# The executable (can include arguments)
Exec=/opt/hello-world/hello-world

# The icon for the entry, using the name from `hicolor/scalable` without the extension.
# You can also use a full path to a file in /opt.
Icon=hello-world
For more information on creating .desktop files see this documentation.
Now the hello-world.desktop file is ready, we can copy it into our install package with.
$ cp hello-world.desktop package/usr/share/applications
Permissions
Packages retain the permissions of installed files from when they were packaged, but will be installed by root. In order
for ordinary users to be able to run the application, you need to change the permissions of the files created.
We can recursively apply the correct permissions 755 - owner can read/write/execute, group/others can read/execute. to our executable and folders, and 644, owner can read/write, group/others can read to all our other library and icons/desktop files.
find package/opt/hello-world -type f -exec chmod 644 -- {} +
find package/opt/hello-world -type d -exec chmod 755 -- {} +
find package/usr/share -type f -exec chmod 644 -- {} +
chmod +x package/opt/hello-world/hello-world
Building your package
Now everything is where it should be in our package "filesystem", we're ready to start building the package itself.
Enter the following into your shell.
fpm -C package -s dir -t deb -n "hello-world" -v 0.1.0 -p hello-world.deb
The arguments in order are:
-Cthe folder to change to before searching for files: ourpackagefolder-sthe type of source(s) to package: in our casedir, a folder-tthe type of package to build: adebDebian/Ubuntu package-nthe name of the application: "hello-world"-vthe version of the application: 0.1.0-pthe package name to output: hello-world-deb
For more command line arguments, see the fpm documentation.
You can create other package types (for other Linux distributions) by changing the -t argument.
After a few seconds, you should see a message to indicate that the package has been created.
$ fpm -C package -s dir -t deb -n "hello-world" -v 0.1.0 -p hello-world.deb
Created package {:path=>"hello-world.deb"}
Installation
The package is ready! Let's install it.
$ sudo dpkg -i hello-world.deb
You'll see some output as the install completes.
Selecting previously unselected package hello-world.
(Reading database ... 172208 files and directories currently installed.)
Preparing to unpack hello-world.deb ...
Unpacking hello-world (0.1.0) ...
Setting up hello-world (0.1.0) ...
Once installation has completed, you can check the files are where you expect, under /opt/hello-world
$ ls /opt/hello-world
app                        libpcre2-8.so.0
base_library.zip           libpcre.so.3
icons                      libpixman-1.so.0
libatk-1.0.so.0            libpng16.so.16
libatk-bridge-2.0.so.0     libpython3.9.so.1.0
etc.
Next try and run the application from the menu/dock -- you can search for "Hello World" and the application will be found (thanks to the .desktop file).
 Application shows up in the Ubuntu search panel, and will also appear in menus on other environments.
If you run the application, the icons will show up as expected.
 Application runs and all icons show up as expected.
Scripting the build
We've walked through the steps required to build an installable Ubuntu .deb package from a PyQt5 application. There isn't that much too it, but if you have to do it more than once it'll quickly get quite tedious and prone to mistakes. To avoid problems I recommend scripting this with a simple bash script & fpm own automation tool.
In this section I'll give you scripts that automate the build we've done for our Hello World application.
package.sh
Save in your project root and chmod +x to make it executable.
#!/bin/sh
# Create folders.
[ -e package ] && rm -r package
mkdir -p package/opt
mkdir -p package/usr/share/applications
mkdir -p package/usr/share/icons/hicolor/scalable/apps

# Copy files (change icon names, add lines for non-scaled icons)
cp -r dist/hello-world package/opt/hello-world
cp icons/penguin.svg package/usr/share/icons/hicolor/scalable/apps/hello-world.svg
cp hello-world.desktop package/usr/share/applications

# Change permissions
find package/opt/hello-world -type f -exec chmod 644 -- {} +
find package/opt/hello-world -type d -exec chmod 755 -- {} +
find package/usr/share -type f -exec chmod 644 -- {} +
chmod +x package/opt/hello-world/hello-world
.fpm file
fpm allows you to store the configuration for the packaging in a configuration file. The file name must be .fpm and it must be in the folder you run the fpm tool.
Our configuration is as follows.
-C package
-s dir
-t deb
-n "hello-world"
-v 0.1.0
-p hello-world.deb
You can override any of the options you like when executing fpm by passing command line arguments as normal.
Executing the build
With these scripts in place our application can be packaged reproducibly with the commands:
pyinstaller hello-world.spec
./package.sh
fpm
Feel free to customize these build scripts further yourself to suit your own project!
Wrapping up
In this tutorial we've covered how to build your PyQt5 applications into a Linux executable using PyInstaller, including adding data files along with your code. Then we walked through the process of creating a Ubuntu .deb package to distribute your app to others. Following these steps you should be able to package up your own applications and make them available to other people.
PyQt6 Crash Course by Martin Fitzpatrick — The important parts of PyQt6 in bite-size chunks
