Adding images to your application is a common requirement, whether you're building an image/photo viewer or just want to add some decoration to your GUI. Unfortunately, because of how this is done in Qt, it can be a little bit tricky to work out at first.
In this short tutorial, we will look at how you can insert and display an image in your PySide6 application layout, using both Python code and Qt Designer.
Which Widget to Use for Displaying Images in PySide6?
Since you're wanting to insert an image you might be expecting to use a widget named QImage or similar, but that would make a bit too much sense! QImage is actually Qt's image object type, which is used to store the actual image data for use within your application. The widget you use to display an image is QLabel.
The primary use of QLabel is of course to add labels to a UI, but it also has the ability to display an image — or pixmap — instead, covering the entire area of the widget. Below we'll look at how to use QLabel with QPixmap to display an image in your PySide6 applications.
Displaying Images in PySide6 Using Qt Designer
First, create a MainWindow object in Qt Designer and add a "Label" to it. You can find Label in Display Widgets at the bottom of the left hand panel. Drag this onto the QMainWindow to add it. If you're new to Qt Designer, see our guide to getting started with Qt Designer in PySide6.
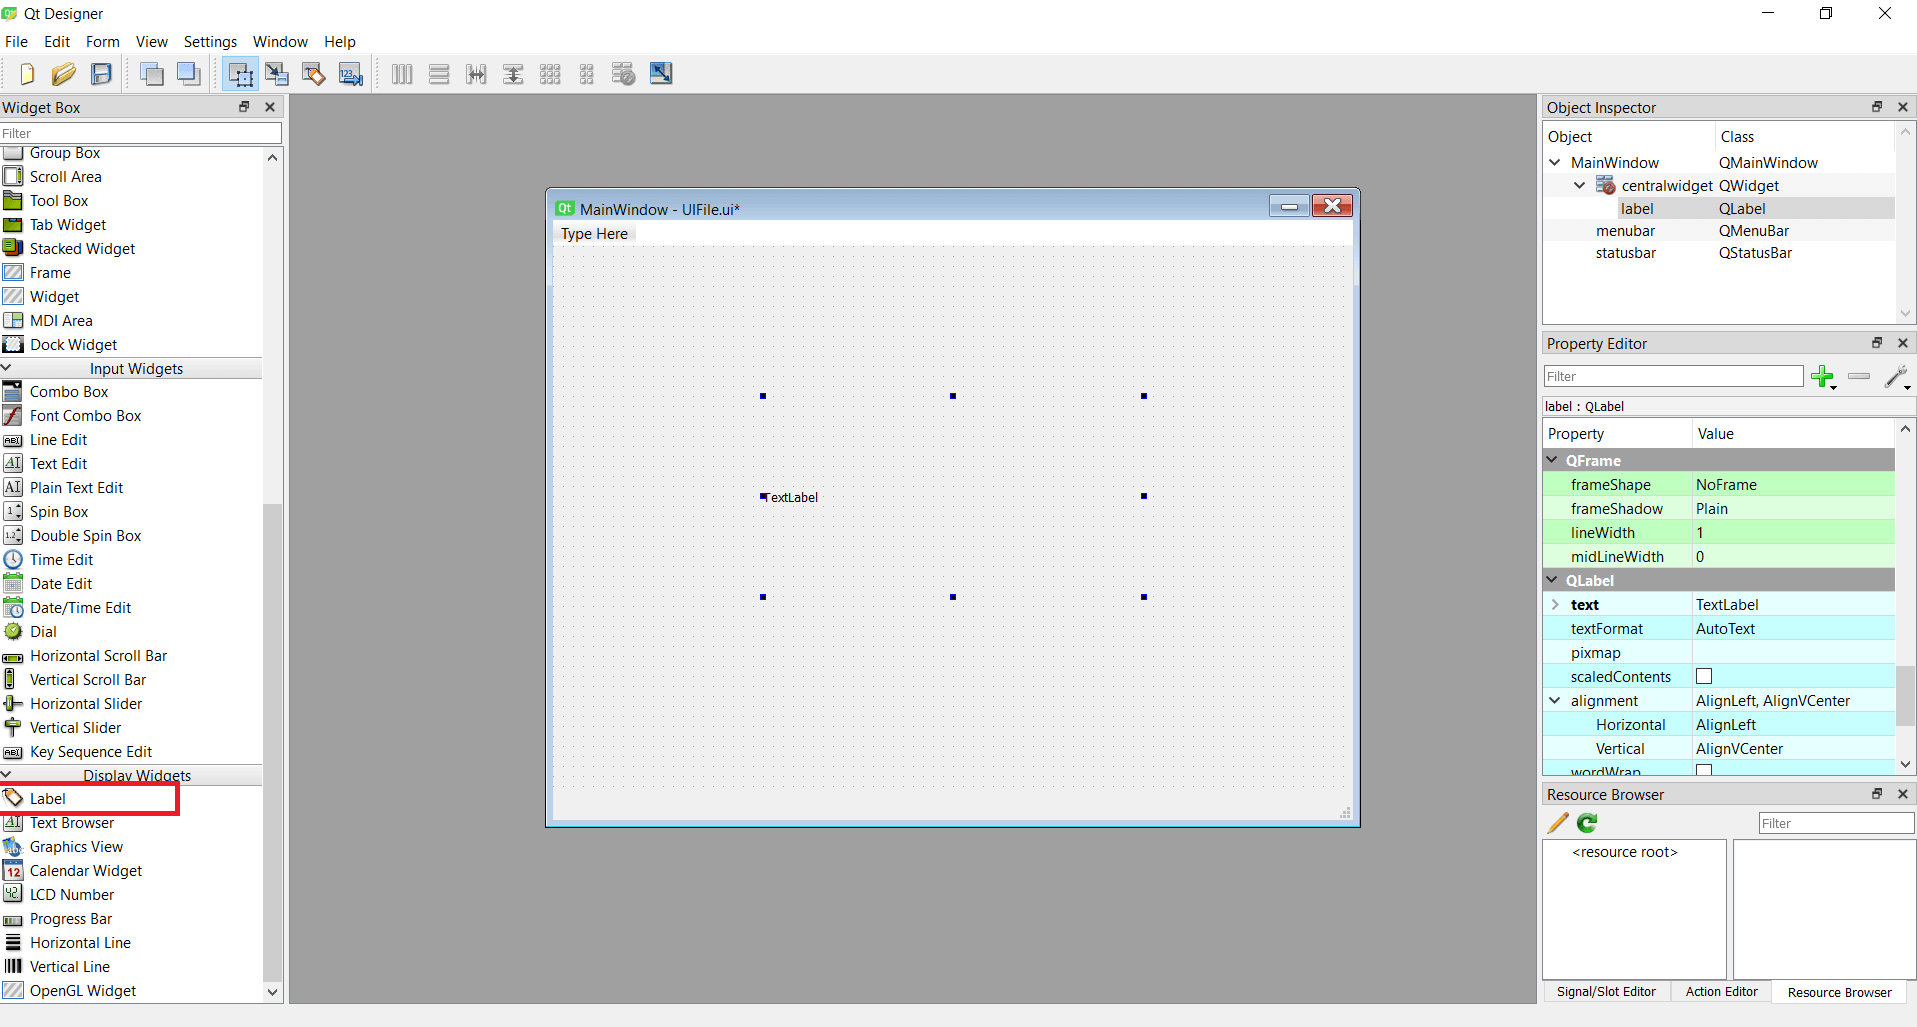 MainWindow with a single QLabel added
Next, with the Label selected, look in the right hand QLabel properties panel for the pixmap property (scroll down to the blue region). From the property editor dropdown select "Choose File…" and select an image file to insert.
As you can see, the image is inserted, but the image is kept at its original size, cropped to the boundaries of the QLabel box. You need to resize the QLabel to be able to see the entire image.
Purchasing Power Parity
Developers in [[ country ]] get [[ discount.discount_pc ]]% OFF on all books & courses with code [[ discount.coupon_code ]]In the same controls panel, click to enable scaledContents.
When scaledContents is enabled the image is resized to fit the bounding box of the QLabel widget. This shows the entire image at all times, although it does not respect the aspect ratio of the image if you resize the widget.
You can now save your UI to file (e.g. as mainwindow.ui).
To view the resulting UI, we can use the standard application template below. This loads the .ui file we've created (mainwindow.ui), creates the window and starts up the application.
import sys
from PySide6 import QtWidgets
from PySide6.QtUiTools import QUiLoader

loader = QUiLoader()
app = QtWidgets.QApplication(sys.argv)
window = loader.load("mainwindow.ui", None)
window.show()
app.exec()
Running the above code will create a window, with the image displayed in the middle.
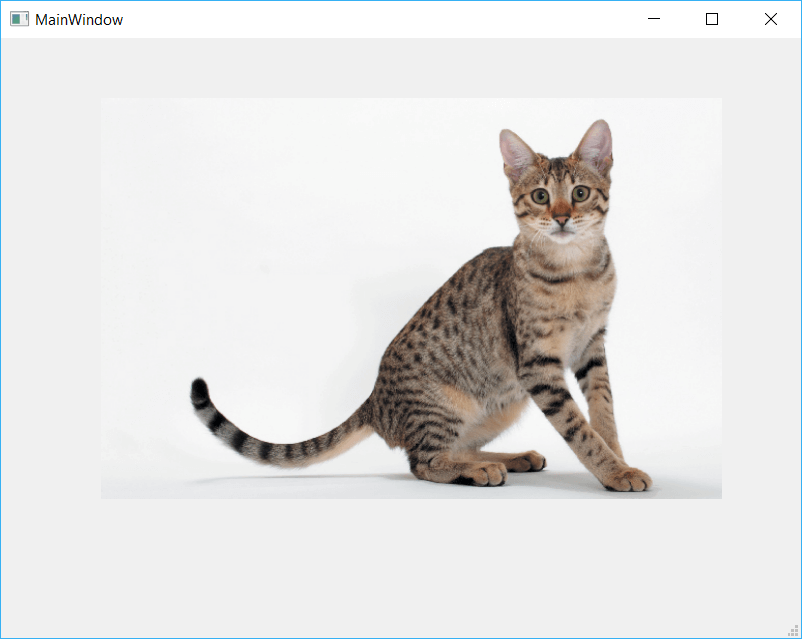 PySide6 application showing an image loaded via Qt Designer
Displaying Images Using Python Code with QLabel and QPixmap
Instead of using Qt Designer, you can also show an image in your PySide6 application through Python code. As before we use a QLabel widget and add a pixmap image to it. This is done by creating a QPixmap object from an image file and applying it to the label using the QLabel method .setPixmap(). The full code is shown below.
import sys
from PySide6.QtGui import QPixmap
from PySide6.QtWidgets import QMainWindow, QApplication, QLabel

class MainWindow(QMainWindow):

    def __init__(self):
        super().__init__()
        self.title = "Image Viewer"
        self.setWindowTitle(self.title)

        label = QLabel(self)
        pixmap = QPixmap('cat.jpg')
        label.setPixmap(pixmap)
        self.setCentralWidget(label)
        self.resize(pixmap.width(), pixmap.height())


app = QApplication(sys.argv)
w = MainWindow()
w.show()
sys.exit(app.exec())
If you're new to building windows with PySide6, take a look at our tutorial on creating your first PySide6 window.
The block of code below shows the step-by-step process of creating the QLabel, loading an image into a QPixmap object from our file cat.jpg (passed as a file path), setting this QPixmap onto the QLabel with .setPixmap() and then finally resizing the window to fit the image.
label = QLabel(self)
pixmap = QPixmap('cat.jpg')
label.setPixmap(pixmap)
self.setCentralWidget(label)
self.resize(pixmap.width(), pixmap.height())
Launching this code will show a window with the cat photo displayed and the window sized to the size of the image.
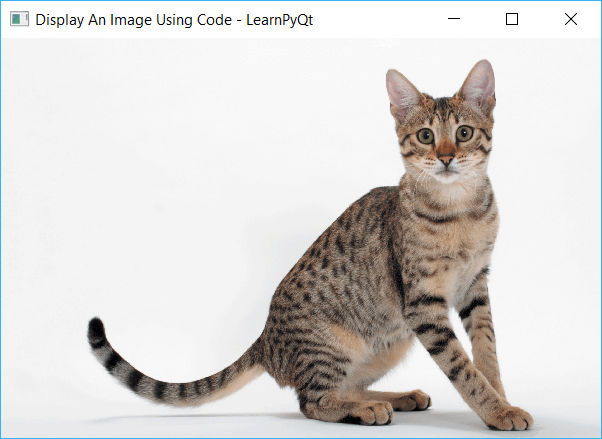 QMainWindow with image displayed using QLabel and QPixmap
Scaling Images in PySide6 with setScaledContents
Just as in Qt Designer, you can call .setScaledContents(True) on your QLabel image to enable scaled mode, which resizes the image to fit the available space.
label = QLabel(self)
pixmap = QPixmap('cat.jpg')
label.setPixmap(pixmap)
label.setScaledContents(True)
self.setCentralWidget(label)
self.resize(pixmap.width(), pixmap.height())
Notice that you set the scaled state on the QLabel widget and not the image pixmap itself.
Conclusion
In this quick tutorial we've covered how to display images in your PySide6 applications using QLabel and QPixmap, both from Qt Designer and directly from Python code. The QLabel widget combined with QPixmap provides a straightforward way to add images to any PySide6 GUI, and setScaledContents gives you control over how images resize within your layout. To learn more about the full range of PySide6 widgets available, or to explore how to build custom widgets, check out our other PySide6 tutorials.
Create GUI Applications with Python & Qt6 by Martin Fitzpatrick — (PySide6 Edition) The hands-on guide to making apps with Python — Save time and build better with this book. Over 15K copies sold.
