When you start building apps that display long documents, large amounts of data or large numbers of widgets, it can be difficult to arrange things within a fixed-size window. Resizing the window beyond the size of the screen isn't an option, and shrinking widgets to fit can make the information unreadable.
To illustrate the problem below is a window in which we've created a large number of QLabel widgets. These widgets have the size Vertical Policy set to Preferred which automatically resizes the widgets down to fit the available space. The results are unreadable.
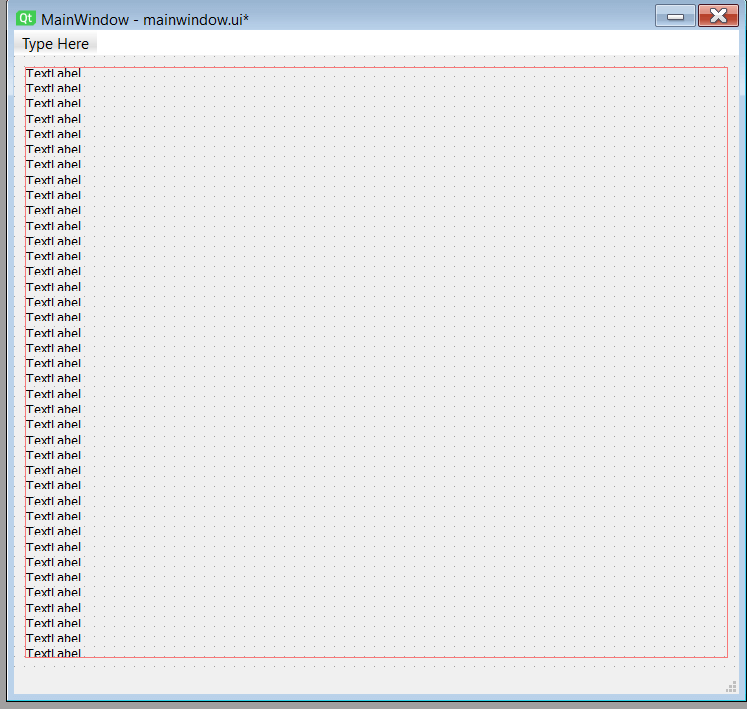 Problem of Too Many Widgets.png
Settings the Vertical Policy to Fixed keeps the widgets at their natural size, making them readable again.
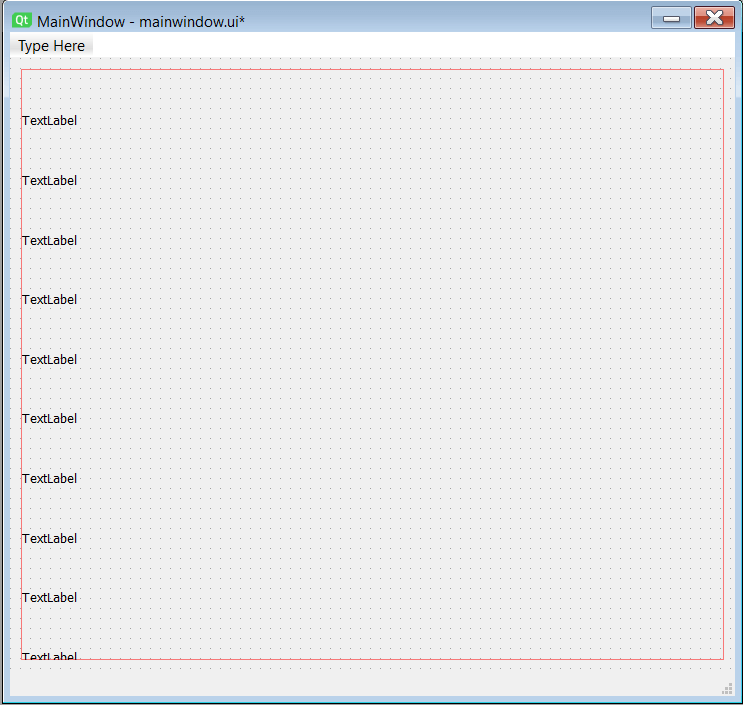 Problem of Too Many Widgets With Fixed Heights
However, while we can still add as many labels as we like, eventually they start to fall off the bottom of the layout.
To solve this problem GUI applications can make use of scrolling regions to allow the user to move around within the bounds of the application window while keeping widgets at their usual size. By doing this an almost unlimited amount of data or widgets can be shown, navigated and viewed within a window — although care should be taken to make sure the result is still usable!
Purchasing Power Parity
Developers in [[ country ]] get [[ discount.discount_pc ]]% OFF on all books & courses with code [[ discount.coupon_code ]]In this tutorial, we'll cover adding a scrolling region to your PyQt application using QScrollArea.
Adding a QScrollArea in Qt Designer
First we'll look at how to add a QScrollArea from Qt Designer.
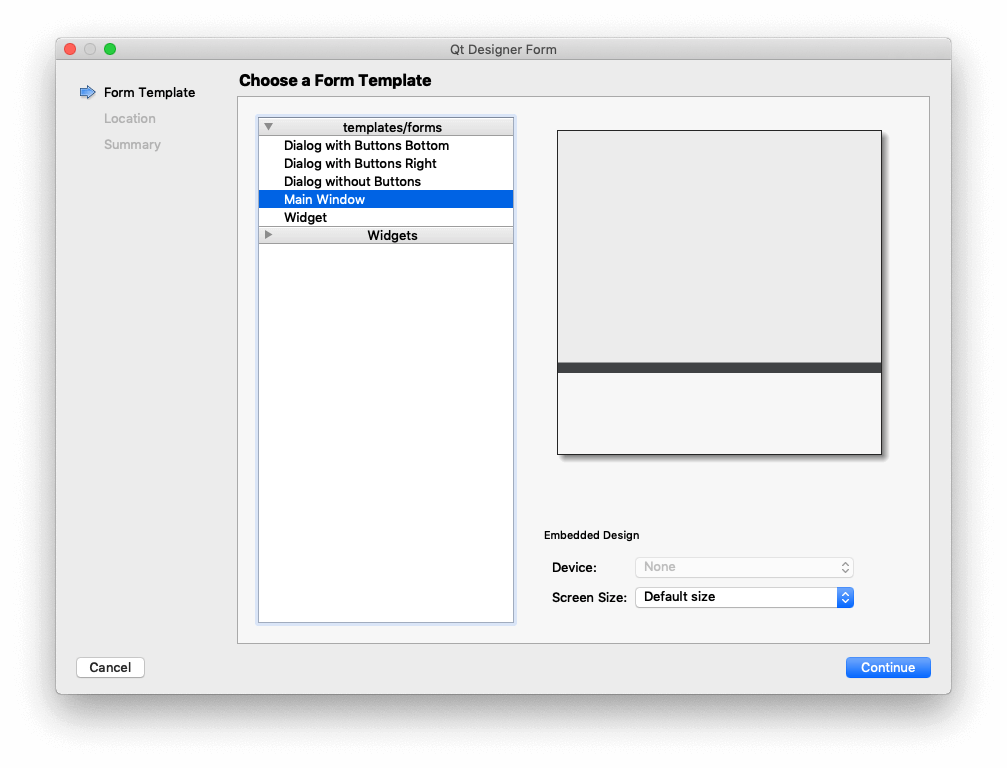 Qt Creator — Select MainWindow for widget type
So we will choose the scroll area widget and add it to our layout as below.
First, create an empty MainWindow in Qt Designer and save it as mainwindow.ui
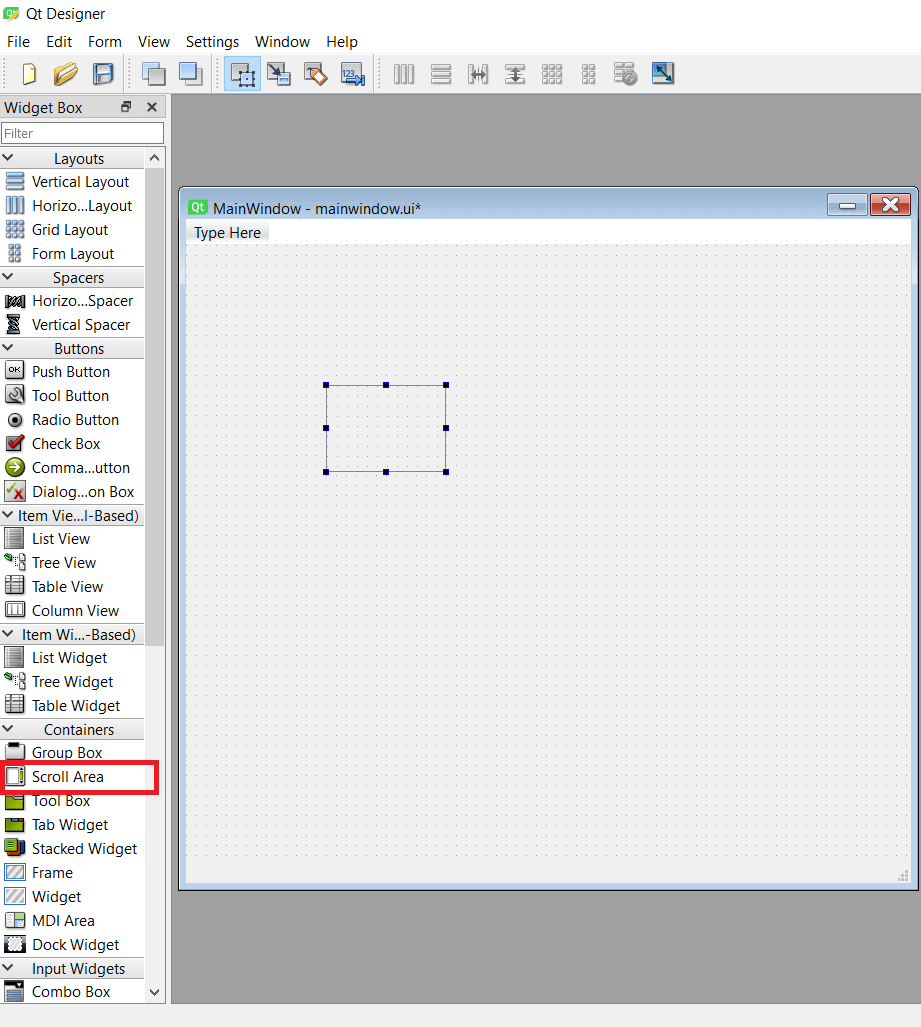 Add Scroll Area
Next choose to lay out the QScrollArea vertically or horizontally, so that it scales with the window.
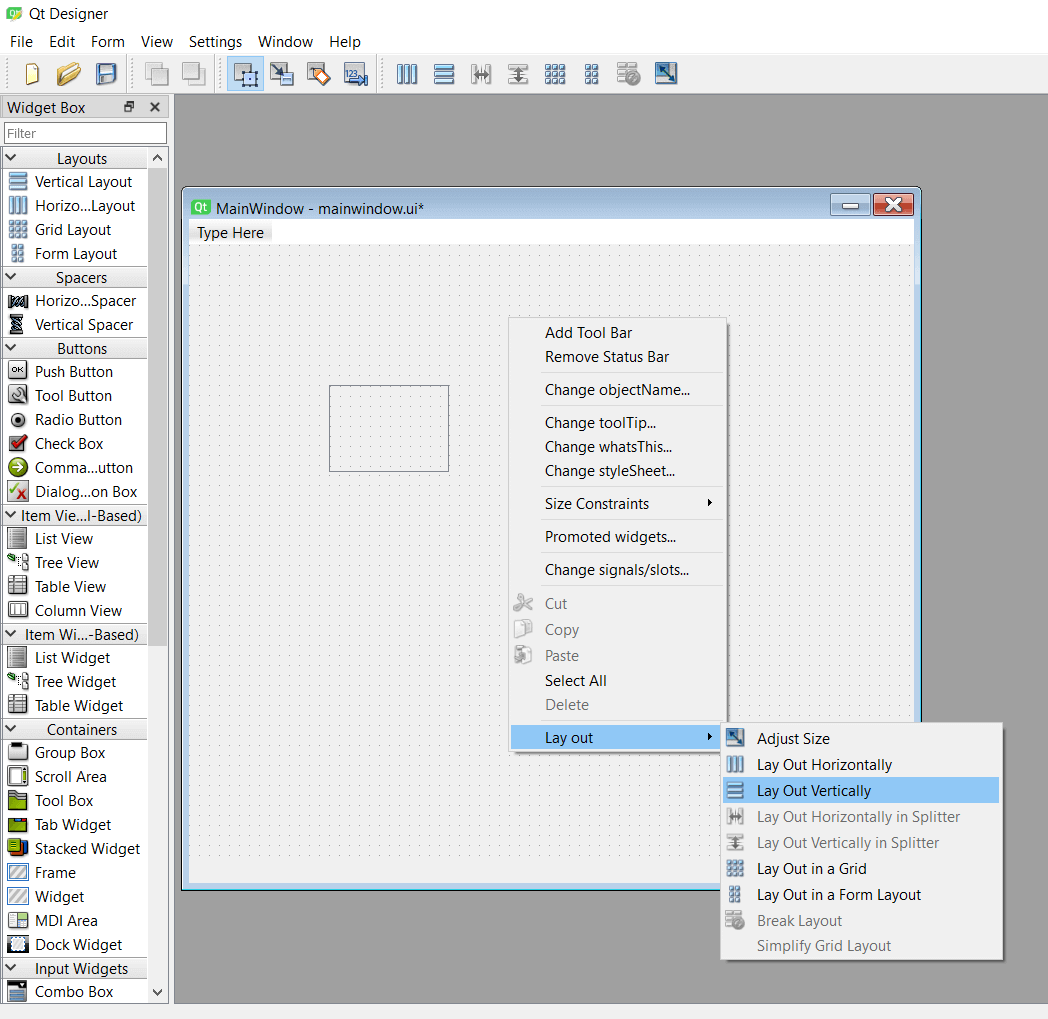 Lay Out The Scroll Area Vertically Or Horizontally
Voila, we now have a completed scroll area that we can populate with anything we need.
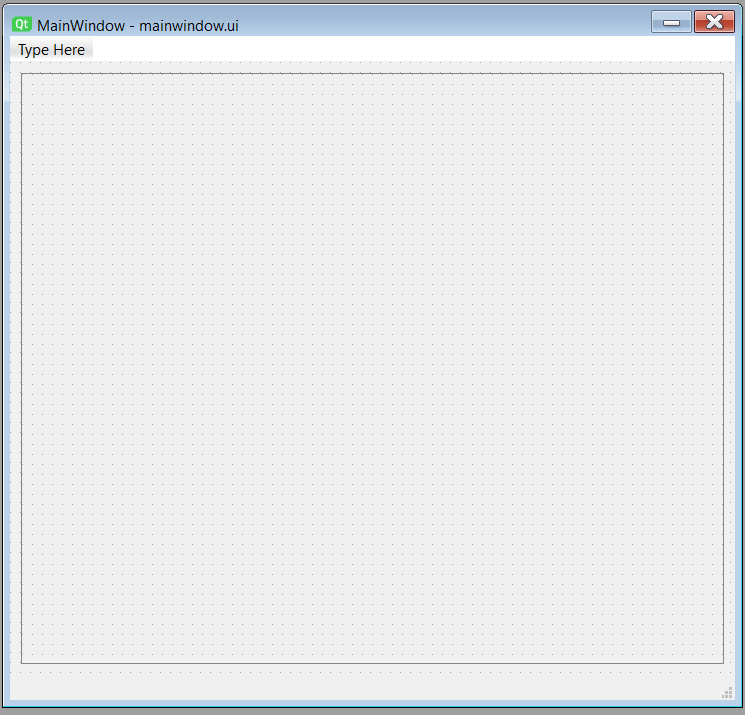 The Scroll Area Is Created
Inserting Widgets
We will now add labels to that scroll area. Lets take two labels and place it inside the QScrollArea. We will then proceed to right click inside the scroll area and select Lay Out Vertically so our labels will be stacked vertically.
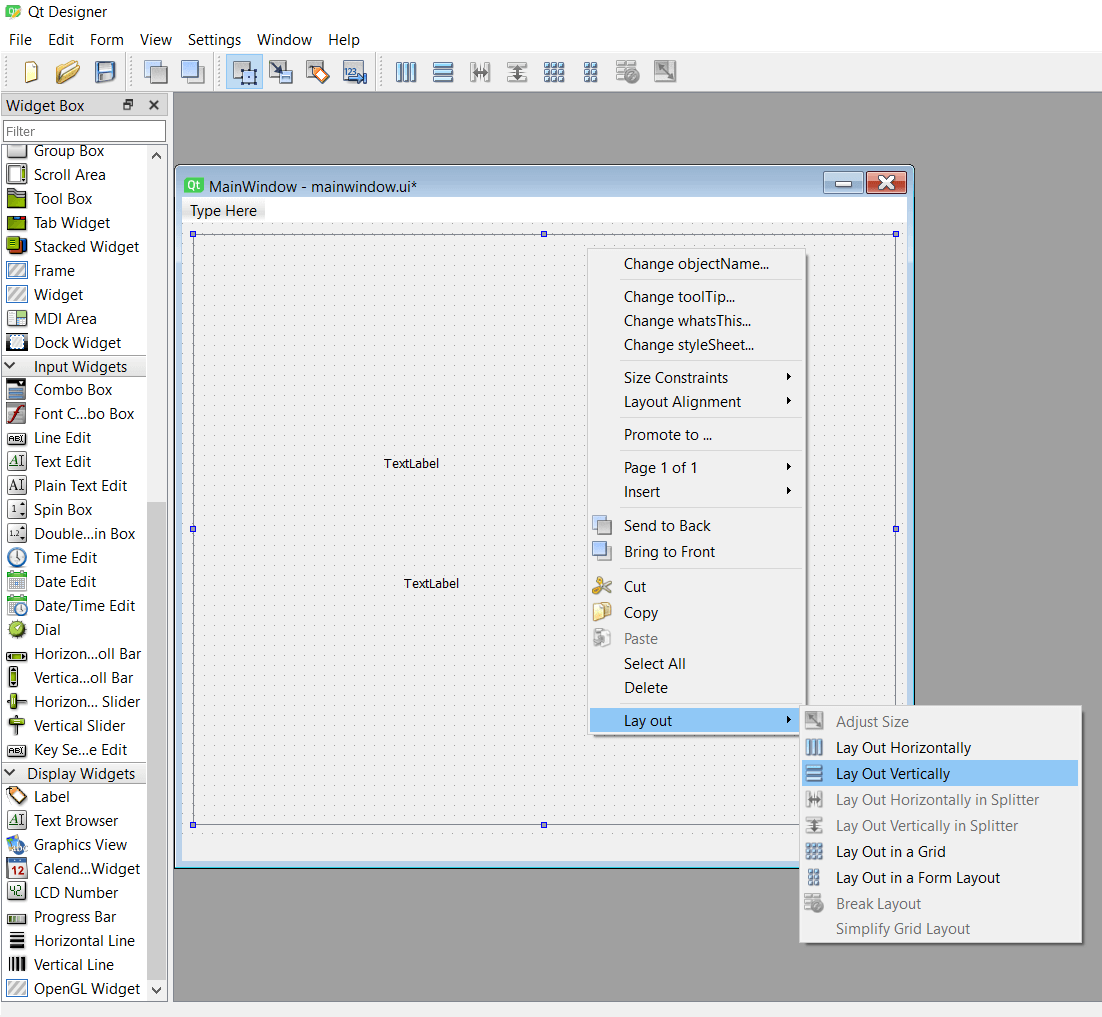 Add Labels to The Scroll Area And Set the Layout
We've set the background to blue so the illustration of this this works is clear. We can now add more labels to the QScrollArea and see what happens. By default, the Vertical Policy of the label is set to Preferred which means that the label size is adjusted according to the constraints of widgets above and below.
Next, we'll add a bunch of widgets.
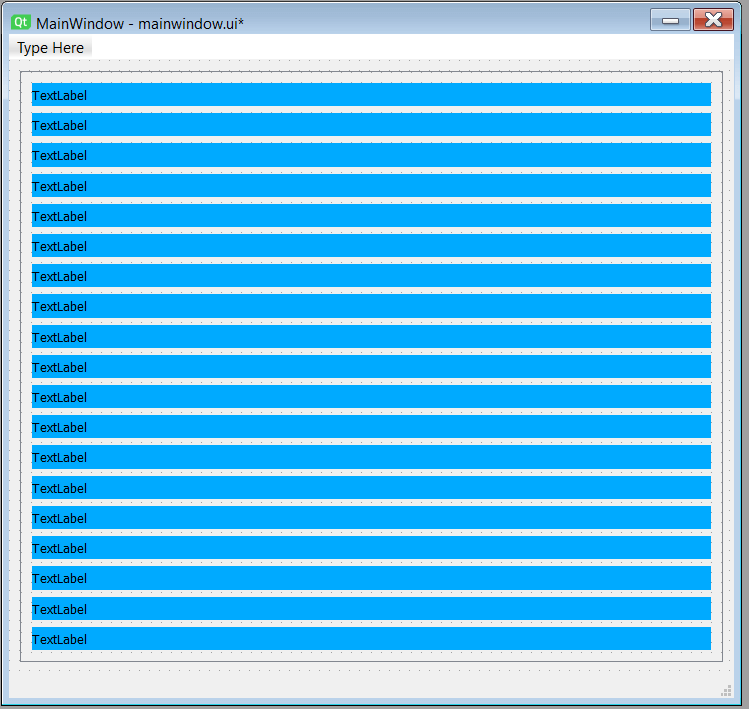 Adding More Labels to QScrollArea
Any widget can be added into a `QScrollArea` although some make more sense than others. For example, it's a great way to show multiple widgets containing data in a expansive dashboard, but less appropriate for control widgets — scrolling around to control an application can get frustrating.
Note that the scroll functionality has not been triggered, and no scrollbar has appeared on the right hand side. Instead the labels are still progressively getting smaller in height to accommodate the widgets.
However, if we set Vertical Policy to Fixed and set the minimumSize of height to 100px the labels will no longer be able to shrink vertically into the available space. As the layout overflows this will now trigger the QScrollArea to display a scrollbar.
PyQt/PySide 1:1 Coaching with Martin Fitzpatrick — Save yourself time and frustration. Get one on one help with your Python GUI projects. Working together with you I'll identify issues and suggest fixes, from bugs and usability to architecture and maintainability.
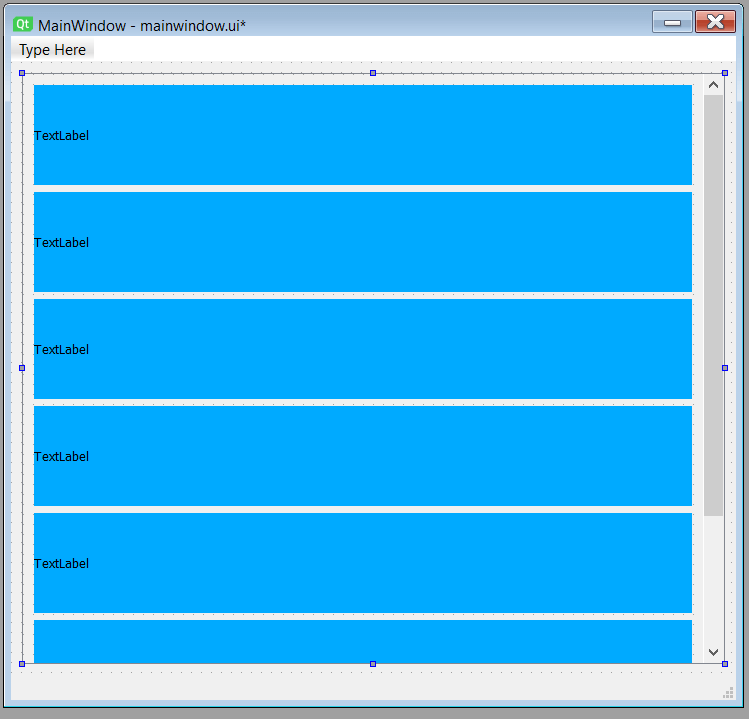 Setting Fixed Heights for Labels
With that, our scrollbar appears on the right hand side. What has happened is that the scroll area only appears when necessary. Without a fixed height constraint on the widget, Qt assumes the most logical way to handle the many widgets is to resize them. But by imposing size constraints on our widgets, the scroll bar appears to allow all widgets to keep their fixed sizes.
Another important thing to note is the properties of the scroll area. Instead of adjusting fixed heights, we can keep it in Preferred , we can set the properties of the verticalScrollBar to ScrollBarAlwaysOn which will enable the scroll bar to appear sooner as below
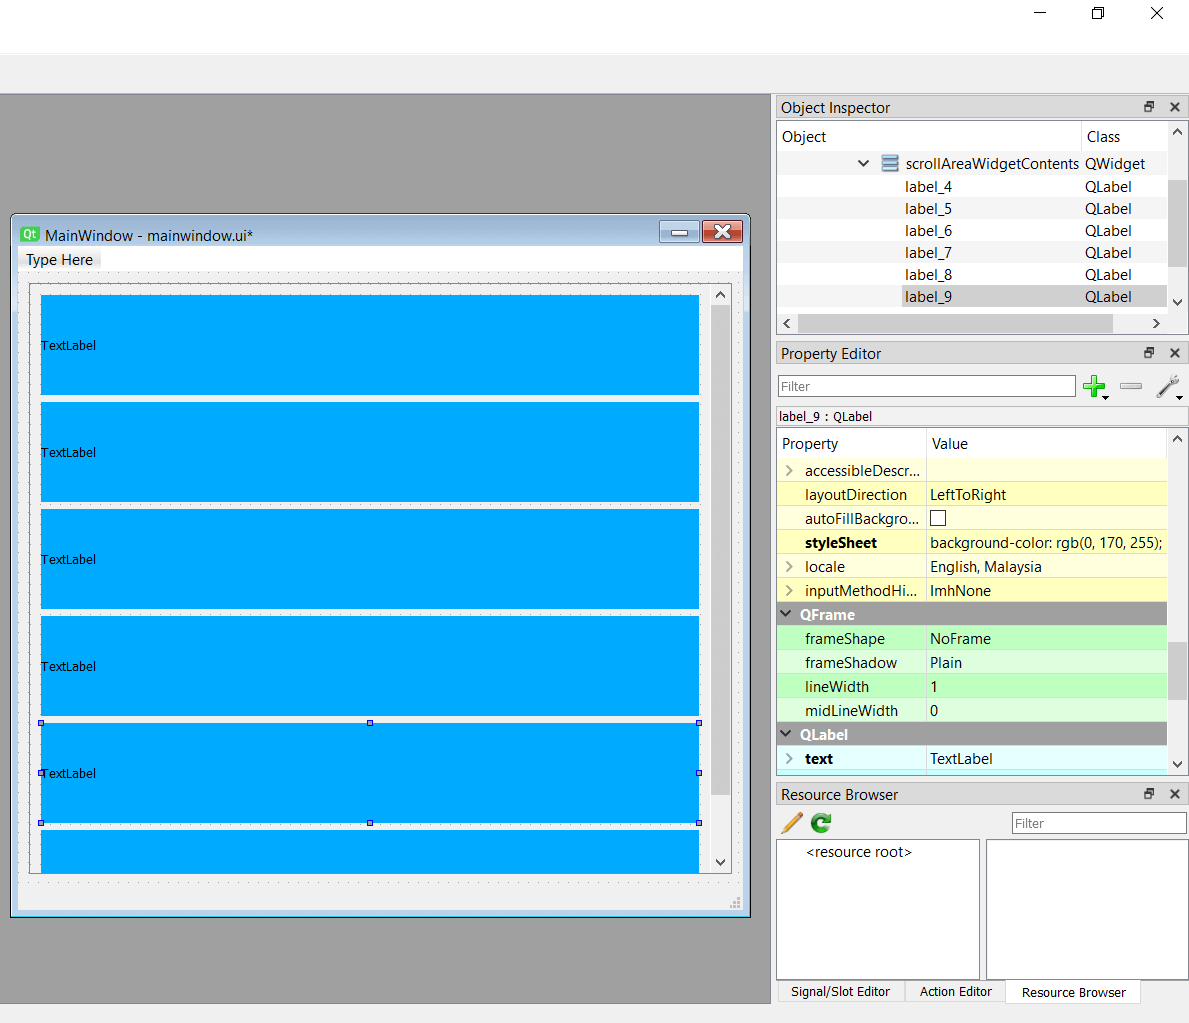 ScrollArea Properties
Saving and running the code at the start of this tutorial gives us this scroll area app which is what we wanted.
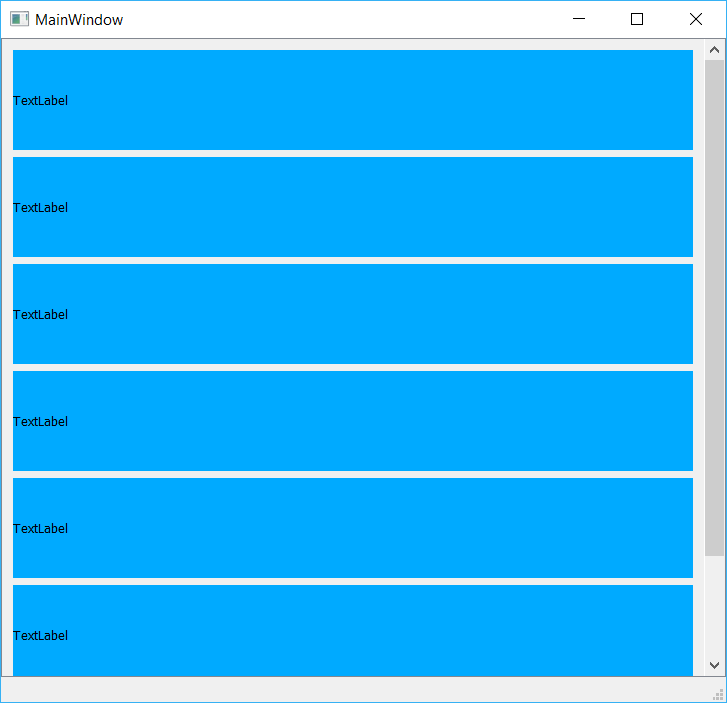 App With Scroll Bar
Adding a QScrollArea from code
As with all widgets you can also add a QScrollArea directly from code. Below we repeat the above example, with a flexible scroll area for a given number of widgets, using code.
from PySide2.QtWidgets import (QWidget, QSlider, QLineEdit, QLabel, QPushButton, QScrollArea,QApplication,
                             QHBoxLayout, QVBoxLayout, QMainWindow)
from PySide2.QtCore import Qt, QSize
from PySide2 import QtWidgets
import sys


class MainWindow(QMainWindow):

    def __init__(self):
        super().__init__()

        self.scroll = QScrollArea()             # Scroll Area which contains the widgets, set as the centralWidget
        self.widget = QWidget()                 # Widget that contains the collection of Vertical Box
        self.vbox = QVBoxLayout()               # The Vertical Box that contains the Horizontal Boxes of  labels and buttons

        for i in range(1,50):
            object = QLabel("TextLabel")
            self.vbox.addWidget(object)

        self.widget.setLayout(self.vbox)

        #Scroll Area Properties
        self.scroll.setVerticalScrollBarPolicy(Qt.ScrollBarAlwaysOn)
        self.scroll.setHorizontalScrollBarPolicy(Qt.ScrollBarAlwaysOff)
        self.scroll.setWidgetResizable(True)
        self.scroll.setWidget(self.widget)

        self.setCentralWidget(self.scroll)

        self.setGeometry(600, 100, 1000, 900)
        self.setWindowTitle('Scroll Area Demonstration')
        self.show()


app = QtWidgets.QApplication(sys.argv)
main = MainWindow()
sys.exit(app.exec_())
If you run the above code you should see the output below, with a custom widget repeated multiple times down the window, and navigable using the scrollbar on the right.
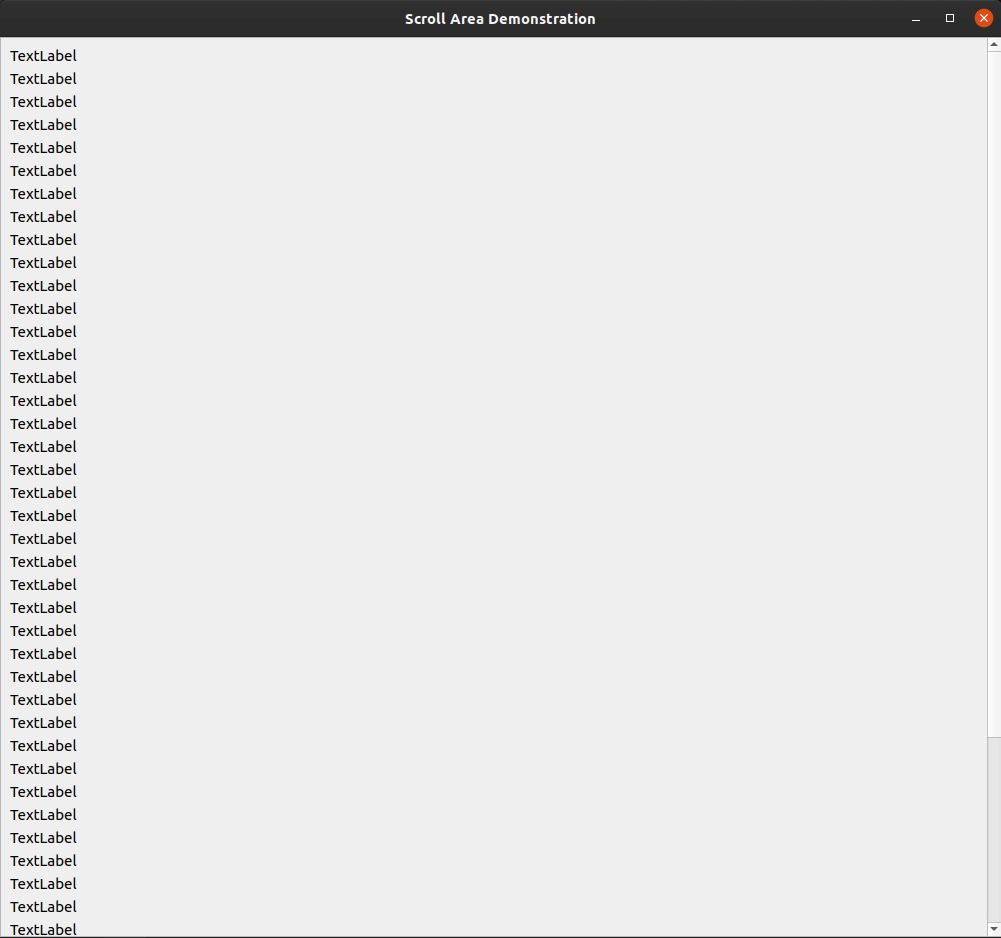 Scroll Area App
Next, we'll step through the code to explain how this view is constructed.
First we create our layout hierarchy. At the top level we have our QMainWindow which we can set the QScrollArea onto using .setCentralWidget. This places the QScrollArea in the window, taking up the entire area.
To add content to the QScrollArea we need to add a widget using .setWidget, in this case we are adding a custom QWidget onto which we have applied a QVBoxLayout containing multiple sub-widgets.
    self.scroll = QScrollArea()             # Scroll Area which contains the widgets, set as the centralWidget
    self.widget = QWidget()                 # Widget that contains the collection of Vertical Box
    self.vbox = QVBoxLayout()               # The Vertical Box that contains the Horizontal Boxes of  labels and buttons

    for i in range(1,50):
        object = QLabel("TextLabel")
        self.vbox.addWidget(object)
This gives us the following hierarchy in the window:
Finally we set up properties on the QScrollArea, setting the vertical scrollbar Always On and the horizontal Always Off. We allow the widget to be resized, and then add the central placeholder widget to complete the layout.
#Scroll Area Properties
self.scroll.setVerticalScrollBarPolicy(Qt.ScrollBarAlwaysOn)
self.scroll.setHorizontalScrollBarPolicy(Qt.ScrollBarAlwaysOff)
self.scroll.setWidgetResizable(True)
self.scroll.setWidget(self.widget)
Finally, we will add the QScrollArea as the central widget for our QMainWindow and set up the window dimensions, title and show the window.
self.setCentralWidget(self.scroll)

self.setGeometry(600, 100, 1000, 900)
self.setWindowTitle('Scroll Area Demonstration')
self.show()
Conclusion.
In this tutorial we've learned how to add a scrollbar with an unlimited number of widgets, programmatically or using Qt Designer. Adding a QScrollArea is a good way to include multiple widgets especially on apps that are data intensive and require objects to be displayed as lists.
Have a go at making your own apps with QScrollArea and share with us what you have made!
For more information about using QScrollArea check out the PyQt5 documentation.
Create GUI Applications with Python & Qt6 by Martin Fitzpatrick — (PyQt6 Edition) The hands-on guide to making apps with Python — Over 15,000 copies sold!

