Python is a popular programming language used for everything from scripting routine tasks to building websites and performing complex data analysis. While you can accomplish a lot with command-line tools, some tasks are better suited to graphical interfaces. You may also find yourself wanting to build a desktop front-end for an existing tool to improve usability for non-technical users. Or maybe you're building some hardware or a mobile app and want an intuitive touchscreen interface.
To create graphical user interfaces (GUIs) with Python, you need a GUI library. Unfortunately, at this point, things get pretty confusing — there are many different Python GUI libraries available, all with different capabilities and licensing.
So, the question is: Which Python GUI library should you use for your project?
In this article, we will look at a selection of the most popular Python GUI frameworks and libraries currently available and why you should consider using them for your own projects. You'll learn about the relative strengths of each library, understand the licensing limitations, and write a quick Hello, World! application in each. By the end of the article, you will feel confident choosing the right Python GUI library for your project.
Quick Recommendations
There are a lot of libraries to choose from but, honestly, for most projects you can ignore the majority of them. Below are a few common scenarios and recommendations for them:
- Professional Desktop Software If you want to build professional-quality desktop software, start with PySide6 or PyQt6. The Qt framework is batteries-included — whatever your project is, you'll be able to get it done. Here, you'll find a complete PySide6 tutorial and PyQt6 tutorial.
- Data Science Dashboards If you want to build data science dashboards, viewable in the web browser, take a look at Streamlit.
- Beginners If you're just beginning with UI development, many people recommend Tkinter because it's bundled with Python and "basic". But, I recommend you just start with PySide6. The basics are no more complex than Tkinter - many common things are actually easier to accomplish - and it is far more capable.
Build Professional Desktop Software with Python
If you're looking for more demos to see what you can do with Python, we have a GitHub repository full of Python GUI examples to get you started.
Python GUI Libraries at a Glance
Here's a quick comparison of the Python GUI libraries covered in this article to help you decide which one to explore first:
| Library | Best For | Native Look | Mobile Support | License |
|---|---|---|---|---|
| PyQt6 / PySide6 | Professional desktop apps | Yes (styled) | Android (Qt Quick) | GPL / LGPL |
| Qt Quick/QML | Embedded & touchscreen UIs | Custom | Yes | GPL / LGPL |
| Tkinter | Simple desktop tools | Partial (ttk) | No | PSF (permissive) |
| Kivy | Mobile apps (Android/iOS) | No | Yes | MIT |
| BeeWare Toga | Cross-platform native apps | Yes (native) | Yes | BSD 3-Clause |
| wxPython | Native desktop apps | Yes (native) | No | wxWindows (permissive) |
| PyGObject (GTK) | GNOME/Linux apps | Yes (GNOME) | Limited | LGPL v2.1 |
| Dear PyGui | GPU-accelerated tools & visualizations | No | No | MIT |
| Flet | Cross-platform apps (Flutter) | Yes (adaptive) | Yes | Apache 2.0 |
| NiceGUI | Web-based Python UIs | N/A (browser) | N/A | MIT |
| Streamlit | Data science dashboards | N/A (browser) | N/A | Apache 2.0 |
| Remi | Web-based/headless UIs | N/A (browser) | N/A | Apache 2.0 |
PyQt or PySide
Best for commercial, multimedia, scientific, or engineering desktop applications. Best all-rounder with batteries included.
PyQt and PySide are Python wrappers around the Qt framework. They allow you to easily create modern interfaces that look right at home on any platform, including Windows, macOS, Linux, and even Android. They also have solid tooling, with the most notable being Qt Creator, which includes a WYSIWYG (what you see is what you get) editor for designing GUI interfaces quickly and easily. Being backed by a commercial project means that you will find plenty of support and online learning resources to help you develop your applications.
Qt — and by extension PyQt and PySide — is not just a GUI library but a complete application development framework. In addition to standard UI elements, such as widgets and layouts, Qt provides the following features:

Purchasing Power Parity
Developers in [[ country ]] get [[ discount.discount_pc ]]% OFF on all books & courses with code [[ discount.coupon_code ]]- MVC-like data-driven views (spreadsheets, tables)
- Database interfaces and models
- Graphs and plotting
- Vector graphics visualization
- Multimedia playback, sound effects, and playlists
- Built-in interfaces for common hardware operations like printing
The Qt signals and slots model allows large applications to be built from reusable and isolated components.
While other toolkits can work great when building small and simple tools, Qt really comes into its own for building real commercial-quality applications, where you will benefit from the pre-built components. This comes at the expense of a slight learning curve. However, for smaller projects, Qt is not really any more complex than other libraries.
Qt Widgets generally don't instantiate the platform's native control widgets. Instead, they're painted by Qt using platform styles through QStyle to match the native look and feel across Windows, macOS, and Linux.
Installation:
- PyQt6
- PySide6
$ pip install pyqt6
$ pip install pyside6
A quick Hello, world! application in PyQt6 or PySide6, using the Qt Widgets API, is shown below:
- PyQt6
- PySide6
from PyQt6.QtWidgets import QApplication, QMainWindow, QPushButton

class MainWindow(QMainWindow):
    def __init__(self):
        super().__init__()
        self.setWindowTitle("Hello, World!")

        button = QPushButton("Exit")
        button.pressed.connect(self.close)

        self.setCentralWidget(button)
        self.show()

app = QApplication([])
window = MainWindow()
app.exec()
from PySide6.QtWidgets import QApplication, QMainWindow, QPushButton

class MainWindow(QMainWindow):
    def __init__(self):
        super().__init__()
        self.setWindowTitle("Hello, World!")

        button = QPushButton("Exit")
        button.pressed.connect(self.close)

        self.setCentralWidget(button)
        self.show()

app = QApplication([])
window = MainWindow()
app.exec()
As you can see, the code is almost identical between PyQt and PySide, so it's not something to be concerned about when you start developing with either; you can always migrate easily if you need to.
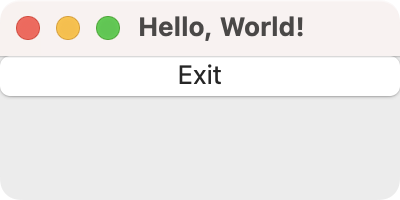
Run it! You'll get a window that looks like the following:
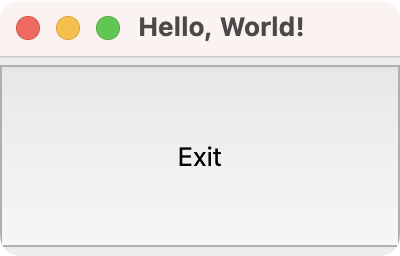 Hello, World! app in PyQt or PySide
Before the Qt Company (under Nokia) released the officially supported PySide library in 2009, Riverbank Computing had released PyQt in 1998. The main difference between these two Python GUI libraries is in licensing:
- PyQt (its free-to-use version) is licensed under the GNU General Public License (GPL) v3. This means that you must also license your applications with the GPL unless you purchase a commercial version.
- PySide is licensed under the GNU Lesser General Public License (LGPL). This means you may use it in your applications without any additional fee.
Note that both these libraries are separate from Qt itself, which also has a free-to-use, open-source version and a paid, commercial version.
For more information, see the article on PyQt vs PySide licensing. If you want to develop closed-source software without paying for a license, then use PySide6.
Here are a few resources that you can check out to learn more about these Python GUI libraries:
-
PySide6
-
PyQt6
-
PyQt5
PyQt or PySide with QML
Best for Raspberry Pi, microcontrollers, industrial, and consumer electronics.
When using PyQt and PySide, you have two options for building your GUIs. We've already introduced the Qt Widgets API, which is well-suited for building desktop applications. However, Qt also provides a declarative API in the form of Qt Quick/QML.
Using this API, you have access to the entire Qt framework for building your applications. Your UI consists of two parts:
- The Python code that handles the business logic
- The QML code that defines the structure and behavior of the UI itself
You can control the UI using Python or use embedded JavaScript code to handle events and animations.
Qt Quick/QML is ideally suited for building modern touchscreen interfaces for embedded devices, such as the Raspberry Pi. However, you can also use it on the desktop to build completely customized applications, like those found in media player applications like Spotify or desktop games.
Installation: Qt Quick/QML is bundled with PyQt or PySide.
A simple Hello, World! app in PyQt6 with QML. Save the QML file in the same folder as the Python file, and run it normally.
- main.py
- helloworld.qml
import sys

from PyQt6.QtCore import QUrl
from PyQt6.QtGui import QGuiApplication
from PyQt6.QtQml import QQmlApplicationEngine

app = QGuiApplication(sys.argv)
engine = QQmlApplicationEngine()
engine.load(QUrl.fromLocalFile("helloworld.qml"))

if not engine.rootObjects():
    sys.exit(-1)

sys.exit(app.exec())
import QtQuick
import QtQuick.Controls
import QtQuick.Window

Window {
    id: mainWindow
    width: 200
    height: 100
    visible: true
    title: "Hello, World!"

    minimumWidth: exitButton.implicitWidth + 20
    minimumHeight: exitButton.implicitHeight + 20

    Button {
        id: exitButton
        text: "Exit"
        anchors.fill: parent

        onClicked: {
            mainWindow.close()
        }
    }
}
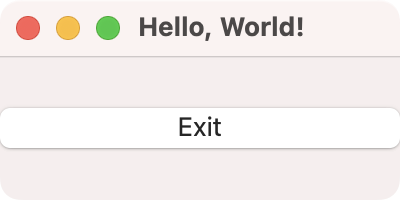
Run it! You'll see a window that looks as shown below.
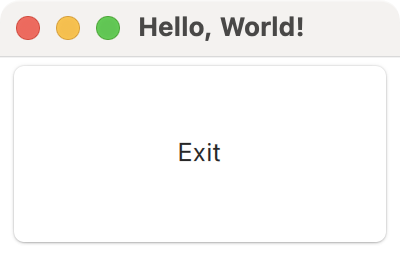 Hello, World! app in PyQt with Qt Quick/QML
Licensing for Qt Quick/QML applications is the same as for other PyQt/PySide apps.
Here are some useful resources if you want to learn more about Qt Quick/QML:
-
PyQt
-
PySide
Tkinter
Best for simple portable Python GUI applications.
Tkinter is the official built-in GUI library for Python. It comes bundled with Python on Windows and macOS. On Linux, however, you may need to download and install an additional package from your distribution's repo.
Tkinter is a wrapper around the Tcl/Tk GUI toolkit. Its name is an amalgamation of the words Tk and Interface.
Tkinter is a simple library with support for standard layouts and widgets, as well as a few complex widgets, such as tabbed views and progress bars. Tkinter is a pure GUI library, instead of a complete GUI framework. This means that it has no built-in support for GUIs driven from data sources, databases, or for displaying or manipulating multimedia or hardware. If you need some of these features in your project, then you will have to use a standard library solution or a third-party library.
For simple projects that don't require complex additional dependencies or functionalities, Tkinter may be what you are looking for.
Tkinter is cross-platform. However, its classic widgets can look outdated, particularly on Windows. Fortunately, Tkinter offers an alternative set of themed widgets (ttk) that significantly enhance the look and feel on Windows and macOS. On Linux, the themed widgets may still feel outdated.
If you're looking for a more modern look for your Tkinter applications, consider CustomTkinter. CustomTkinter is a modern and customizable Python UI library based on Tkinter that provides an improved, contemporary appearance to existing Tkinter applications. You can find it on GitHub.
Installation: Tkinter is already installed with Python on Windows and macOS. On Ubuntu/Debian Linux, you may need to run the following command to install Tkinter:
$ sudo apt install python3-tk
Here's a demo Hello, World! application in Tkinter:
- Script-based
- Class-based
import tkinter as tk

window = tk.Tk()
window.title("Hello World")

def handle_button_press(event):
    window.destroy()

button = tk.Button(text="My simple app.")
button.bind("", handle_button_press)
button.pack()

# Start the event loop.
window.mainloop()
import tkinter as tk

class Window(tk.Tk):
    def __init__(self):
        super().__init__()
        self.title("Hello, World!")
        self.geometry("200x100")

        self.button = tk.Button(text="Exit", command=quit)
        self.button.pack(fill="both", expand=True)

root = Window()
root.mainloop()
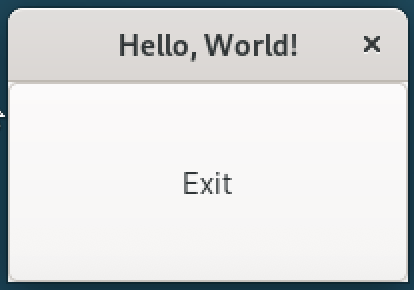
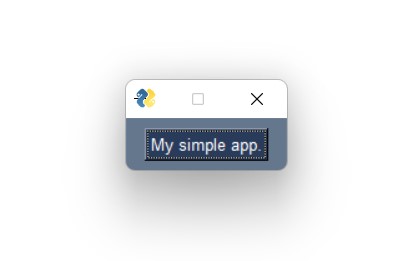
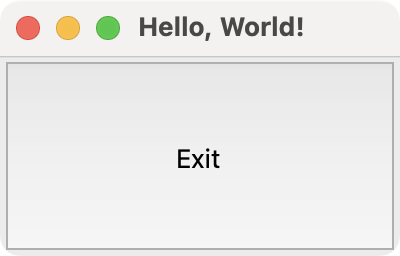 Hello, World! app in Tkinter
Tkinter was originally developed by Steen Lumholt and Guido van Rossum, who designed Python itself. Both the GUI library and the language are licensed under the same Python Software Foundation (PSF) License. While the license is compatible with the GPL, it is a permissive license — similar to the MIT License — that allows you to use them for proprietary applications.
Here are some useful resources to learn more about Tkinter:
Kivy
Best for Python mobile app development.
While most Python GUI frameworks and libraries are bindings to toolkits written in other programming languages, Kivy is perhaps the only framework primarily written in pure Python. If you want to create touchscreen-oriented interfaces focused on mobile platforms such as Android and iOS, Kivy is the way to go.
Kivy runs on desktop platforms like Windows, macOS, and Linux, but your application may not look and behave like a native application. However, there is a pretty large community around this library, and you can easily find resources to help you learn it online.
The look and feel of Kivy is extremely customizable, allowing it to be used as an alternative to libraries like Pygame for making games with Python. Developers have also released a number of separate libraries for Kivy. Some provide Kivy with better integration and access to certain platform-specific features, or help package your application for distribution on platforms like Android and iOS.
Kivy has its own UI design language called Kv, which is similar to QML for Qt. It allows you to easily separate the interface design from the application's logic.
There is a third-party add-on for Kivy named KivyMD that replaces Kivy's widgets with ones that comply with Google's Material Design.
Installation:
$ pip install kivy
A simple Hello, World! application in Kivy is shown below:
from kivy.app import App
from kivy.core.window import Window
from kivy.uix.button import Button

class KivyApp(App):
    def build(self):
        Window.size = (200, 100)
        self.title = "Hello, World!"
        button = Button(text="Exit")
        button.bind(on_press=quit)
        return button

app = KivyApp()
app.run()
Run it! You'll get a window that looks something like the following.
 Hello, World! app in Kivy
An equivalent application built using the Kv declarative language is shown below:
- main.py
- kivyapp.kv
from kivy.app import App
from kivy.core.window import Window

class KivyApp(App):
    def build(self):
        Window.size = (200, 100)
        self.title = "Hello, World!"

app = KivyApp()
app.run()
Button:
    text: "Exit"
    on_press: quit()
The name of the .kv file must match the name of the class from the main application, but in lowercase — here KivyApp and kivyapp.kv.
Kivy is licensed under the MIT license, which is a permissive license that allows you to use the library freely in both open source and proprietary applications. As such, you are even allowed to make proprietary modifications to the framework itself.
Here are some resources that you can check out to learn more about Kivy:
- Kivy Tutorial
- Kivy Website
- Kivy Documentation
- GitHub Repository
- KivyMD Documentation
- Kv Language Guide
BeeWare Toga
Best for simple cross-platform native Python GUI development.
BeeWare is a collection of tools and libraries that work together to help you write cross-platform Python applications with native GUIs. That means, the applications you create use the OS-provided widgets and behaviors, appearing just like any other application despite being written in Python.
The BeeWare system includes the following tools and libraries:
- Toga, a cross-platform widget toolkit.
- Briefcase, a tool for packaging Python projects as distributable artifacts.
- Libraries for accessing platform-native APIs.
- Pre-compiled builds of Python for platforms where official Python installers aren't available.
Installation:
$ pip install toga
A simple Hello, World! application using BeeWare/Toga is shown below:
import toga
from toga.style import Pack

class TogaApp(toga.App):
    def startup(self):
        main_box = toga.Box()

        button = toga.Button(
            "Exit",
            on_press=lambda w: self.exit(),
            style=Pack(flex=1, padding=0),
        )
        main_box.add(button)

        self.main_window = toga.MainWindow(
            title="Hello, World!", size=(200, 100)
        )
        self.main_window.content = main_box
        self.main_window.show()

app = TogaApp(
    formal_name="Hello, World!",
    app_id="hello.world",
)
app.main_loop()
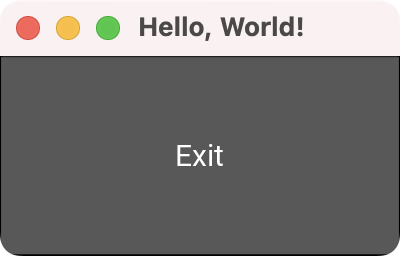
Run it! You'll get a window like the following.
 Hello, World! app in BeeWare/Toga
BeeWare is licensed under the BSD 3-Clause "New" or "Revised" License. The above example uses a single Python file for simplicity. See the linked tutorial below to learn how to set up an application using Briefcase for cross-platform deployment:
wxPython
Best for simple portable desktop applications with native look and feel.
The wxPython library is a Python wrapper for the popular, cross-platform GUI toolkit wxWidgets. It is implemented as a set of Python extension modules that wrap the GUI components of wxWidgets, which is originally written in C++.
wxPython uses native widgets on most platforms, ensuring that your application looks and feels at home.
However, wxPython is known to have certain platform-specific quirks. It also doesn't provide the same level of abstraction between platforms as Qt, for example. This may affect how easy it is to maintain cross-platform compatibility for your application.
wxPython is under active development and is also distributed as wxPython Phoenix (the current major implementation line). The team behind wxWidgets is also responsible for wxPython, which was initially released in 1998.
Installation:
$ pip install wxpython
Below is a quick Hello, World! demo app with wxPython:
import wx

class MainWindow(wx.Frame):
    def __init__(self):
        super().__init__(
            parent=None,
            title="Hello, World!",
            size=wx.Size(200, 100),
        )

        button = wx.Button(self, label="Exit")
        self.Bind(wx.EVT_BUTTON, quit, button)
        self.sizer = wx.BoxSizer(wx.VERTICAL)
        self.sizer.Add(button, proportion=1, flag=wx.EXPAND)

        self.SetSizer(self.sizer)
        self.SetAutoLayout(True)
        self.Show()

app = wx.App(False)
window = MainWindow()
app.MainLoop()
Run it! You'll see a window like the following.
 Hello, World! app in wxPython
Both wxWidgets and wxPython are licensed under a wxWindows Library License, a free software license similar to LGPL but with a special exception. It allows both proprietary and open-source applications to use and modify wxPython.
Below are some useful resources for learning about wxPython:
PyGObject (GTK+)
Best for developing Python GUI applications for the GNOME desktop environment.
If you intend to create an application that integrates well with GNOME and other GTK-based desktop environments for Linux, PyGObject is the right choice. PyGObject itself is a Python binding to the GTK+ widget toolkit. It allows you to create modern, adaptive user interfaces that conform to GNOME's Human Interface Guidelines (HIG).
It also enables the development of convergent applications that can run on both Linux desktop and mobile platforms. There are a few first-party and community-made, third-party tools available for it. They include the GNOME Builder and Glade, which is yet another WYSIWYG editor for building graphical interfaces quickly and easily.
Unfortunately, there aren't a whole lot of online resources to help you learn PyGObject application development, apart from The Python GTK+ 3 Tutorial. While the library supports cross-platform development (e.g. Inkscape, GIMP), the resulting applications won't feel completely native on other desktops.
Setting up a development environment for PyGObject, especially on Windows and macOS, also requires more steps than for most other frameworks in this article, which just need a working Python installation.
Installation: On Ubuntu/Debian, run the following command:
$ sudo apt install python3-gi python3-gi-cairo gir1.2-gtk-4.0
On macOS, execute the following Homebrew command:
$ brew install pygobject4 gtk+4
Here's a quick Hello, World! application in PyGObject:
import gi
gi.require_version("Gtk", "4.0")
from gi.repository import Gtk

def on_activate(app):
    win = Gtk.ApplicationWindow(application=app)
    win.set_title("Hello, World!")
    win.set_default_size(200, 100)

    btn = Gtk.Button(label="Exit")
    btn.connect("clicked", lambda x: win.close())

    win.set_child(btn)
    win.present()

app = Gtk.Application(application_id="org.gtk.Example")
app.connect("activate", on_activate)
app.run(None)
Run it! If you're on a Linux distribution with GNOME, then you'll get the following window.
 Hello, World! app in PyGObject
PyGObject is developed and maintained under the GNOME Foundation, which is also responsible for the GNOME desktop environment. PyGObject replaces several separate Python modules, including PyGTK, GIO and python-gnome, which were previously required to create a full GNOME/GTK application. Its initial release was in 2006 and it is licensed under an older version of LGPL (v2.1). While there are some differences with the current version of LGPL (v3), the license still allows its use in proprietary applications but requires any modification to the library itself to be released as open source.
Dear PyGui
Best for GPU-accelerated tools, visualizations, and dynamic interfaces.
Dear PyGui is an easy-to-use, dynamic, GPU-accelerated, cross-platform graphical user interface toolkit for Python. It is built with Dear ImGui, a popular immediate-mode GUI library widely used in game development and creative tools.
Unlike traditional retained-mode GUI frameworks, Dear PyGui uses an immediate-mode paradigm, which means the UI is redrawn every frame. This makes it particularly well-suited for applications that require real-time data visualization, dynamic interfaces, or high-performance rendering — such as debugging tools, data dashboards, game editors, and scientific instruments.
Dear PyGui provides a rich set of built-in widgets including plots, node editors, tables, drawing canvases, and file dialogs. It supports themes and styling for complete visual customization. Because it is GPU-accelerated, it delivers smooth performance even with complex, data-heavy interfaces.
Note that Dear PyGui does not use native OS widgets and does not aim to produce applications with a platform-native look and feel. Instead, it renders its own widgets using the GPU, similar to how game engines render their UIs.
Installation:
$ pip install dearpygui
A simple Hello, World! application in Dear PyGui is shown below:
import dearpygui.dearpygui as dpg

dpg.create_context()
dpg.create_viewport(title="Hello, World!", width=300, height=150)

with dpg.window(label="Hello, World!", width=280, height=120):
    dpg.add_button(label="Exit", callback=lambda: dpg.stop_dearpygui())

dpg.setup_dearpygui()
dpg.show_viewport()
dpg.start_dearpygui()
dpg.destroy_context()
Run it! You'll get a GPU-rendered window with a button.
Dear PyGui is licensed under the MIT license, which is a permissive license that allows you to use it freely in both open-source and proprietary applications.
Flet
Best for cross-platform Python UIs built on Flutter.
Flet is a popular Python UI framework that enables you to build cross-platform applications for desktop (Windows, macOS, Linux), web, and mobile (Android, iOS) — all from a single Python codebase. Under the hood, Flet is powered by Flutter, Google's UI toolkit, which gives your applications a modern Material Design look and smooth performance.
With Flet, you write your entire UI in Python — no need to learn Flutter, Dart, or any front-end technologies. Flet provides a rich set of built-in controls including buttons, text fields, dialogs, navigation bars, charts, and more. It also supports adaptive controls that automatically adjust their appearance to match the target platform's native look and feel.
Flet applications can run as desktop apps, be served in a web browser, or be packaged for mobile deployment. This makes it a versatile choice if you need to target multiple platforms from a single codebase. Flet also supports real-time updates, making it suitable for dashboards and interactive applications.
Installation:
$ pip install flet
A simple Hello, World! application in Flet is shown below:
import flet as ft

def main(page: ft.Page):
    page.title = "Hello, World!"
    page.window.width = 200
    page.window.height = 100

    def exit_clicked(e):
        page.window.close()

    page.add(ft.ElevatedButton("Exit", on_click=exit_clicked))

ft.app(target=main)
Run it! You'll get a window with a Material Design-styled button.
Flet is licensed under the Apache License 2.0, a permissive license that allows you to use it freely in both open-source and proprietary applications.
NiceGUI
Best for web-based Python UIs with a modern, feature-rich interface.
NiceGUI is a Python framework that lets you build web-based user interfaces using pure Python. Like Remi, it renders your UI in the browser, but NiceGUI provides a much more modern and feature-rich experience. It is built on top of Vue.js and Quasar, giving your applications a polished Material Design look out of the box.
NiceGUI includes a wide range of built-in components including buttons, dialogs, tables, charts, 3D scenes, and interactive elements — all accessible through a clean Pythonic API. It supports features like data binding, auto-refresh, and real-time updates, making it well suited for dashboards, data visualization tools, and internal applications.
Unlike traditional desktop GUI frameworks, NiceGUI applications are served via the browser. This means they can be accessed remotely from any device on the same network. NiceGUI also supports multi-page routing and can be deployed as a standalone desktop app using its built-in native mode.
Installation:
$ pip install nicegui
Below is a simple Hello, World! application implemented in NiceGUI:
from nicegui import ui

ui.button("Hello, World!", on_click=lambda: ui.notify("Hello!"))

ui.run()
Run it! Your default browser will open with the NiceGUI interface.
NiceGUI is licensed under the MIT license, which is a permissive license allowing you to use it freely in both open-source and proprietary applications.
Streamlit
Best for building data science dashboards and interactive data tools in Python.
Streamlit is a popular open-source Python library for creating web-based user interfaces, particularly for data science and machine learning applications. Unlike traditional GUI frameworks, Streamlit lets you build interactive dashboards and tools using simple Python scripts — no front-end development experience required.
With Streamlit, you write a Python script that describes your UI from top to bottom. Streamlit takes care of rendering the interface in a web browser. Every time a user interacts with a widget (such as a slider, button, or text input), the script re-runs automatically, making it very easy to build reactive applications.
Streamlit is particularly well-suited for:
- Data exploration and visualization dashboards
- Machine learning model demos and prototypes
- Internal tools for data teams
- Quick proof-of-concept applications
Because Streamlit runs in the browser, your applications are inherently cross-platform and can be easily shared with others over a network. Streamlit also offers Streamlit Community Cloud for deploying and sharing apps online.
Note that Streamlit is designed for data-centric applications and dashboards rather than general-purpose desktop GUI development. If you need a traditional desktop application with native widgets, consider one of the other frameworks in this article.
Installation:
$ pip install streamlit
A simple Hello, World! application in Streamlit is shown below. Save this as a Python file (e.g. app.py) and run it with streamlit run app.py:
import streamlit as st

st.title("Hello, World!")

if st.button("Exit"):
    st.write("Goodbye!")
Streamlit is licensed under the Apache License 2.0, a permissive license that allows use in both open-source and proprietary applications.
Remi
Best for web-based UIs for Python applications.
Remi, which stands for REMote Interface, is a good solution for Python applications intended to run on servers and other headless setups (for example, on a Raspberry Pi). Unlike most other GUI frameworks and libraries, Remi is rendered completely in the browser using a built-in web server. Hence, it is completely platform-independent and runs equally well on all platforms.
This characteristic also makes the application's interface accessible to any computer or device with a web browser that is connected to the same network. Although access can be restricted with a username and password, it doesn't implement any security strategies by default.
Note that Remi is meant to be used as a desktop GUI framework, not for serving web pages. If more than one user connects to the application at the same time, they will see and interact with the exact same things as if a single user were using it.
Remi requires no prior knowledge of HTML or similar web technologies. You only need to have a working understanding of Python, which is then automatically translated to HTML. It also comes with a drag-and-drop GUI editor akin to Qt Designer for PyQt and PySide.
Installation:
$ pip install remi
Below is a simple Hello, World! application implemented in Remi:
import remi.gui as gui
from remi import App, start

class MyApp(App):
    def main(self):
        container = gui.VBox(width=120, height=100)

        # Create a button with the label "Hello, World!"
        self.bt = gui.Button("Hello, World?")
        self.bt.onclick.do(self.on_button_pressed)

        # Add the button to the container, and return it.
        container.append(self.bt)
        return container

    def on_button_pressed(self, widget):
        self.bt.set_text("Hello, World!")

start(MyApp)
Remi is licensed under the Apache License 2.0, another permissive license similar to the MIT License. This license allows Remi to be used in both open-source and proprietary applications and allows proprietary modifications to the framework itself. Its main conditions revolve around the preservation of copyright and license notices.
Run it! You'll get the following web UI opened in your browser.
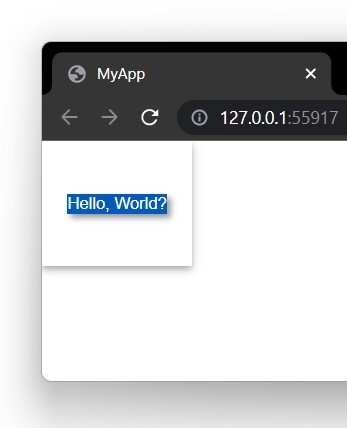 Hello, World! app in Remi
PySimpleGUI
PySimpleGUI is no longer being developed. We do not recommend it if you are starting a new project in 2026. Take a look at PySide6 instead.
PySimpleGUI aims to simplify GUI application development for Python. It doesn't reinvent the wheel but provides a wrapper around other existing frameworks such as Tkinter, Qt (PySide2), wxPython and Remi. By doing so, it lowers the barrier to creating a GUI but also allows you to easily migrate from one GUI framework to another by simply changing the import statement.
While there is a separate port of PySimpleGUI for each of these frameworks, the Tkinter version is considered the most feature-complete. Wrapping other libraries comes at a cost, however — your applications will not be able to exploit the full capabilities or performance of the underlying libraries. The pure-Python event loop can also hinder performance by bottlenecking events with the GIL. However, this is only really a concern when working with live data visualization, streaming or multimedia applications.
There is a fair amount of good resources to help you learn to use PySimpleGUI, including an official Cookbook and a Udemy course offered by the developers themselves. According to their project website, PySimpleGUI was initially made (and later released in 2018) because the lead developer wanted a 'simplified' GUI framework to use in his upcoming project and wasn't able to find any that met his needs.
Installation pip install pysimplegui
import PySimpleGUI as sg

layout = [
    [sg.Button("My simple app.")]
]

window = sg.Window("Hello World", layout)

while True:
    event, values = window.read()
    print(event, values)
    if event == sg.WIN_CLOSED or event == "My simple app.":
        break

window.close()
 Hello world application built using PySimpleGUI, running on Windows 11
PySimpleGUI 4 was licensed under the same LGPL v3 license as PySide. PySimpleGUI 5 switched to a paid commercial license model. There is a fork of PySimpleGUI 4 called FreeSimpleGUI that retains the original LGPL license.
How to Choose the Right Python GUI Library
With so many options available, picking the right Python GUI library depends on your project requirements. Here are some key questions to ask yourself:
- What platform are you targeting? If you need Android or iOS support, consider Kivy, BeeWare Toga, or Flet. For desktop-only apps, PyQt6/PySide6, Tkinter, or wxPython are all strong choices. For browser-based UIs, consider NiceGUI or Remi. For data science dashboards, Streamlit is an excellent option. For cross-platform apps from a single codebase (desktop, web, and mobile), Flet is worth exploring. For GPU-accelerated tools and visualizations, Dear PyGui is a great option.
- Do you need a native look and feel? wxPython and BeeWare Toga use native OS widgets. PyQt/PySide style their widgets to match native platforms. Tkinter's ttk widgets look native on Windows and macOS. Flet offers adaptive controls that adjust to platform conventions. Dear PyGui renders its own widgets via the GPU, so it won't match native platform styling.
- How complex is your project? For quick scripts and simple tools, Tkinter is hard to beat. For full-featured commercial applications, PyQt6 or PySide6 offer the most comprehensive toolkit. For data-focused dashboards, Streamlit gets you up and running quickly. For web-based dashboards and data tools, Streamlit or NiceGUI provide a modern, feature-rich option. For cross-platform apps with a modern look, Flet provides a rich set of controls with minimal setup. For high-performance, GPU-accelerated interfaces with real-time data, Dear PyGui is an excellent choice.
- What are your licensing requirements? If you need to distribute closed-source software, choose a library with a permissive license like PySide6 (LGPL), Tkinter (PSF), Kivy (MIT), wxPython (wxWindows), NiceGUI (MIT), Dear PyGui (MIT), Flet (Apache 2.0), or Streamlit (Apache 2.0).
- Do you need embedded or touchscreen support? Qt Quick/QML with PySide6 is purpose-built for modern touchscreen and embedded interfaces.
Conclusion
If you're looking to build GUI applications with Python, there is probably a Python GUI framework or library listed here that fits the bill for your project. Go ahead and weigh up the capabilities and licensing of the different libraries with the scale of your project, both now and in the future.
Don't be afraid to experiment a bit with different libraries to see which feels the best fit. While the APIs of Python GUI libraries are very different, they share many underlying concepts in common, and things you learn in one library will often apply to others.
You are only limited by your own imagination. So go out there and make something!
Frequently Asked Questions
What is the best Python GUI library for beginners?
Tkinter is often suggested for beginners because it comes pre-installed with Python and has a simple API. However, it is very limited. If you plan to build real applications, starting with PySide6 will save you from having to switch later. If you're working with data science, Streamlit is also very beginner-friendly. Flet is another beginner-friendly option that lets you build cross-platform apps with a clean Python API.
Which Python GUI framework is best for commercial software?
PySide6 is the most common choice for commercial Python GUI development because it offers the full power of the Qt framework under the LGPL license, allowing you to distribute closed-source applications without purchasing a commercial license. However, PyQt remains very popular.
Build Professional Applications with Python
What is the difference between PyQt and PySide?
PyQt and PySide are both Python bindings for the Qt framework and have nearly identical APIs. The main difference is licensing: PyQt's free version uses the GPL (requiring your code to also be GPL), while PySide uses the LGPL, which allows use in proprietary applications without a commercial license.
Can I build mobile apps with Python?
Yes. Kivy is the most popular Python framework for building Android and iOS apps. BeeWare Toga also supports mobile platforms and uses native widgets. Qt Quick/QML with PySide6 supports Android deployment as well. Flet also supports building mobile apps for Android and iOS using Flutter under the hood.
Is Tkinter good enough for production applications?
Tkinter works well for simple, lightweight desktop tools. However, for production applications that need advanced features like database integration, multimedia support, or complex data visualization, a more comprehensive framework like PyQt6 or PySide6 is a better fit.
What is the best Python library for data science dashboards?
Streamlit is the most popular choice for building data science dashboards and interactive data tools in Python. It allows you to create web-based UIs using pure Python scripts without any front-end development experience.
What is the best Python GUI library for GPU-accelerated interfaces?
Dear PyGui is the best choice if you need GPU-accelerated rendering for your Python GUI. Built on top of Dear ImGui, it excels at real-time data visualization, dynamic interfaces, and high-performance tools like game editors and scientific instruments.
PyQt/PySide Office Hours 1:1 with Martin Fitzpatrick — Save yourself time and frustration. Get one on one help with your projects. Bring issues, bugs and questions about usability to architecture and maintainability, and leave with solutions.
