Getting started with a new GUI framework can feel daunting. This guide walks you through the essentials of DearPyGui—from installation and your first app to widgets, layouts, event handling, and plotting.
With DearPyGui, you can quickly build modern, high‑performance desktop interfaces using Python.
You can download the source code for all our articles.
The code for this article is in the folder dearpygui/tutorials/getting-started-dearpygui
What Is DearPyGui?
DearPyGui is a GPU‑accelerated and cross‑platform GUI framework for Python, built on Dear ImGui with a retained‑mode Python API. It renders all UI using the GPU rather than native OS widgets, ensuring consistent, high‑performance UI across Windows, Linux, macOS, and even Raspberry Pi 4.
Note that official wheels for Raspberry Pi may lag behind. Users sometimes compile from source.
DearPyGui's key features include the following:
- Modern, consistent UI across platforms
- High performance via GPU rendering and C/C++ core
- Customizable styles/themes and full developer tools
- Over 70 widgets, including plots, node editors, and tables
- Built-in demo app, theme inspector, logging, metrics, and debugger
This Python GUI framework is ideal for building interfaces ranging from simple utilities to real-time dashboards, data‑science tools, or interactive applications.
Installing DearPyGui
You can install DearPyGui from PyPI using pip:
$ pip install dearpygui
This command installs DearPyGui from PyPI.
Writing Your First DearPyGui Application
In general, DearPyGui apps follow the following structure:
dpg.create_context()— Initialize DearPyGui and call it before anything elsedpg.create_viewport()— Create the main application window or viewport- Define UI widgets within windows or groups — Add and configure widgets and containers to build your interface
dpg.setup_dearpygui()— Set up DearPyGui internals and resources before showing the viewportdpg.show_viewport()— Make the viewport window visible to the userdpg.start_dearpygui()— Start the DearPyGui main event and render loopdpg.destroy_context()— Clean up and release all DearPyGui resources on exit
Here's a quick Hello World application displaying a window with basic widgets:
import dearpygui.dearpygui as dpg

def main():
    dpg.create_context()
    dpg.create_viewport(title="Viewport", width=300, height=100)

    with dpg.window(label="DearPyGui Demo", width=300, height=100):
        dpg.add_text("Hello, World!")

    dpg.setup_dearpygui()
    dpg.show_viewport()
    dpg.start_dearpygui()
    dpg.destroy_context()

if __name__ == "__main__":
    main()
Inside main(), we initialize the library with dpg.create_context(), create a window (viewport) via dpg.create_viewport(), define the GUI, set up the library with dpg.setup_dearpygui(), show the viewport with dpg.show_viewport(), and run the render loop using dpg.start_dearpygui(). When you close the window, dpg.destroy_context() cleans up resources.
You define the GUI itself inside a dpg.window() context block, which parents a text item with the label "Hello, World!".
Always follow the lifecycle order: create context → viewport → setup → show → start → destroy. Otherwise, the app may crash.
Run it! Here's what your first DearPyGui app looks like.
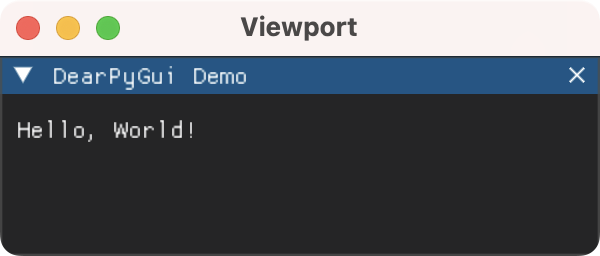 DearPyGui first app
Exploring DearPyGui Widgets
DearPyGui includes a wide variety of widgets for building Python GUIs:
- Basic widgets, including buttons, text input, sliders, and checkboxes
- Containers like windows, groups (horizontal and vertical grouping), tabs, collapsing headers, and menus
- Interactive widgets, such as color pickers, combo boxes, tables, and menus
Here's an example that showcases some commonly used DearPyGui widgets:
import dearpygui.dearpygui as dpg

def main():
    dpg.create_context()
    dpg.create_viewport(title="Widgets Demo", width=400, height=450)

    with dpg.window(
        label="Common DearPyGui Widgets",
        width=380,
        height=420,
        pos=(10, 10),
    ):
        dpg.add_text("Static label")
        dpg.add_input_text(
            label="Text Input",
            default_value="Type some text here...",
            tag="widget_input",
        )
        dpg.add_button(label="Click Me!")
        dpg.add_checkbox(label="Check Me!")
        dpg.add_radio_button(
            ("DearPyGui", "PyQt6", "PySide6"),
        )

        dpg.add_slider_int(
            label="Int Slider",
            default_value=5,
            min_value=0,
            max_value=10,
        )
        dpg.add_slider_float(
            label="Float Slider",
            default_value=0.5,
            min_value=0.0,
            max_value=1.0,
        )

        dpg.add_combo(
            ("DearPyGui", "PyQt6", "PySide6"),
            label="GUI Library",
        )
        dpg.add_color_picker(label="Pick a Color")
        dpg.add_progress_bar(
            label="Progress",
            default_value=0.5,
            width=250,
        )

    dpg.setup_dearpygui()
    dpg.show_viewport()
    dpg.start_dearpygui()
    dpg.destroy_context()

if __name__ == "__main__":
    main()
This code uses the following functions to add the widgets to the GUI:
add_text(): A label for static text or instructionsadd_input_text(): A single‑line text entry fieldadd_button(): A clickable button for user actionsadd_checkbox(): A toggle for boolean valuesadd_radio_button(): A group of radio buttons for selecting one from several optionsadd_slider_int(),add_slider_float(): Sliders with integer and floating-point stepsadd_combo(): A dropdown selection widgetadd_color_picker(): A color picker widgetadd_progress_bar(): A progress bar widget to display visual progress
Run it! Here's what the app will look like.
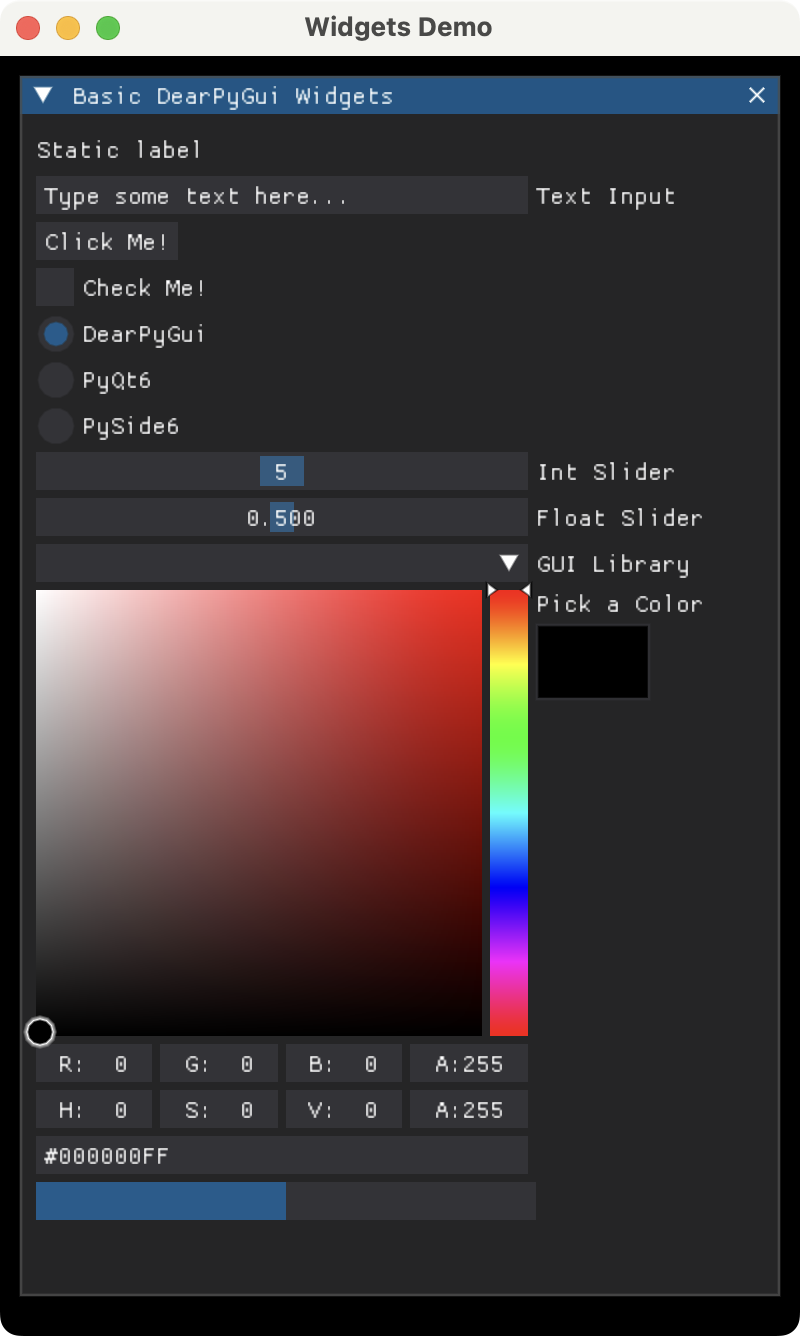 DearPyGui basic widgets
Laying Out Your DearPyGui Interface
By default, DearPyGui stacks widgets vertically. However, additional positioning options include the following:
- Horizontal grouping using
with dpg.group(horizontal=True): - Vertical spacing using
dpg.add_spacer() - Indentation using the per-item
indentkeyword argument, like indpg.add_checkbox(label="Option A", indent=30)or after creation withdpg.configure_item(tag, indent=30) - Absolute positioning via
pos=(x, y)when creating items, or withdpg.set_item_pos(tag, (x, y))after creation
Widgets go inside containers like dpg.window(). You can nest containers to build complex GUI layouts:
import dearpygui.dearpygui as dpg

def main():
    dpg.create_context()
    dpg.create_viewport(title="Layout Demo", width=520, height=420)

    with dpg.window(
        label="Layout Demo",
        width=500,
        height=380,
        pos=(10, 10),
    ):
        dpg.add_text("1) Vertical layout:")
        dpg.add_button(label="Top")
        dpg.add_button(label="Middle")
        dpg.add_button(label="Bottom")

        dpg.add_spacer(height=12)

        dpg.add_text("2) Horizontal layout:")
        with dpg.group(horizontal=True):
            dpg.add_button(label="Left")
            dpg.add_button(label="Center")
            dpg.add_button(label="Right")

        dpg.add_spacer(height=12)

        dpg.add_text("3) Indentation:")
        dpg.add_checkbox(label="Indented at creation (30px)", indent=30)
        dpg.add_checkbox(label="Indented after creation (35px)", tag="indent_b")
        dpg.configure_item("indent_b", indent=35)

        dpg.add_spacer(height=12)

        dpg.add_text("4) Absolute positioning:")
        dpg.add_text("Positioned at creation: (x=100, y=300)", pos=(100, 300))
        dpg.add_text("Positioned after creation: (x=100, y=320)", tag="move_me")
        dpg.set_item_pos("move_me", (100, 320))

    dpg.setup_dearpygui()
    dpg.show_viewport()
    dpg.start_dearpygui()
    dpg.destroy_context()

if __name__ == "__main__":
    main()
In this example, we create an app that showcases basic layout options in DearPyGui. The first section of widgets shows the default vertical stacking by adding three buttons one after another. Then, you use dpg.add_spacer(height=12) to insert vertical whitespace between sections.
Then, we create a horizontal row of buttons with dpg.group(horizontal=True), which groups items side-by-side. Next, we have an indentation section that demonstrates how to indent widgets at creation (indent=30) and after creation using dpg.configure_item().
Finally, we use absolute positioning by placing one text item at a fixed coordinate using pos=(100, 300) and moving another after creation with dpg.set_item_pos(). These patterns are all part of DearPyGui's container and item-configuration model, which we can use to arrange the widgets in a user-friendly GUI.
Run it! You'll get a window like the following.
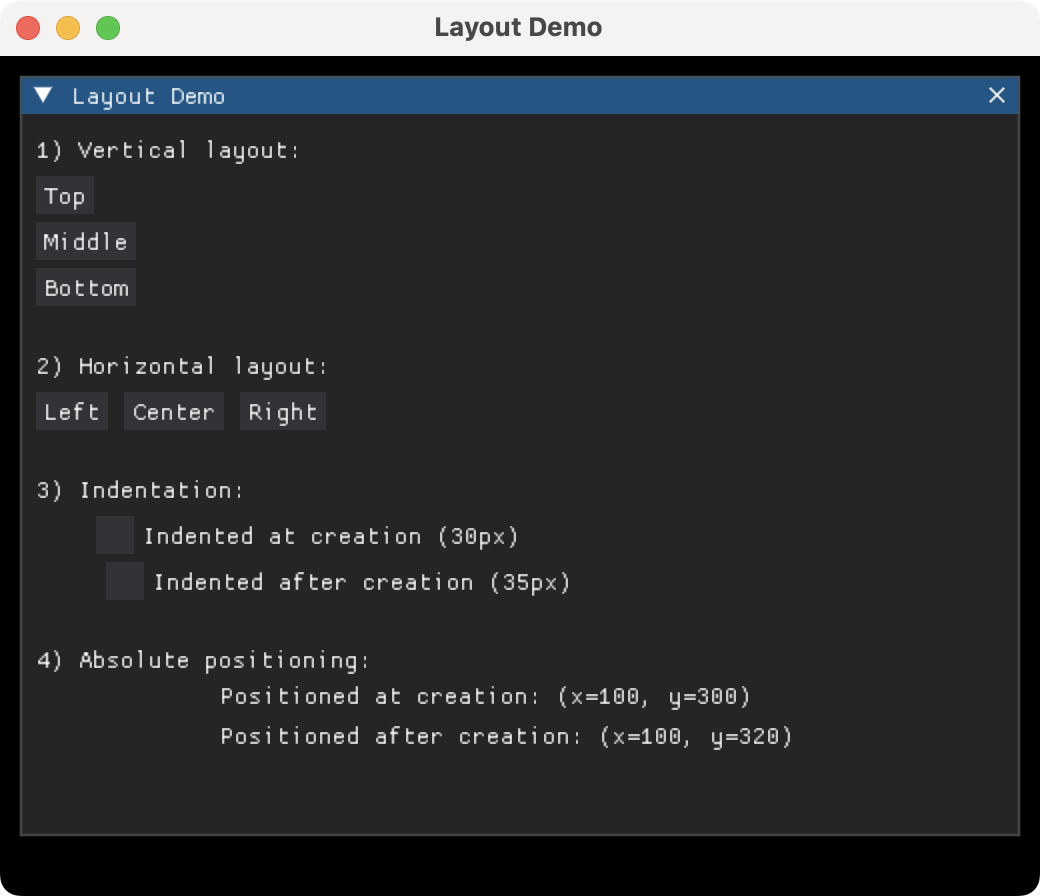 DearPyGui layouts
Handling Events with DearPyGui Callbacks
DearPyGui uses callbacks to handle events. Most widgets accept a callback argument, which is executed when we interact with the widget itself.
The example below provides a text input and a button. When we click the button, it opens a dialog showing the input text:
import dearpygui.dearpygui as dpg

def on_click_callback(sender, app_data, user_data):
    text = dpg.get_value("input_text")
    dpg.set_value("dialog_text", f'You typed: "{text}"')
    dpg.configure_item("dialog", show=True)

def main() -> None:
    dpg.create_context()
    dpg.create_viewport(title="Callback Example", width=270, height=120)

    with dpg.window(label="Callback Example", width=250, height=80, pos=(10, 10)):
        dpg.add_text("Type something and press Click Me!")
        dpg.add_input_text(label="Input", tag="input_text")
        dpg.add_button(label="Click Me!", callback=on_click_callback)
        with dpg.window(
            label="Dialog",
            modal=True,
            show=False,
            width=230,
            height=80,
            tag="dialog",
            no_close=True,
            pos=(10, 10),
        ):
            dpg.add_text("", tag="dialog_text")
            dpg.add_button(
                label="OK",
                callback=lambda s, a, u: dpg.configure_item("dialog", show=False),
            )

    dpg.setup_dearpygui()
    dpg.show_viewport()
    dpg.start_dearpygui()
    dpg.destroy_context()

if __name__ == "__main__":
    main()
The button takes the on_click_callback() callback as an argument. When we click the button, DearPyGui invokes the callback with three standard arguments:
sender, which holds the button's IDapp_data, which holds extra data specific to certain widgetsuser_data, which holds custom data you could have supplied
Inside the callback, we pull the current text from the input widget using dpg.get_value(), and finally, we display the input text in a modal window.
Run it! You'll get a window like the following.
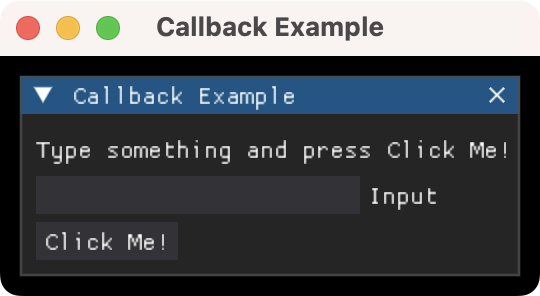 DearPyGui callbacks
To see this app in action, type some text into the input and click the Click Me! button.
Creating Plots and Charts with DearPyGui
DearPyGui comes with powerful plotting capabilities built in. It includes high-performance plots such as lines, bars, scatter plots, and histograms. These plots allow interactive zoom and pan and real-time data updates, making them excellent for scientific visualizations and data dashboards.
Here's an example of how to create a line plot using DearPyGui's plotting widgets:
import dearpygui.dearpygui as dpg
import numpy as np

def main() -> None:
    dpg.create_context()
    dpg.create_viewport(title="Plotting Example", width=420, height=320)

    x = np.linspace(0, 2 * np.pi, 100)
    y1 = np.sin(x)
    y2 = np.cos(x)

    with dpg.window(label="Plot Window", width=400, height=280, pos=(10, 10)):
        with dpg.plot(label="Sine and Cosine Plot", height=200, width=360):
            dpg.add_plot_legend()
            dpg.add_plot_axis(dpg.mvXAxis, label="X")
            with dpg.plot_axis(dpg.mvYAxis, label="Y"):
                dpg.add_line_series(x.tolist(), y1.tolist(), label="sin(x)")
                dpg.add_line_series(x.tolist(), y2.tolist(), label="cos(x)")

    dpg.setup_dearpygui()
    dpg.show_viewport()
    dpg.start_dearpygui()
    dpg.destroy_context()

if __name__ == "__main__":
    main()
In this example, we create two line series: sine and cosine curves. To plot them, we use NumPy‑generated data. We also add X and Y axes, plus a legend for clarity. You can update the series in a callback for live data dashboards.
Run it! You'll get a plot like the one shown below.
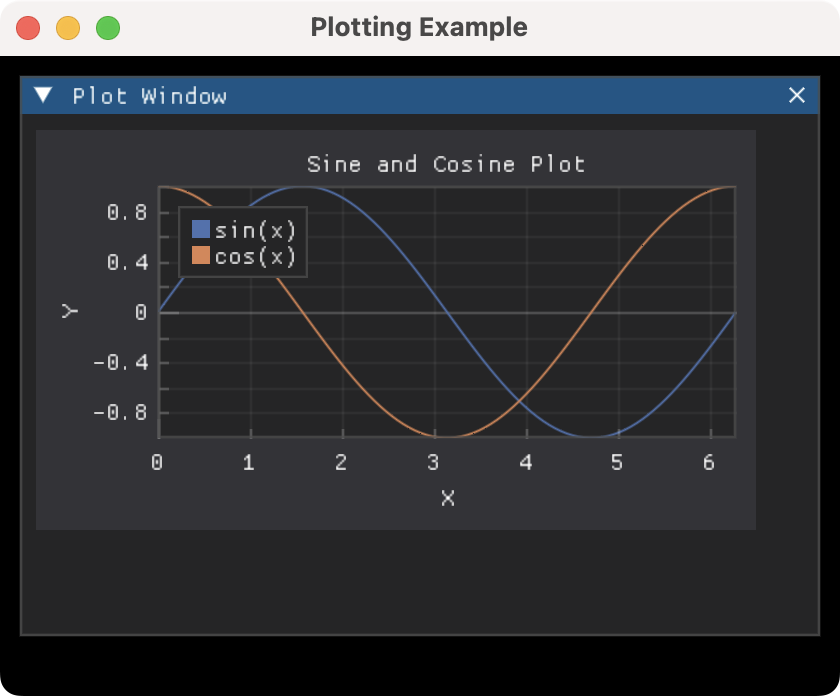 DearPyGui plotting demo
Conclusion
DearPyGui offers a powerful and highly customizable GUI toolkit for building desktop applications in Python. With a rich widget set, interactive plotting, node editors, and built-in developer tools, it's a great choice for both simple utilities and complex interfaces.
In this tutorial, you learned how to install DearPyGui, create your first application, work with widgets and layouts, handle events with callbacks, and create interactive plots. Try building your own DearPyGui app and experimenting with these features to create professional Python desktop GUIs!
PyQt/PySide 1:1 Coaching with Martin Fitzpatrick
Save yourself time and frustration. Get one on one help with your Python GUI projects. Working together with you I'll identify issues and suggest fixes, from bugs and usability to architecture and maintainability.